
In late July, Microsoft announced the preview of Dependent Assemblies, which would allow the ability to register individual assemblies, and upload a nuget package that contains both the plugin assembly and the dependent assembly. Previously, the only way this was available was the use of the ILMerge tool to manually merge dependent assemblies.
With this new functionality, Microsoft is providing two ways to incorporate this:
- Packaging all assemblies into a nuget package and registering them using Power Platform Tools for Visual Studio
- Using the Power Apps Command Line Interface (CLI) and the Plug-in Registration tool (PRT)
In this post, we will review how to incorporate this functionality using the Plug-in Registration tool. A separate post will cover using the Power Platform Tools for Visual Studio. Now let’s get started.
The first thing that is needed is to get the latest version of the latest versions of Microsoft Power Platform CLI (requires version 1.17 or later) and the Plug-in Registration Tool (requires version 9.1.0.155 or later). You will also need to use Visual Studio 2019 or later (note that the Power Platform Tools for Visual Studio do not currently work on Visual Studio 2022).
You can download the files in the links below:
Power Platform Command Line Interface: https://aka.ms/PowerAppsCLI
Plug-in Registration Tool: https://www.nuget.org/packages/Microsoft.CrmSdk.XrmTooling.PluginRegistrationTool
Once you have finished installing both the CLI and the PRT, you can go ahead and start creating your new project.
First create a directory to host your plugin and related file (using File Explorer).
Open Powershell Terminal window in Visual Studio Code, and change the directory to the one that you created using File Explorer. Next, execute the following commands in the Terminal window:
- pac install latest
- pac plugin init –skip-signing
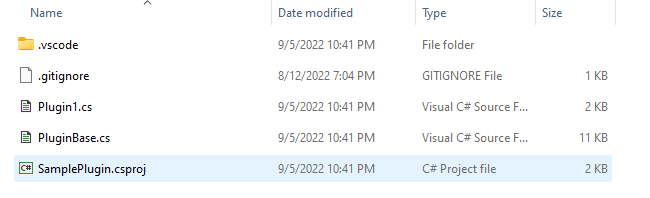
When you navigate back to your directory in File Explorer, you will see that a .NET class library project has been created for you. It should be somewhat similar to the screenshot below:
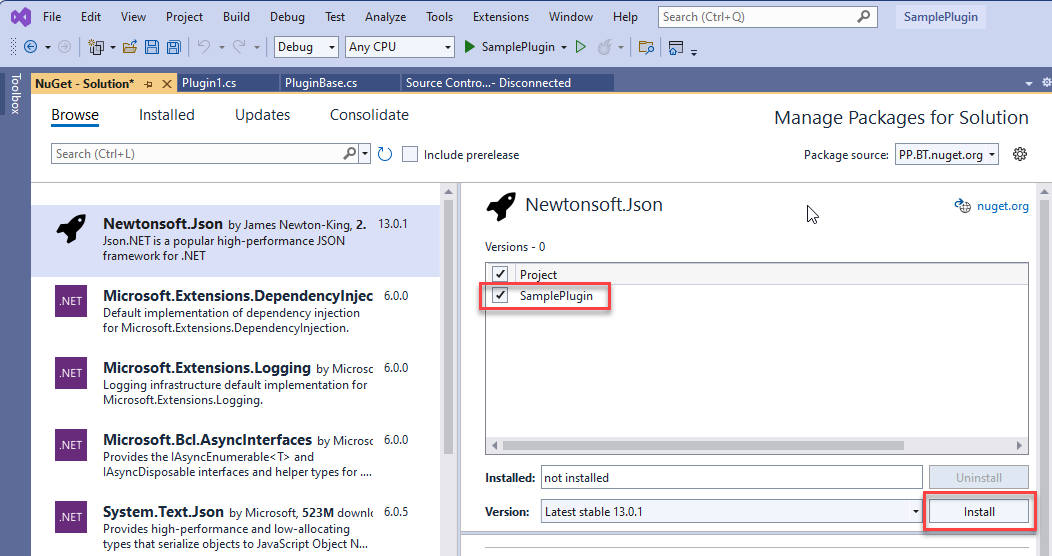
Go ahead and open the project. Go to the Tools menu, select Nuget Package Manager, and then select Manage Nuget Packages for Solution… In the Nuget solution window that appears, click on the Browse tab, and select the Newtonsoft.Json package. On the right side of the tab, check the Project file, and then click on the Install button to install the package into your project as shown in the image below.
If you take a look at the list of Packages under the Dependencies tree hive in Solution Explorer, we will see that the Newtonsoft.Json now appears in that list.

We can now go ahead and build the project. Once we build the project, if you navigate to the bin/Debug folder you will see a nuget package with the same name as the Package that you created. This package will include your plugin code as well as the nuget package that we added to the project previously. The name will be similar to SamplePlugin.1.0.0.nukpg. The next steps are to install the package using the Plug-in Registration tool.
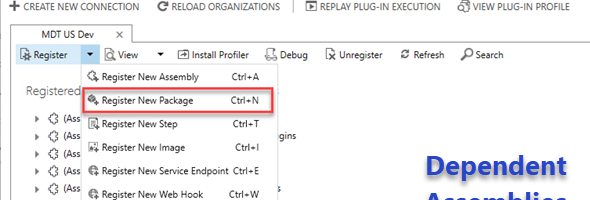
Let’s go ahead and launch the new version of the Plugin Registration tool that we downloaded and installed. Once we authenticate using the PRT, and we click on the Register drop down, you will notice that there is a new option called Register New Package.
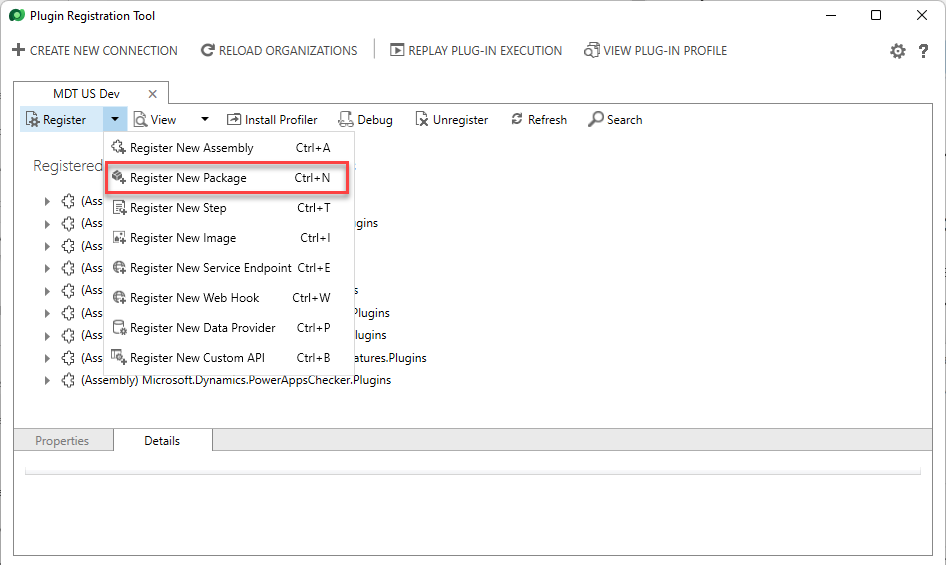
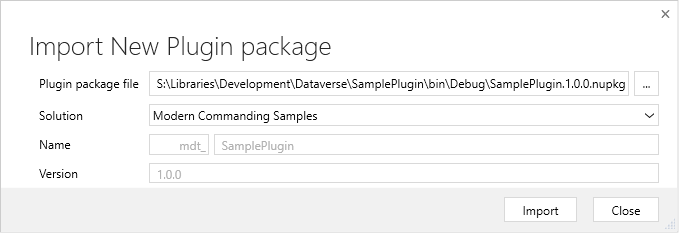
This option allows us the import and register a Nuget package as a plug-in package. When you click on the Register New Package option, the PRT will open a new dialog that will allow selection of the plug-in package that we created. The screenshot below shows this dialog. Note that you have the option here to import the package into an existing solution or create a new solution.
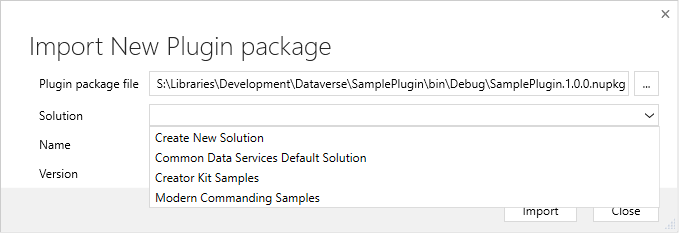
In this case, I will select an existing solution, and click on the Import button.
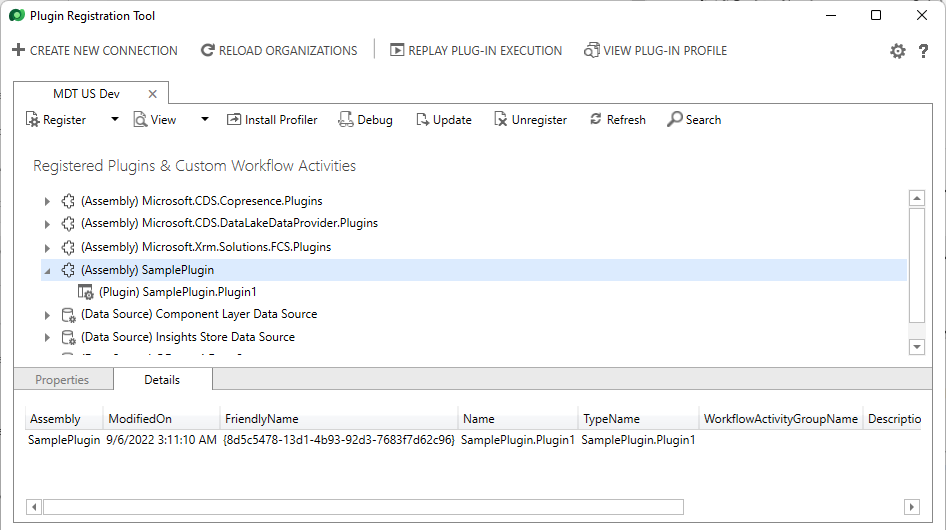
The Import process might take a little time based on the size of your package. Once imported, you will see that your assembly has been imported and registered (shown below).
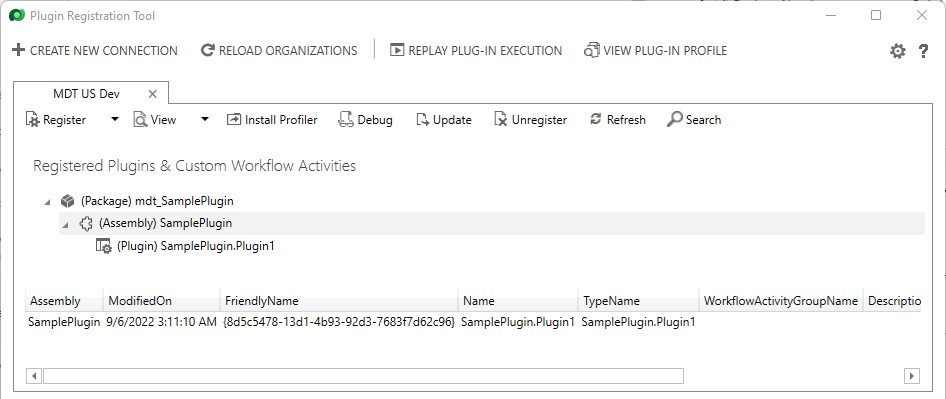
If you want to see the actual package that was imported, you can click on the View menu, and select Display by package.
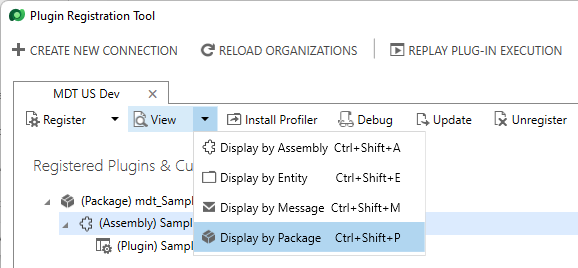
This will show you the Package that has been installed along with the Plugin Assembly.
At this point in time, you can go ahead and add any required steps to the assembly, or if you need to make changes or remove the plugin, you can Update the Plugin package or remove the Plugin package.
In the next post, I will show how to execute this process using the Power Platform Command Line Interface. I hope this was helpful.