

As always, I try to bring some real world scenarios that I was required to implement and modify the logic a little bit. In today’s app we will be creating a project record and adding and removing membership to the project while adding custom logic to adhere to special circumstances. You can do this of course with a model-driven app, but the main requirement was to make sure that the percentages of ownership on the Project is always 100%.
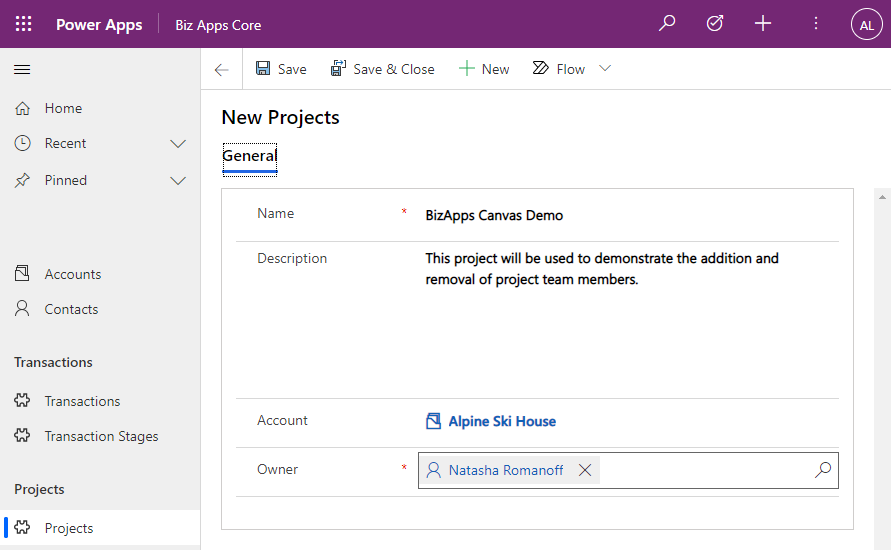
The first part is to create a new project, which requires as one of the fields the name of the account on the project. When the project is saved, the primary contact on the account record is automatically added as a Project Member. The Image below shows the creation of the new project.
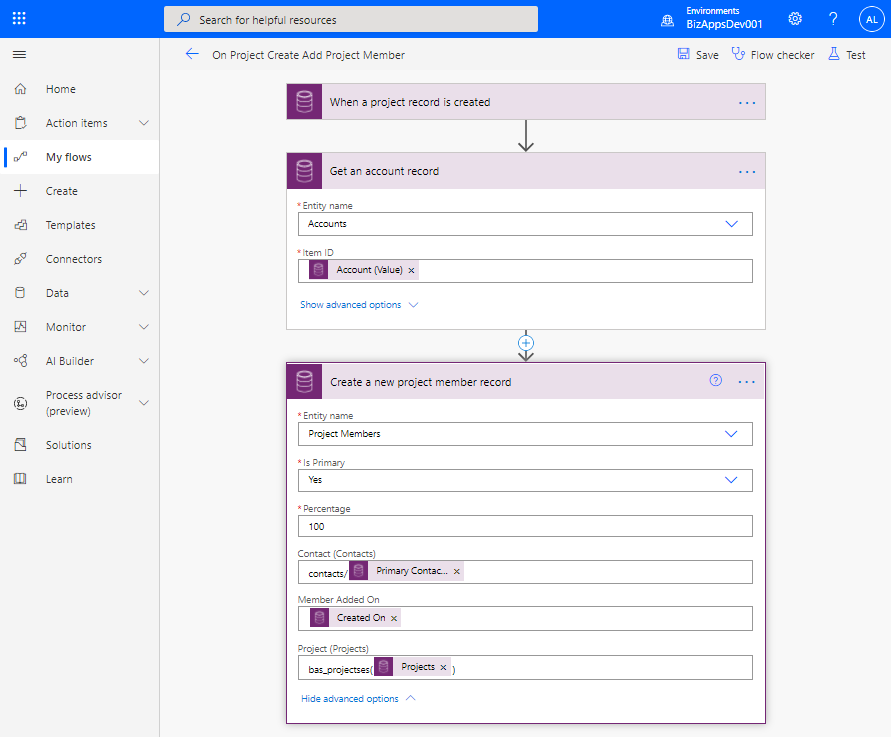
When the record is saved, a Cloud Flow is being called that retrieves the Primary Contact on from the account record, and creates the First Project Member on the Project. It also marks the member as Primary, so that it cannot be deleted from the App. The image below contains the steps in the Cloud Flow.
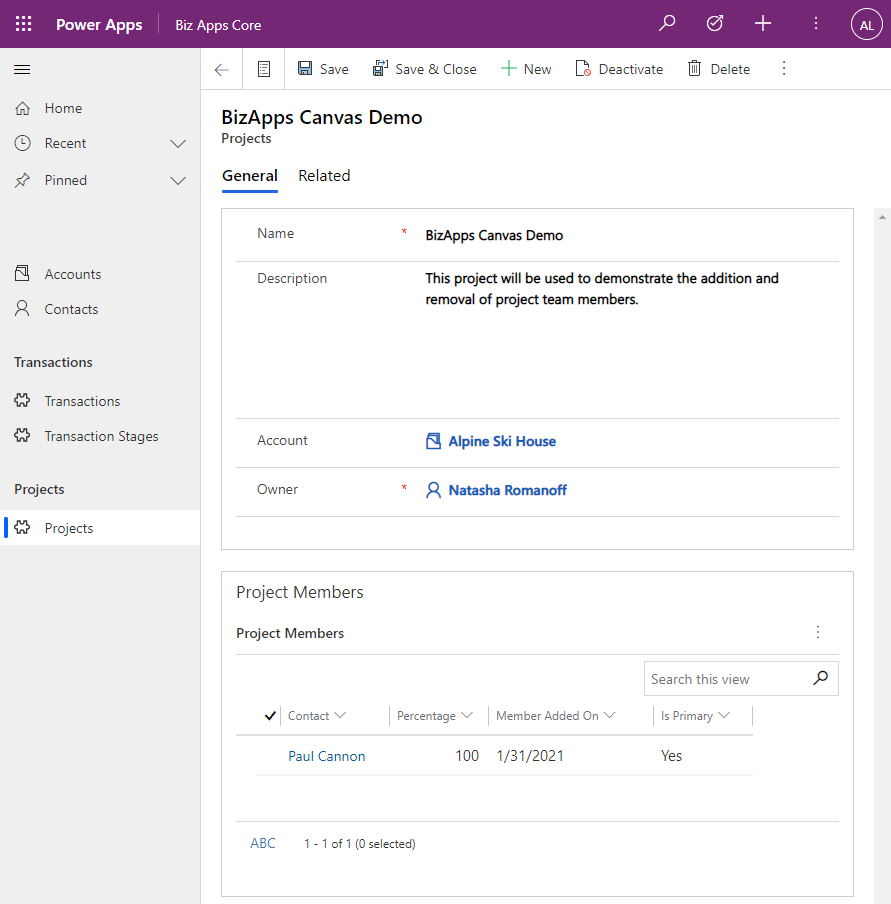
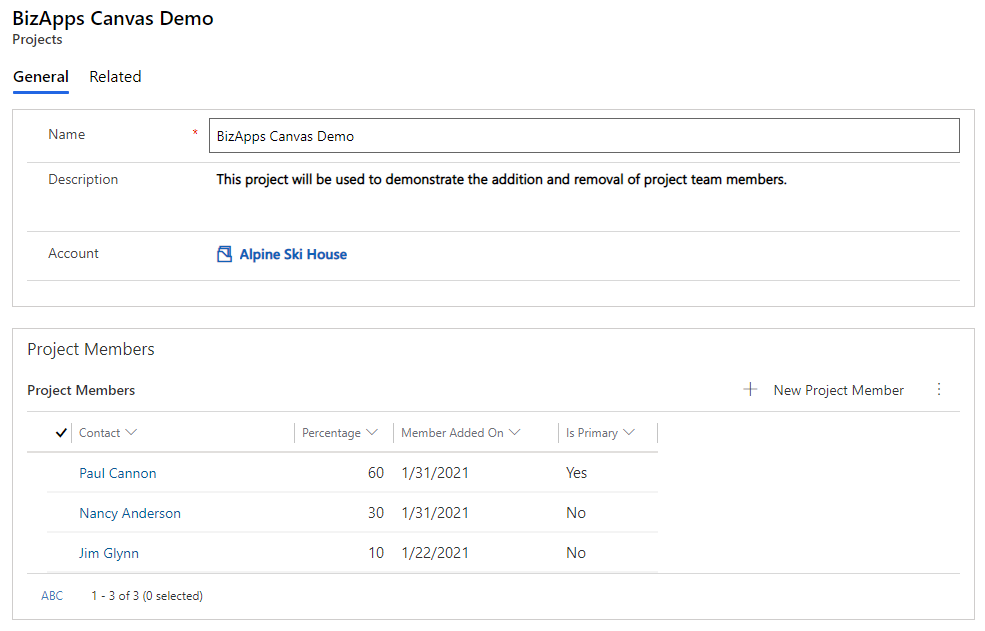
After the flow is executed, we will be able to see the project member that was added within the project record, as shown below.
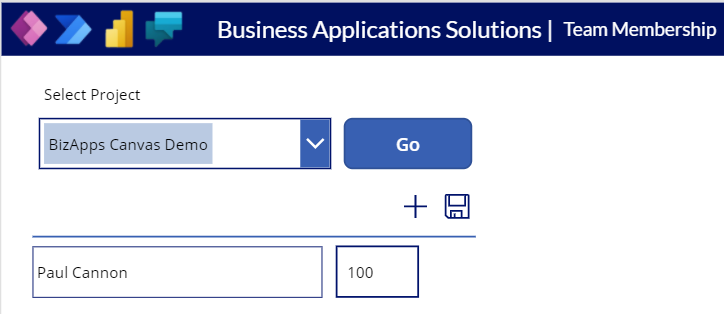
Next, let’s go ahead and look at the Canvas App. When we load the Canvas App, we have the ability to select the project that we want, and then once the project is selected, we will see the Project Members in the gallery (as shown below). You will notice that there is a single member that is visible, as this is a new project that was created, and the default member was added to the project.
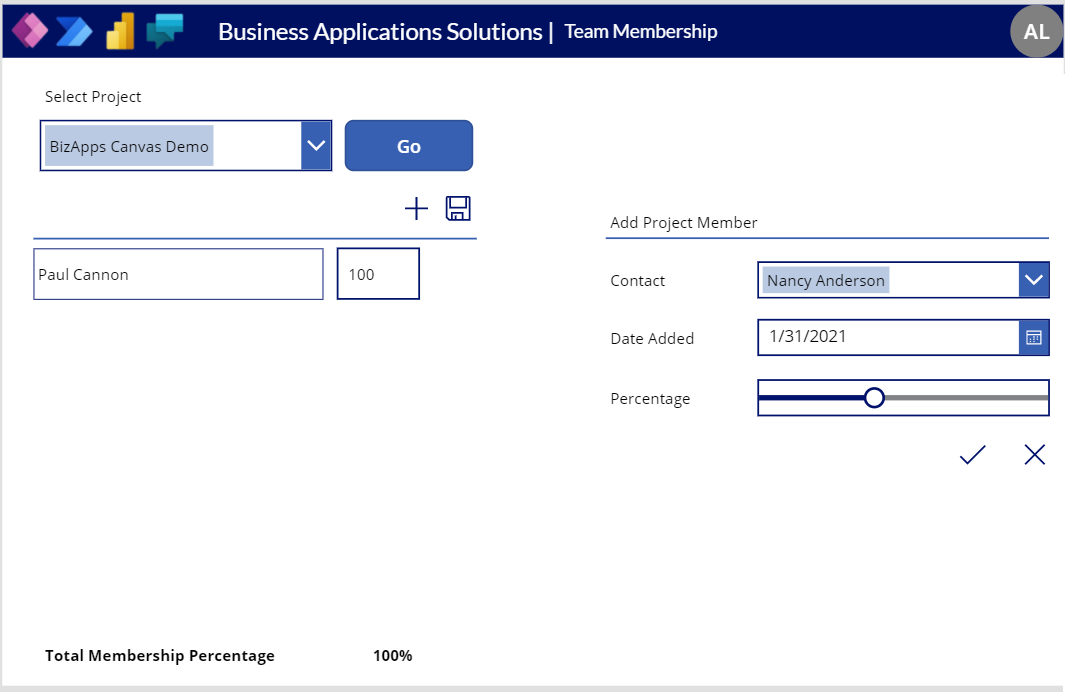
You will notice the + button above the gallery. Clicking on the Plus button will allow us to add a new Project Member. The action will show a new section on the form which will request a Contact, Date Added and Percentage, as shown below. The Contact field is filtered to only show members that have not yet been added to the gallery.
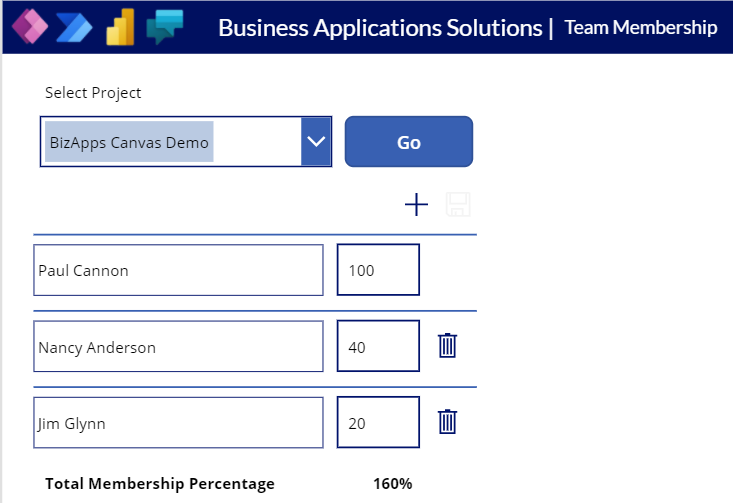
Once the member is added, I will be able to see the two members in my gallery. I also see that the Save button is disabled, because the total membership percentage is not equal to 100%. I will add one more member for the purpose of the demo. I now see that I have three members with a total membership percentage of 160%
In order for me to Save this record, I will have change the percentages so that they are equal to 100%. Let’s go ahead and do that, and then Save the record to see the results.
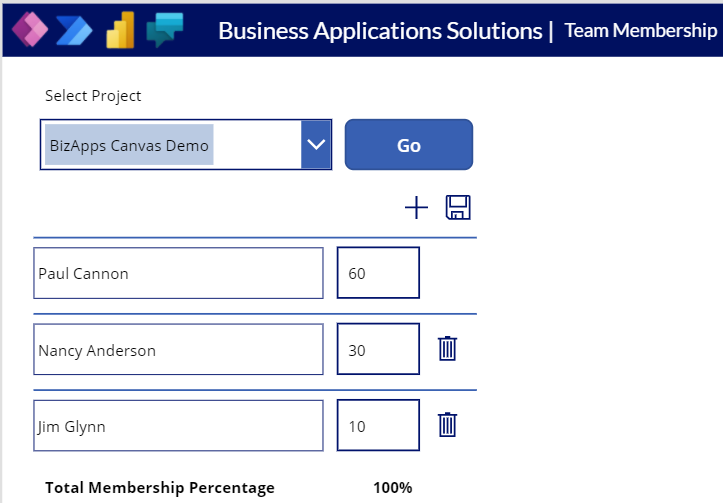
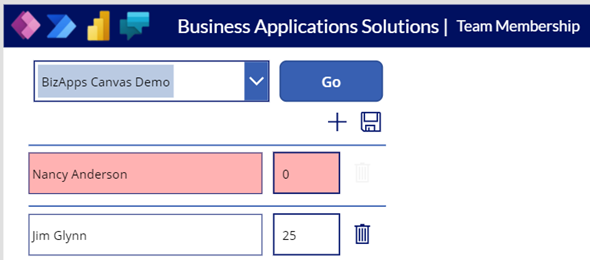
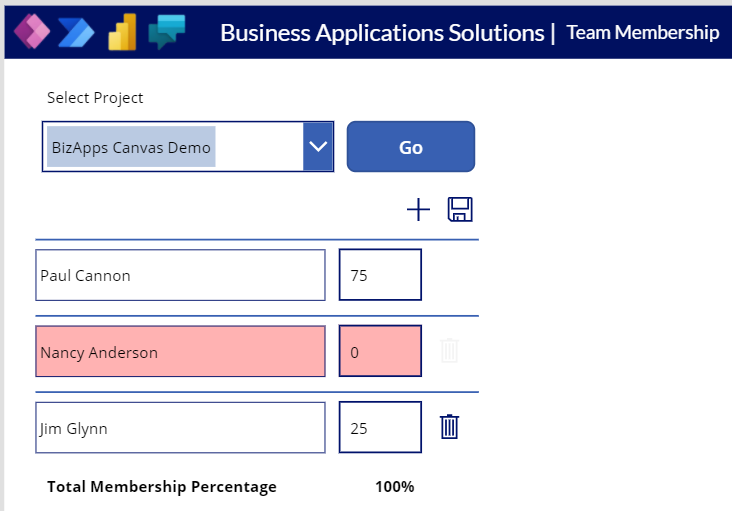
Now, let’s go back to the canvas app, and remove one of these members. You will notice that Paul Cannon, which is the Primary Member does not have a remove icon, because that is the primary member. All other members, we can delete. Let’s go ahead and delete Nancy Anderson, which has a 30% membership. The member is highlighted as removed. In order to save the changes again, we have to update the percentages to match 100%, and then save the changes. The image below shows the record to be removed and the updated percentages.
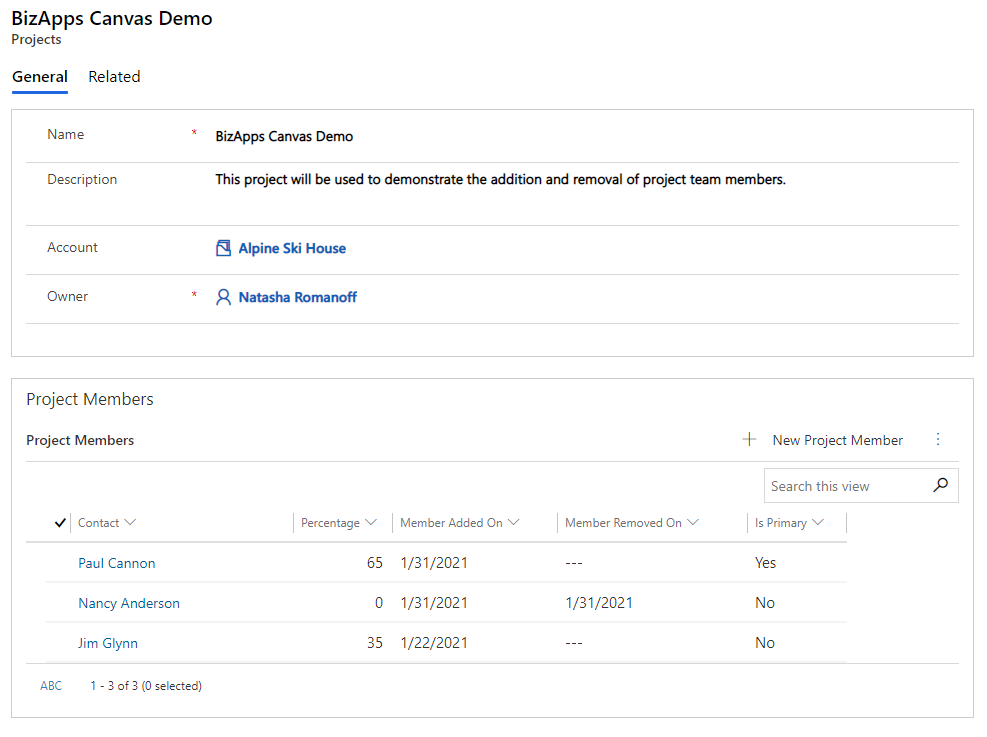
Now let’s go ahead and save the record, and look at the results in the Model-Driven app. You will notice that I still see the three Project Members, but that is because I am showing both Active and Inactive Users. The member that was removed from the group is showing a date value in the Member Removed on, which allows me to keep track of the members added and removed, and a history of such.
Next, let’s go ahead and look at the implementation. First, when the form loads, we select a project and click on the Go button. The OnSelect method of the Go button contains logic to load the projects into a collection, and load contacts into a collection removing the contacts that are already added to the project.
Set(SelectedProject, cmbProject.Selected.Projects);

// Add Project Members to the Gallery
Clear(ProjectMembers);
ForAll(
    Filter('Project Members', Project.Projects = SelectedProject, Status = 'Status (Project Members)'.Active),
Collect(ProjectMembers,
{
    ProjectMemberId: 'Project Member',
    ProjectId: Project.Projects,
    ContactId: Contact.Contact,
    Name: Contact.'Full Name',
    DateAdded: 'Member Added On',
    Percentage: Percentage,
    IsPrimary: 'Is Primary',
    IsDeleted: false
})
);

// Add All Contacts to the Collection to allow adding of new contacts
Clear(AvailableContacts);
ForAll(Filter(Contacts, Role = 'Role (Contacts) Decision Maker'),
Collect(AvailableContacts,
{
    ContactId: Contact,
    FullName: ''Full Name',
    IsAvailable: true
})
);

// Mark the Contacts that are already in the Project Members Gallery as not available
// so that they do not appear in the Contacts Combo Box
ForAll(ProjectMembers,
    Patch(AvailableContacts,
        First(Filter(AvailableContacts, FullName = Name)),
        { IsAvailable: false })
        );

Set(hasError, false);
The plus button, only sets an Action Type value to Add, which in turn displays the entire list of controls that are visible to allow addition of a new record. Once clicked I can see the Add Project Member, Contact, Date Added, Percentage fields, and the Accept and Cancel icons.
The Contact Combo Box, has a Filter to only show Available Contacts, using the following line:
Filter(AvailableContacts, IsAvailable = true)
Clicking on the check button (Accept), will add a new Project Team Member into the collection, and remove that member from the list of available Contacts.
If(IsBlank(cmbContact.Selected.FullName),
   Set(hasError, true),
    Collect(ProjectMembers,
    {
        ProjectId: GUID(SelectedProject),
        ContactId: cmbContact.Selected.ContactId,
        Name: cmbContact.Selected.FullName,
        Percentage: sliderPercentage.Value,
        DateAdded: dtpDateAdded.SelectedDate,
        IsPrimary: 'Is Primary (Project Members)'.No,
        IsDeleted: false
    });
    Patch(AvailableContacts,
        First(Filter(AvailableContacts, ContactId = cmbContact.Selected.ContactId)),
        { IsAvailable: false }
        );
    Set(hasError, false)
);

Reset(cmbContact);
Set(ActionType, "");
Finally, for the Save action, I loop through all the Project Team Members, and either create a new member (based on the Project Member Id being blank), or update an existing record. The update patch can either update the percentage of the project or deactivate the project.
ForAll(ProjectMembers,
    If (IsBlank(ProjectMemberId),
        // Create New Record
        Patch('Project Members', Defaults('Project Members'),
        {
            Project: LookUp(Projects, Projects = ProjectId),
            Contact: LookUp(Contacts, Contact = ContactId),
            'Is Primary': 'Is Primary (Project Members)'.No,
            'Member Added On': DateAdded,
            Percentage: Percentage
        }),
        // Update Existing Record
        Patch('Project Members', LookUp('Project Members', 'Project Member' = ProjectMemberId),
        {
            Percentage: Percentage,
            'Member Removed On': If (IsDeleted, Today(), ""),
            Status: If (IsDeleted, 'Status (Project Members)'.Inactive, 'Status (Project Members)'.Active),
            'Status Reason': If (IsDeleted, 'Status Reason (Project Members)'.Inactive, 'Status Reason (Project Members)'.Active)
        })
    );
);

Select(Button2);
Below you will also find a video of this blog and I will add the source code to my github repository as soon as I can.