

With everything that is going on around ALM and CI/CD and how to implement an automated deployment process with Azure Dev Ops of Github actions, there are still many organizations that have a lot of work that needs to be done before they can turn the switch over.
In this post, I will show how we can use Power Automate Cloud flows to initiate an Azure DevOps Pipeline, and in turn use a Canvas App to call the flow that will call the Azure DevOps pipeline.
There are a few prerequisite steps that must be done, and you might already have done them, but I would like to review them again in case they have not been completed.
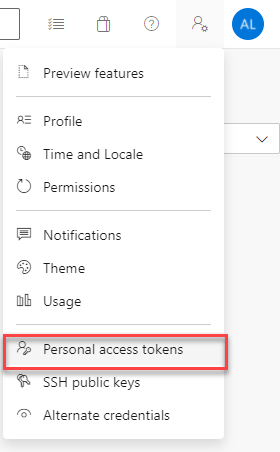
In order to call the Azure DevOps REST API we need to have a Personal Access Token. That can be acquired by going to our Personal Account Settings, and selecting Personal access tokens as shown in the image below:
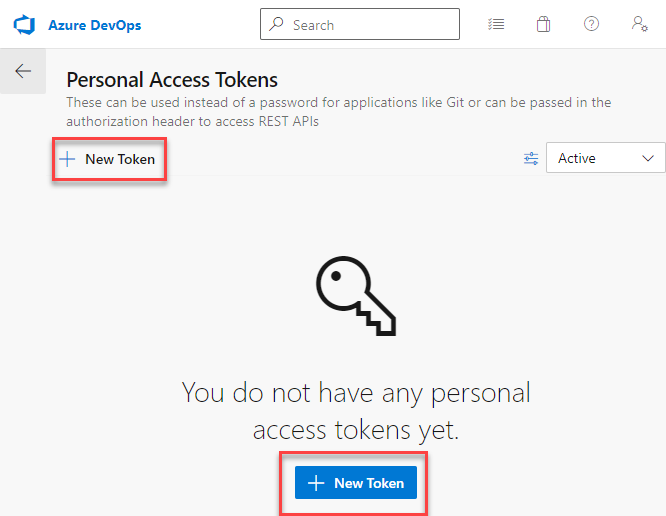
If you already have a Personal access token, clicking on the above link will show you the list of available tokens, but if you don’t you will see a screenshot saying that you don’t have a personal access token yet, and you can click on one of the New Token links to create a New Access Token.
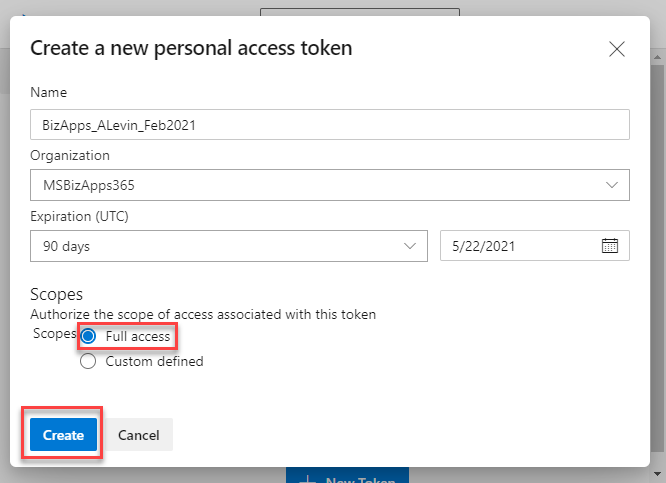
You will need to give your Personal access token a name, specify the organization and expiration date, as well as the Scope of the token. For the purpose of this demonstration, I have given Full access, but you can also provide a custom defined scope, which lets you determine whether you want to provide Read, Write and Manage access to the different objects that make up the API.
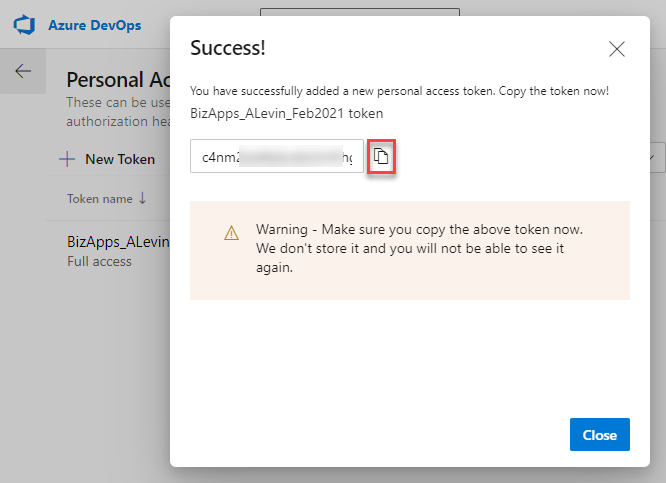
Once you click on the Create button, you will see the Success notification showing you the Personal access token, and an icon that allows you to copy the token to the clipboard. It is important to copy it and store in a safe place, as once the window is closed, this token will no longer be accessible.
Not that we have the token, we will need to convert it to base 64, so that it can be used in our HTTP call in the flow, passing it as a Basic Authentication token. This can be done by using Git Bash or other utilities that allow you to convert to Base 64. Open Git Bash, by clicking on Start -> Git and then selecting Git Bash.

Once Git Bash is opened, you will need to enter the following command in the Bash window:
$ echo -n :[PERSONAL_ACCESS_TOKEN] | base64
You will need to replace the [PERSONAL_ACCESS_TOKEN] with the real access token that you copied earlier. The following screenshot (with some blurring) shows the Git Bash command.

Copy the result into Notepad++ or another text editor, as you will need it at a later time.
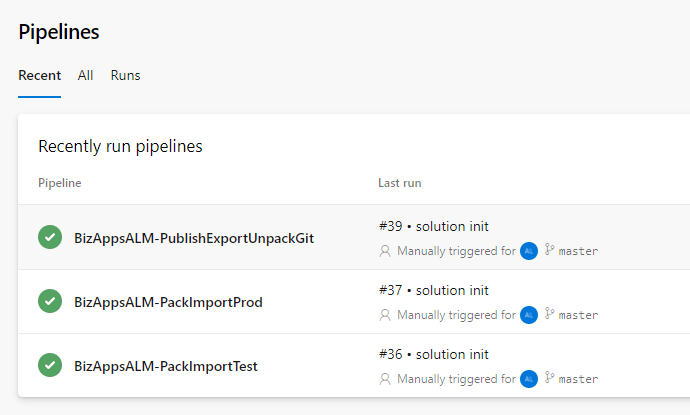
The next thing that we will need to get is the Pipeline Id that we are going to call. Navigate to Azure DevOps and click on Pipelines. This will give you the list of Pipelines as shown in the image below.
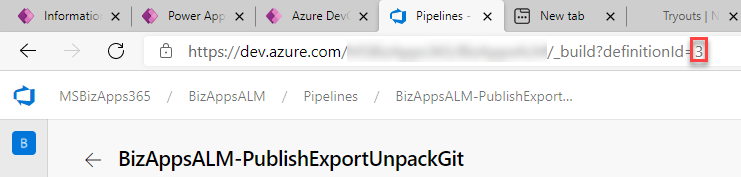
Click on the Pipeline that you want to execute from your Cloud flow or Canvas app, and let’s examine the Url. You will notice that the end of the url contains a definition Id. That is the Pipeline Id that will will need to use in order to execute the Pipeline.
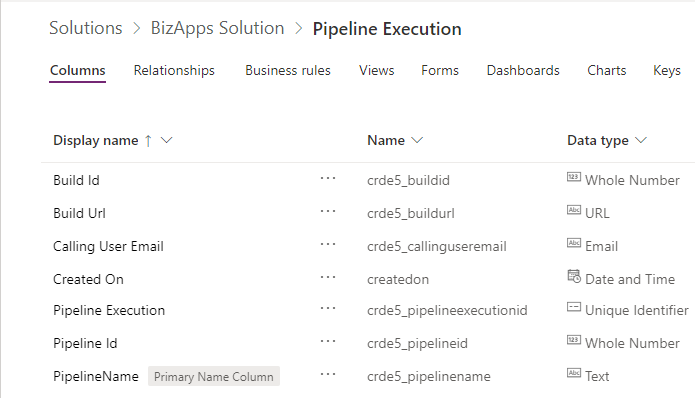
Next, we will be creating a table in Dataverse, so that we can store the executions. Although not required, I like having a log of who executed these processes and when. Mostly for historic purpose.
The columns that I added are the following, but additional columns can be added.
Let’s go ahead and look at the flow that I added to the Solution. I start the flow using a Power Apps trigger, and initializing three variables containing the Pipeline Name, Pipeline Id and the User Email that is executing the flow. The image below shows these steps
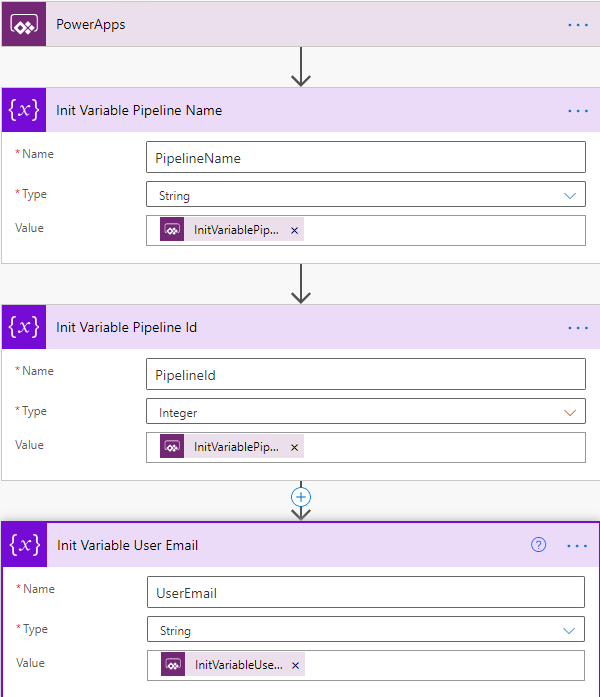
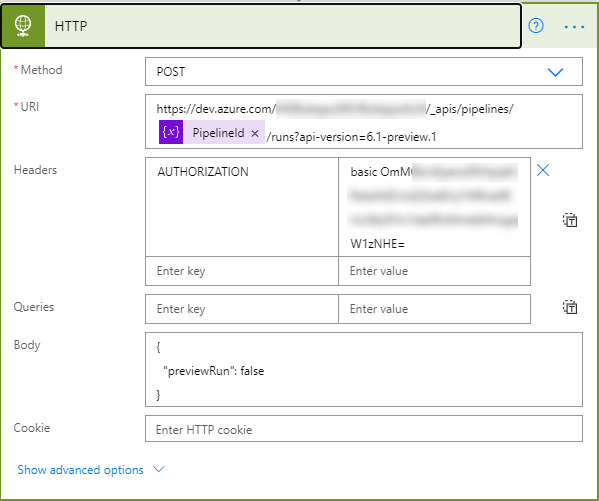
You will notice that each of the variables that are being initialized use the “Ask In PowerApps” option, so that the value is initialized from my Canvas App. The next step is to call the REST API using a HTTP Post request. The url below is the Microsoft Docs url containing the information of the Pipelines REST API:
Within the document, it details the actual url to be used in the HTTP request, which is:
You will notice the HTTP post request below. The blurred section contains the organization and project from DevOps within the URI parameter, and in the Header, we paste the result that we go from the conversion of our Personal access token to base 64 in Git Bash.
At this point, the execution will commence, and the final stage that I demonstrate below are really optional, but a nice to have. If I would like to write the results back to my table in my Dataverse instance, I can retrieve the Build Id and Build Url from the result of the HTTP. I can do this by using a Parse JSON request, which will give me the properties that I need.
The Parse JSON contains the Body from the HTTP request, and then a copy of the Schema. I can run the flow before adding the last two steps, and then get the JSON result to be pasted in the run results of the Cloud flow HTTP action step, by pasting them in the Generate from sample below which will generate the Schema.
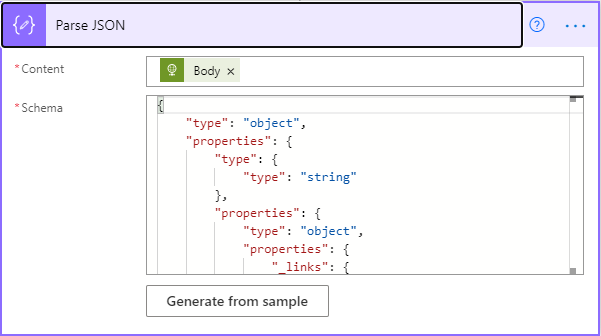
You can find the actual needed schema for this step pasted below.
[Parse JSON Schema]
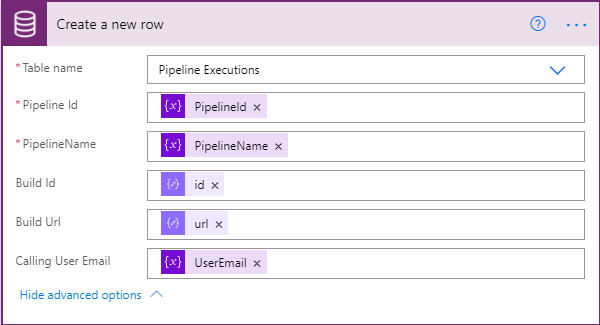
Finally the last step is to add the record to Dataverse. We have the Pipeline Id, Pipeline Name and User Email being passed from the Canvas App. The Build Id and Build Url are the results from the Parse JSON request, which are basically body(‘Parse_JSON’)?[‘id’] and body(‘Parse_JSON’)?[‘url’].
Once the flow is execute we will see a new record in my Dataverse instance.

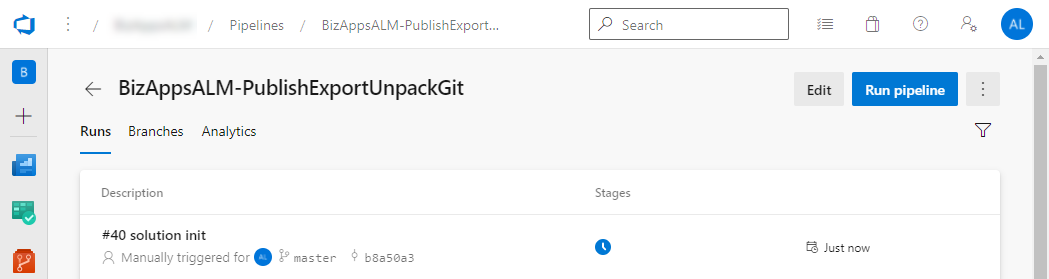
We will also see that the Azure DevOps pipeline is being initialized
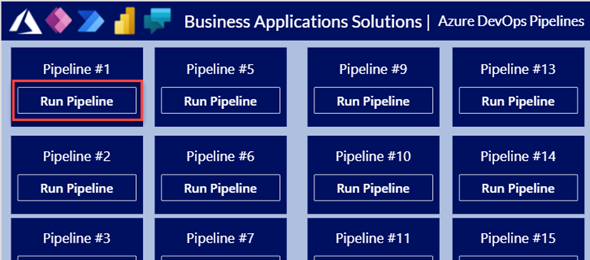
Now, in order to execute this, I create a Canvas App, that will have all the Pipelines that are part of my process. This might be temporary pipelines are automated and scheduled pipelines. The app is shown below
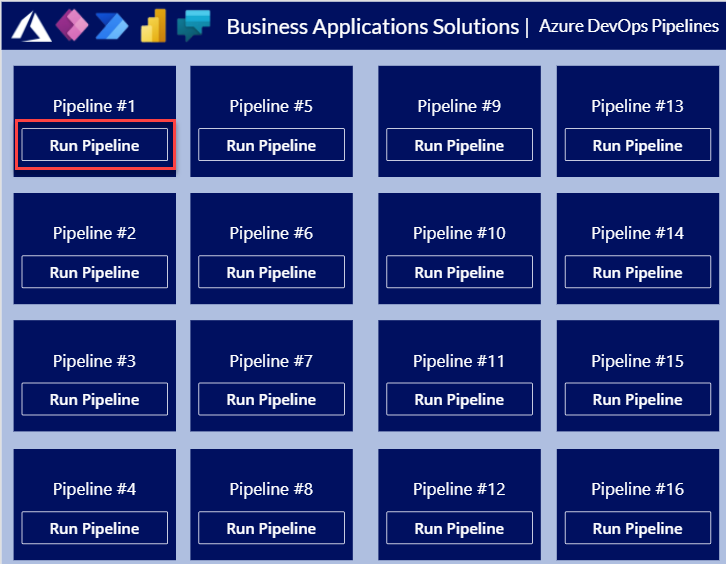
When you click on the Run Pipeline button under each of the pipelines, it will call the Power Automate Cloud flow by using the following Canvas App Command.
InitializeDevOpsPipeline.Run(“PublishExportUnpackGit”, 3, User().Email)
This can be of course enhanced further, but for an initial execution of the pipelines this is a great help. It is the first step in beginning to have an ALM. Like always, I hope this was helpful to some of our community members.
I also want to give a special thanks to Paul Breuler for Microsoft for helping me out in some of these challenges.