

I have been working with a client for the past year or so, where they have been using the Data Export Service to write data from their Dataverse environment to an Azure hosted SQL Server.
The Data Export service, for anyone who is not aware is a Microsoft solution that uses the Data Export Framework that allows the moving of data from Microsoft Dynamics 365/Dataverse to an Azure SQL Server (whether running on an Azure VM, Azure SQL or an Azure Managed instance). This solution works without the requirement for any custom development or SQL Server Integration Services.
The Data Export Service is a good solution, but it comes with its own fallbacks, especially with large customers. Those fallbacks include failures and delays in synching at points in time, complexities in troubleshooting, the inability to copy configuration from one environment to the next, such that would be expected in an ALM process.
Last year, Microsoft introduced an alternative option to the Data Export Service. This new alternative called Azure Synapse Link (or at the time Data Lake) allowed the option to easily export data from your Microsoft Dataverse environment to an Azure Data Lake Storage.
There is no deprecation notice for the Data Export service and that there are a lot of Microsoft customers that are still using it, but it seems like the direction that Microsoft is pushing customers is to use Azure Synapse Link (formerly Azure Data Lake) in order to sync the data between their Microsoft Dataverse environment and an Azure data source.
This Azure Data Lake Storage (Generation 2) is an Azure offering that provides the ability to store big data from analytics purposes. It is based on Azure Blob storage making it cost effective and robust. The next few steps will show you how to configure the Azure Storage V2 account that is required for setting up the link between Microsoft Dataverse and Azure Synapse Link.
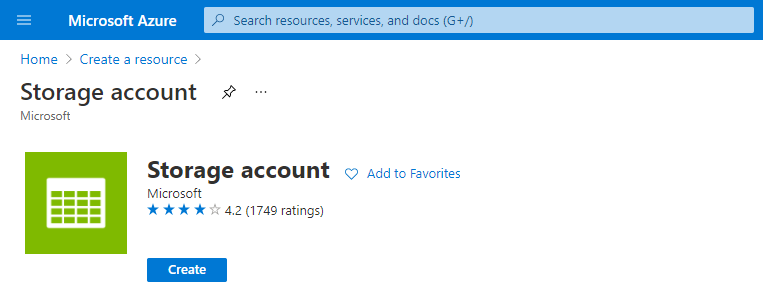
The first step is to login to the Azure Portal by navigating to https://portal.azure.com, and then click on the Create a resource link icon and look for Storage account. Click on the create option for Storage account.
Select a subscription and Resource group, enter a storage account, select the region and you can leave the rest of the settings as is. The screenshot below shows the first tab of the Storage account creation
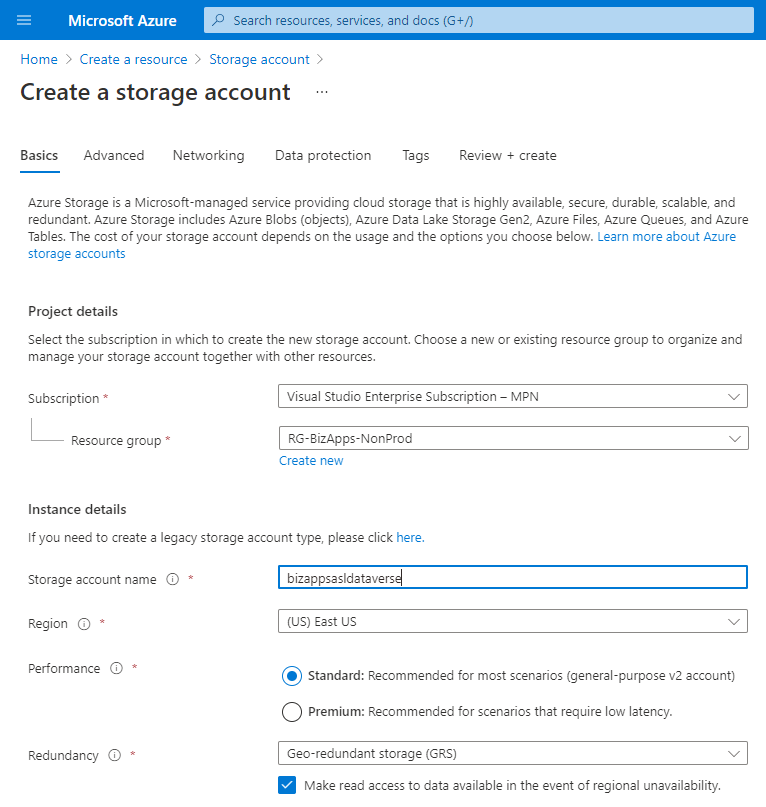
Do not click on the Review and create button at the bottom of the screen, but rather the Next: Advanced button to move to the advanced tab.
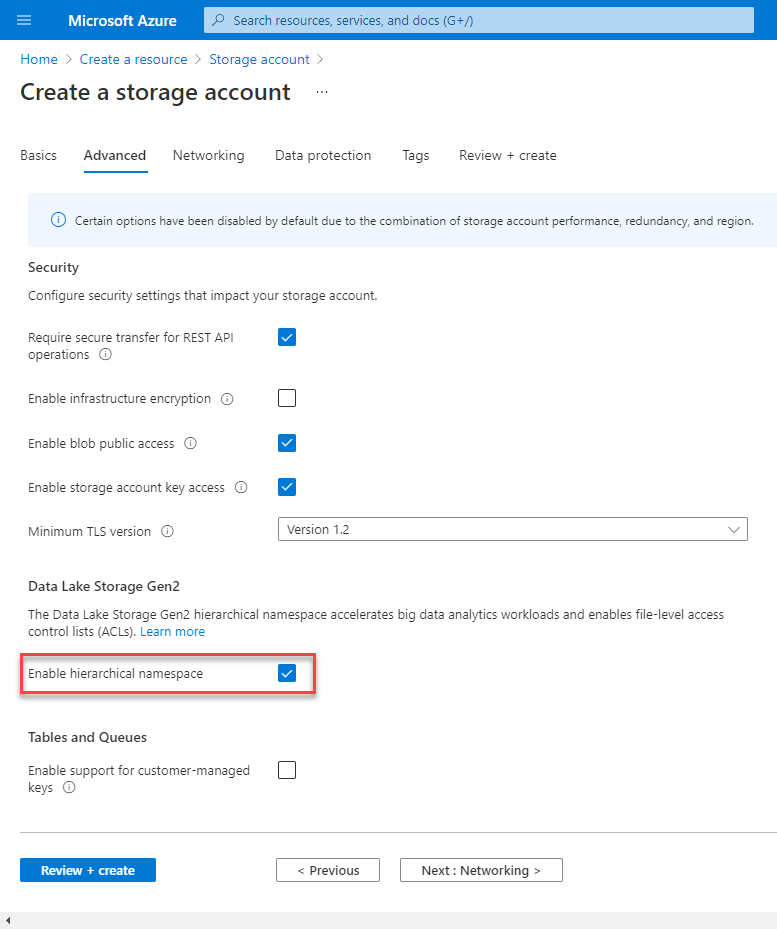
You will notice in the advanced tab that there is an section for Data Lake Storage Gen 2. Check the box to enable hierarchical namespace. The image below shows this tab.
You can skip the rest of the tabs and click on Review + create to finalize the creation of the Storage account. Once the Azure Storage account is configured, we can go ahead and start configuring the Azure Synapse Link in our Dataverse environment.
Navigate back to your maker portal, by going to https://make.powerapps.com. Within your instance, expand the Data menu, and click on the Azure Synapse Link menu item. This will open the New link to data lake panel, where you can specify your Subscription, Resource Group and Storage account that you created for use with Azure Synapse Link. The image below shows this
You will notice that there is also an option to Connect to your Azure Synapse Analytics workspace, which is currently in preview. This allows us to bring the Dataverse data into Azure Synapse with just a few clicks, visualize the data within Azure Synapse Analytics workspace and then rapidly start processing the data to discover insights using features link serverless data lake exploration, code-free data integration, data flows for ETL pipelines and optimized Apache Spark for big data analytics.
Let’s go back to our Azure portal and create the Azure Synapse Analytics so that we can do this at the same time within database. In your Azure portal, click on the create a resource link again, and this time search of Azure Synapse Analytics.
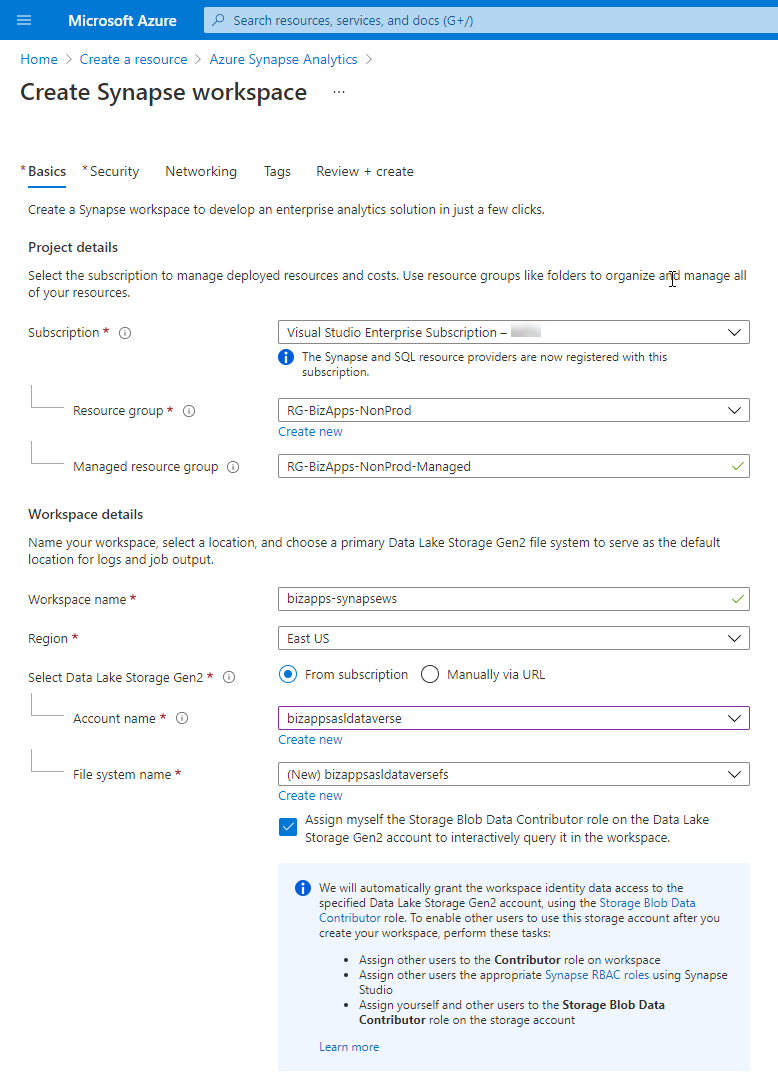
This will open the Create Synapse workspace page on the Basics tab. Select your subscription and Resource group. You will also have to enter a name for the managed resource group. A managed resource group is a container that holds ancillary resources created by Azure Synapse Analytics for your workspace. By default, a managed resource group is created for you when your workspace is created.
Enter the name of the workspace and the region. The you will have to enter the name of the Storage Gen2 that we previously created and the name of the File System. If you do not have a file system name, click on the Create new link under it and provide a name, this will create the File system for you.
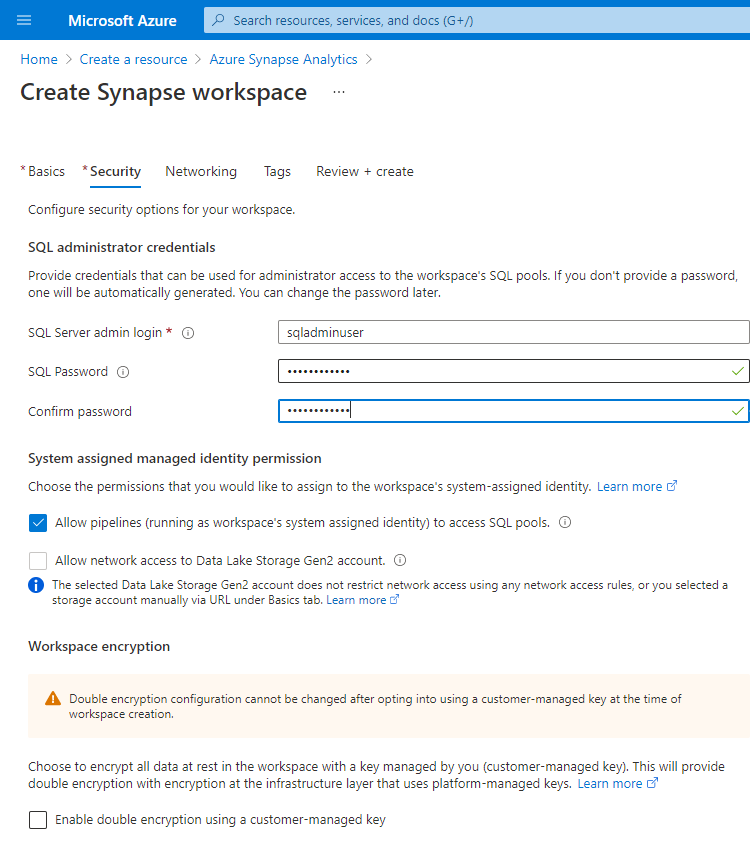
Do not click on the Review + create, but on the Next: Security button. You will have to provide a password for your Sql Server admin login.
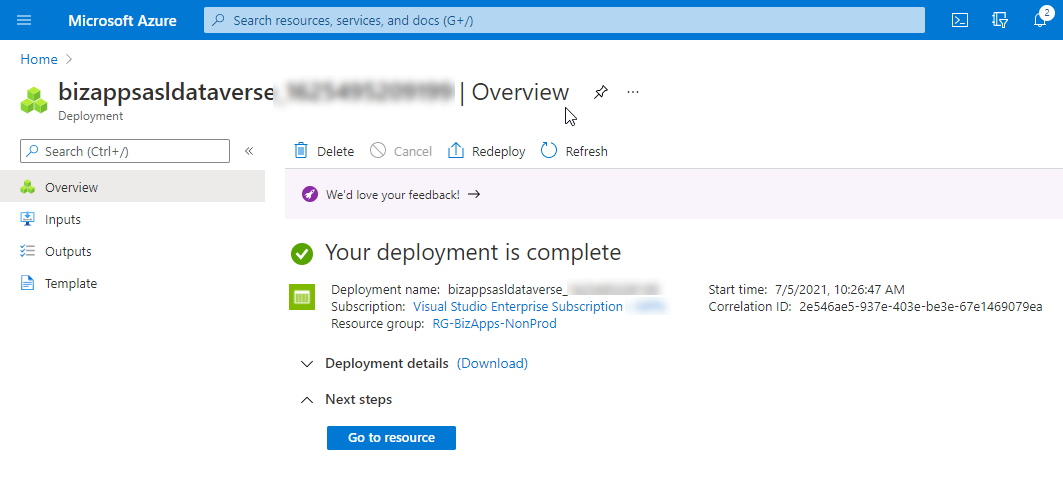
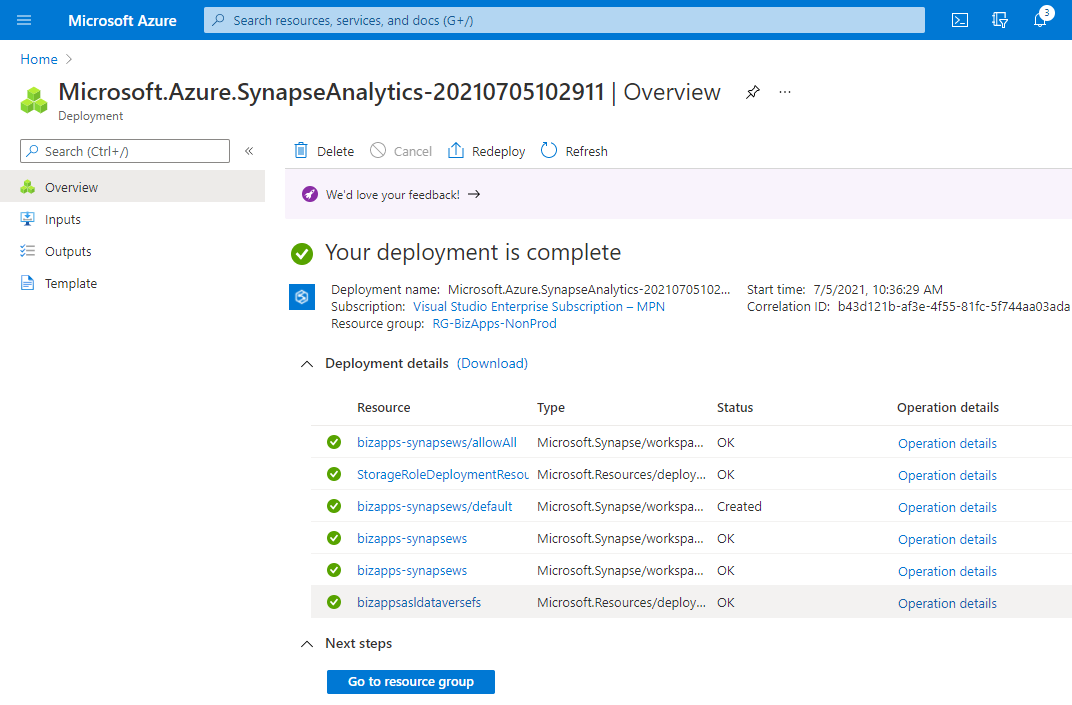
You can now click on the Review + create, and then the create buttons to create the synapse workspace. This process takes a little longer then the creation of the storage account, as more resources are being created. Once deployment is done you can go to your new Azure Synapse Analytics resource by clicking on the Go to resource group button.
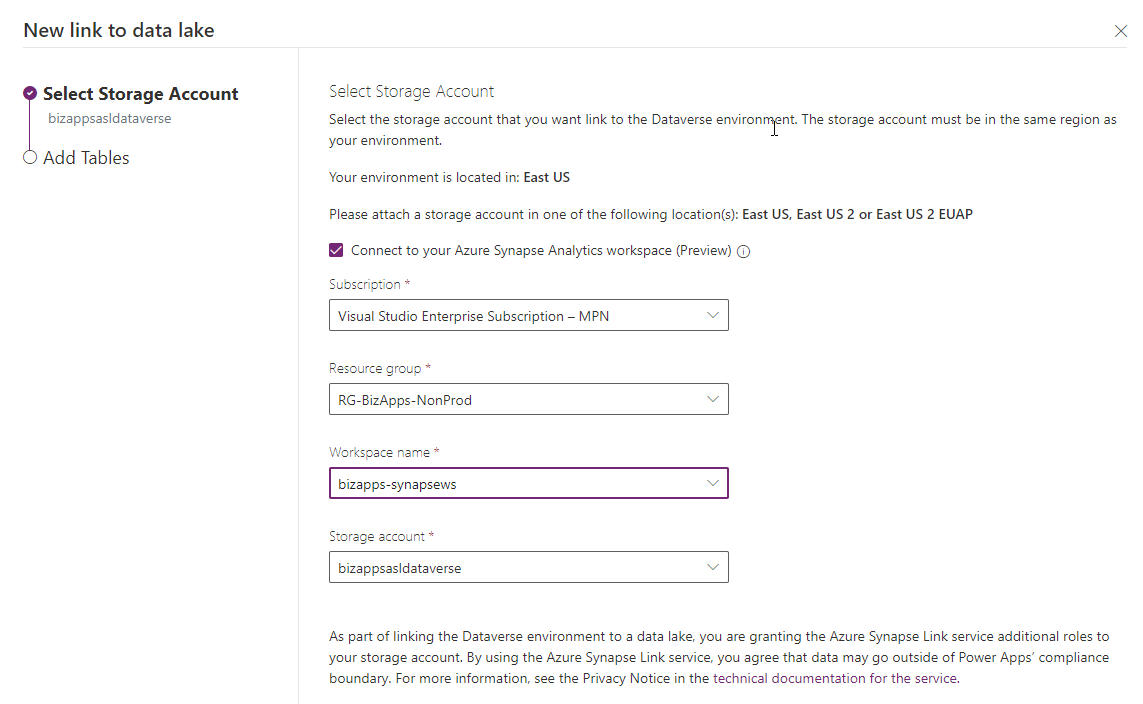
Let’s go back to our Maker portal and select the Connect to Azure Synapse Link again, but this time we will also provide the information for the workspace.
Check the Connect to your Azure Synapse Analytics workspace (preview), enter your Subscription, Resource group, Workspace name and Storage account. In the resource group make sure that you do not select the managed resource group, as that resource group does not have the workspace and the storage account associated with it.
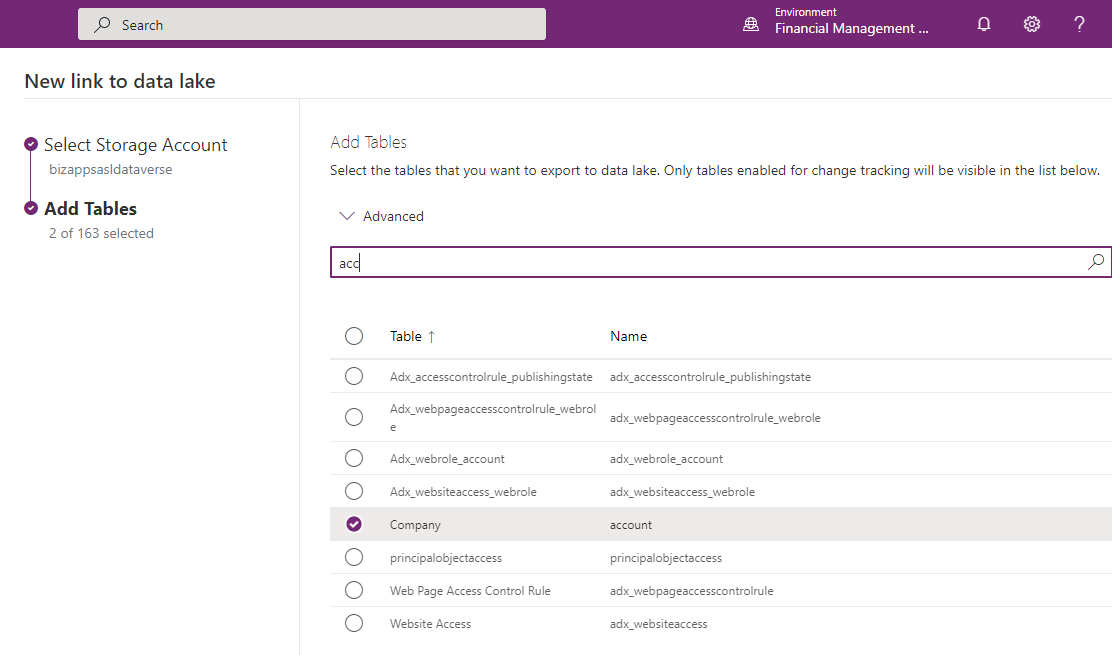
Once you click on the Next button, you can select the tables that you want to sync with Synapse Link. For this purpose we will only select a few tables (account and contact), but you can select as many tables as you want.
Finally, click on the Save button. This will create the connections and allow you to start synching and reviewing data in Synapse Link and Synapse Analytics. Once completed, the page will refresh and you will see the Linked data lake showing the Storage account that you previously created.
Now let’s start by going to Azure and see what happened when we clicked on the Save button. In our list of containers you will see various containers, one of them containing the name of your dataverse organization. Clicking to that container will show you a folder for each of the tables that you selected for your synchronization as well as a model.json file which contains your schema for the entities that you selected.
If you drill down into the selected entities, you will find a single csv file containing the initial dump from Dataverse. You can view and edit the file directly in Azure Blob or download it and open it in Excel. The data will contain all the fields that are part of the entity.
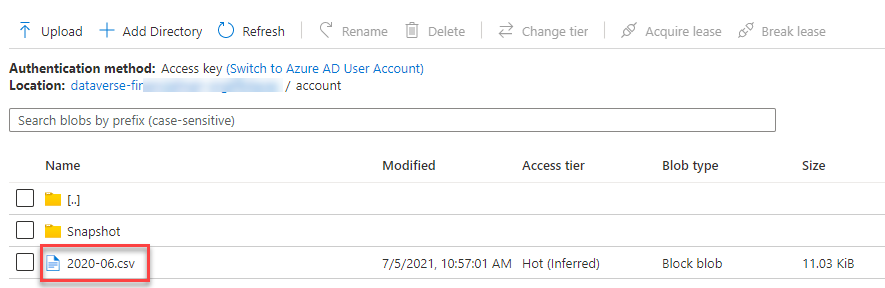
Once we either add an additional record we will notice that a new file gets created corresponding to the month of the creation. If the record already exists in our Azure Blob environment, a new file will not be created, but it will modify the existing record.

When modifying exists records, the changed record will get updated in the corresponding file where it currently exists. In our case, based on the record the changes will either be in the 2021-06 or 2021-07 file.
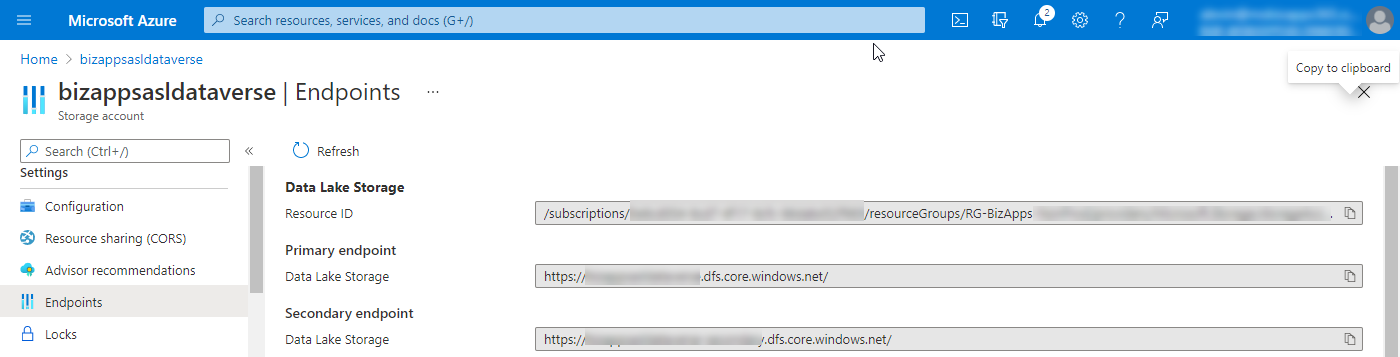
Now that we see that the files are created, let’s go ahead and see how we can view this data in Power BI. The file thing that we are going to need is to get the Endpoint of the Data Like storage. Within your new Storage account, in the left navigation under settings, click on Endpoints. Within the endpoints page, under the Data Lake Storage section, you will see that there are a Primary and Secondary endpoint Urls for Data Lake Storage. Copy the Primary endpoint url. This will be used within Power BI. This is shown in the image below:
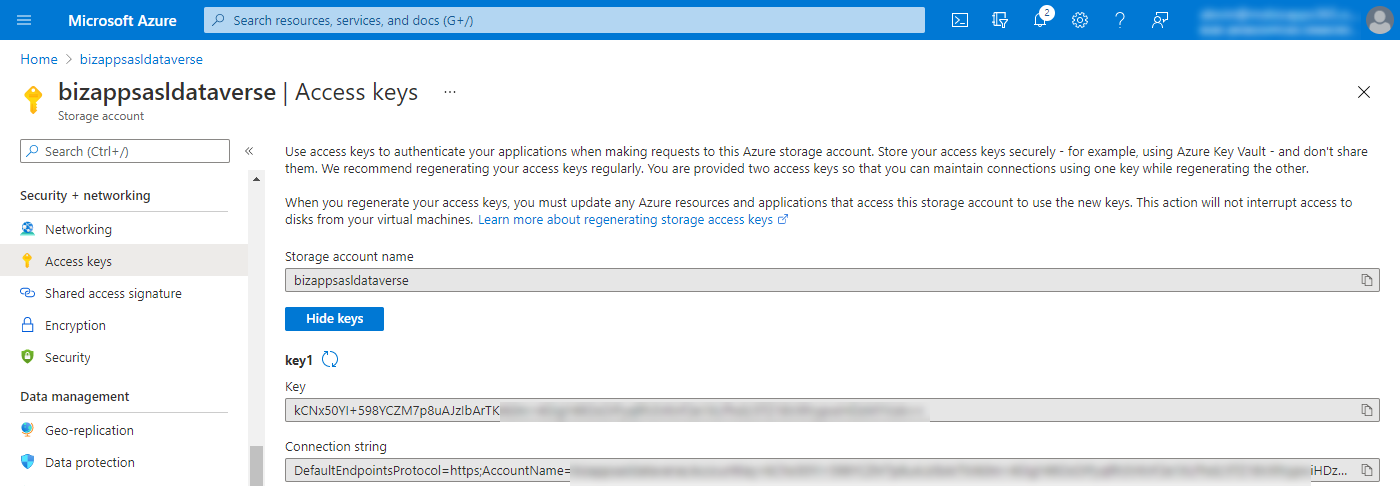
Next you are going to need to get the Access key for the Data Lake Storage Gen2. In the Azure Storage Account, under the Security + networking section, click on Access keys. This will show you the page containing a list of access keys. Click on the Show keys button, and the copy the value of the first key. You will need this for configuring Power BI.
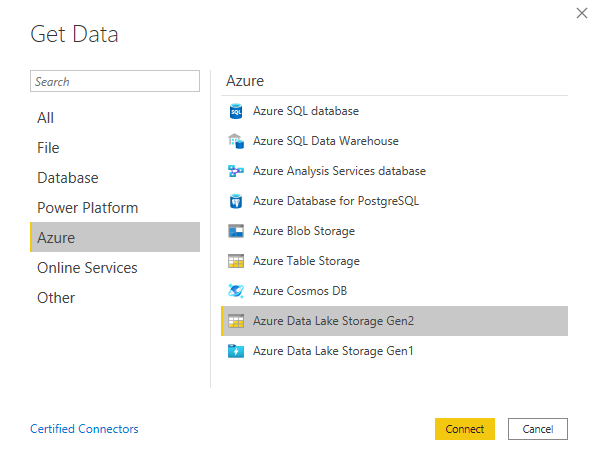
In Power BI, click on the Get Data button in the Ribbon, select Azure for the source of the data, and from the available Azure source select Azure Data Lake Storage Gen2 as shown in the image below:
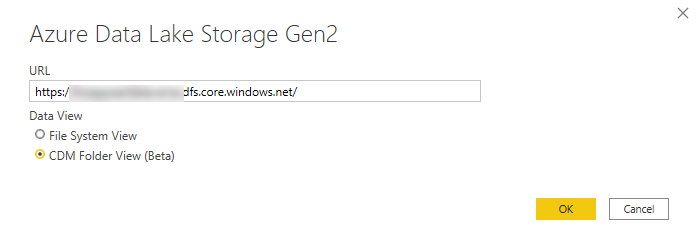
Click on the Connect button, and in the new pop up window, enter the Data Lake Storage Primary endpoint url that you copied in the previous step and paste it in this window, select the CDM Folder view Beta and then click OK.
In the next window, you have the option to sign in using an Organizational account or the account key. Click on the account key. This is the access key that you copied from the previous step. After you enter the access key, you will see the following window, with the available data source results.
You will then see the navigator which provides you with a view of the model that you have in Azure Data Lake. Expand the Storage Container, and then expand the cdm hive. This will show you the list of entities that you have available there as tables. See the screenshot below.
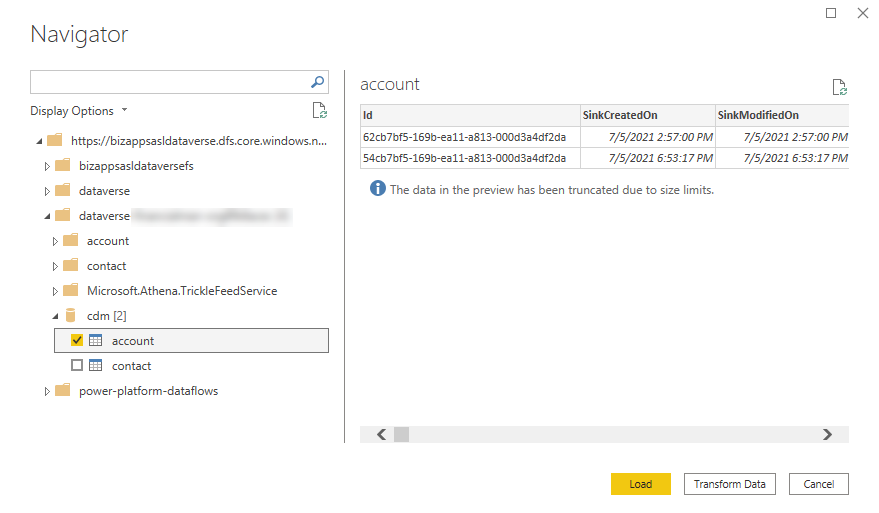
Finally from Power BI, you can start adding visualizations or fields, and customize your data as needed. In the screenshot below, we add a few fields from the accounts table in the Azure Storage account.
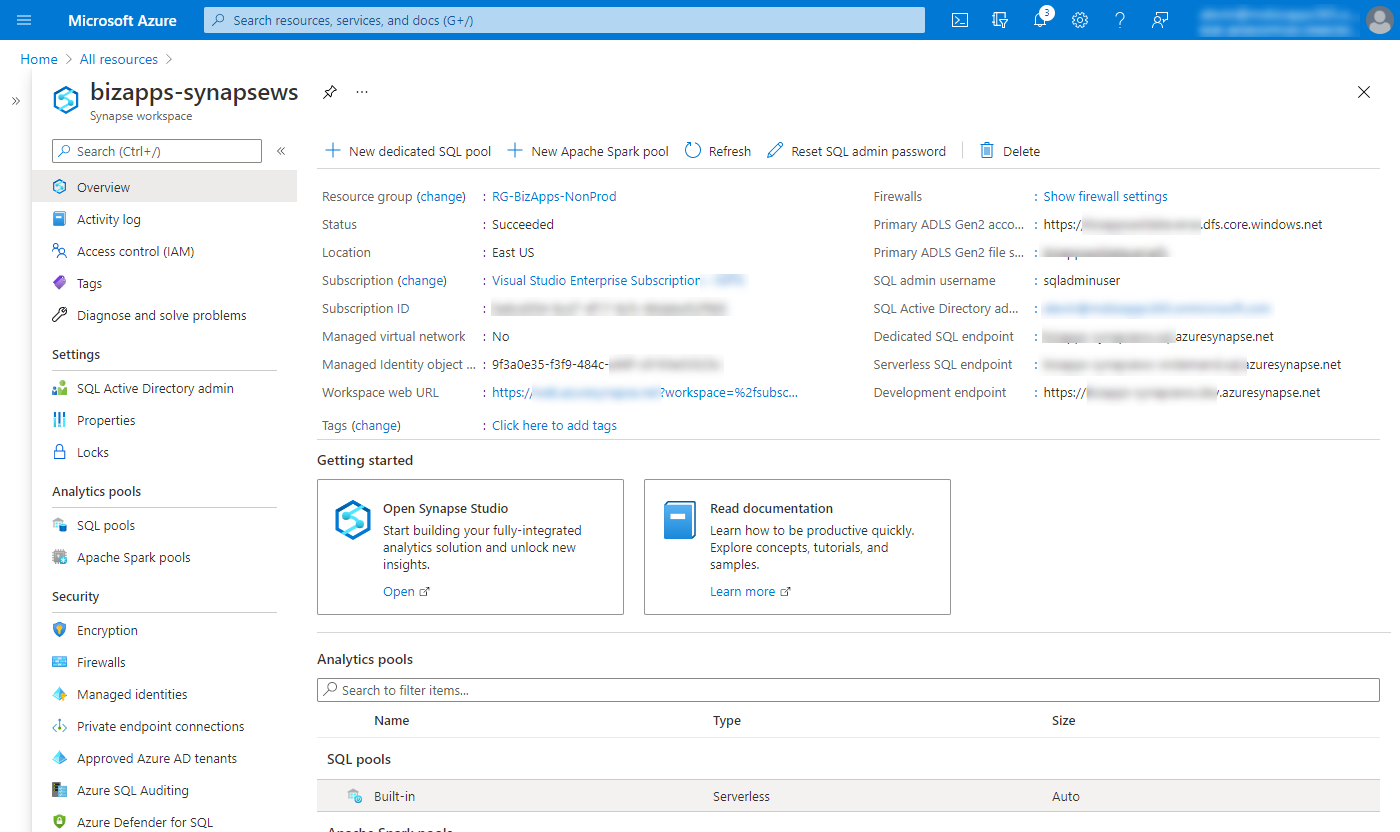
When we configured Azure Synapse link we checked the box for creating a Synapse workspace as well. If we navigate to the Synapse workspace that we created, we will be able to query the data from our Azure Storage account container from within the Synapse Analytics workspace. There are a lot of configuration options that are available in Azure Synapse Analytics workspace, such as configuring Analytics pools, encryption and firewall configuration and more. Those can be further reviewed in the Microsoft documentation, but for our purpose, we are going to take a look at the Synapse studio. The image below shows the Azure Synapse Workspace overview page, where we can click on the Open Synapse Studio to start querying our analytics.
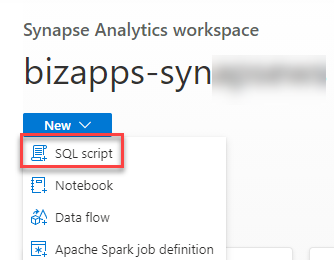
When Synapse Analytics Studio opens, there are a lot of available links on how to use this Azure product, and might be overwhelming, but we are just going to review the basics on how to retrieve or query data from the data warehouse. There are a few options that you can use to create a SQL Script against Synapse Analytics. You can click on the New button on the top of the page, and choose SQL script
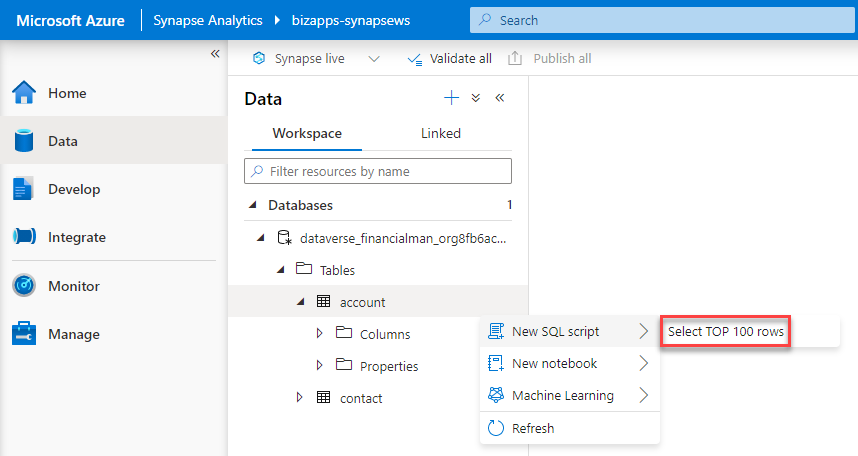
You can click on the Data icon on the left navigation, under the Home icon, which will allow you to expand into the data structure of the data store, and from there click on the account table, choose New SQL script and then choose the Select TOP 100 rows. This will create the SQL script for you and you can start editing it from there.
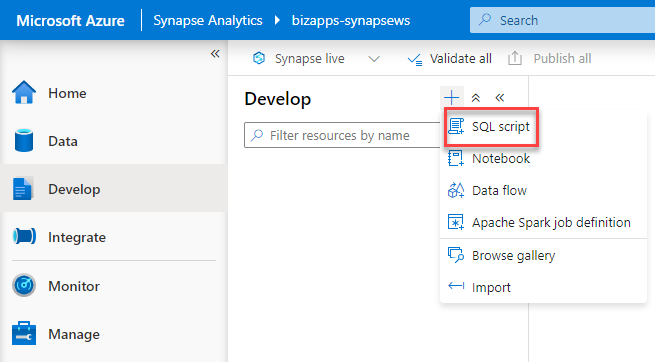
The last option is clicking on the Develop icon in the left navigation, then clicking on the + button and selecting SQL Script as shown below:
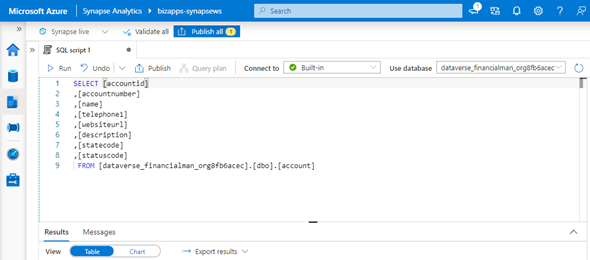
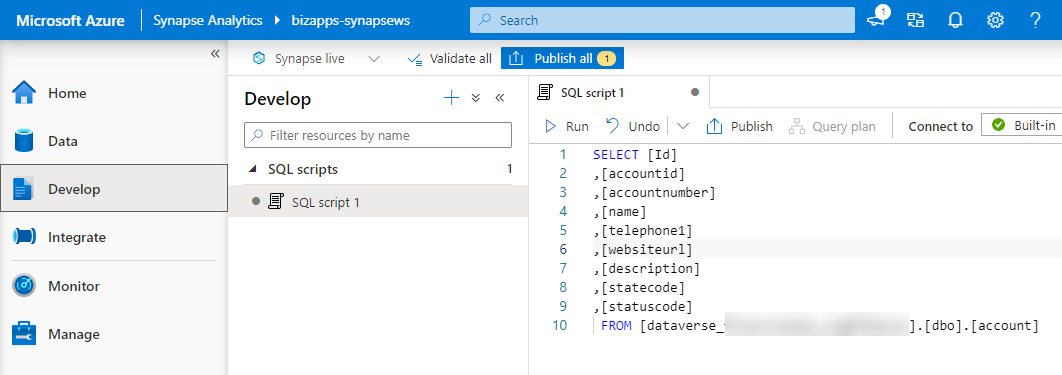
Once we have selected the query option that we want to use, we can go ahead and build our query. In our case we are just going to retrieve the list of accounts as shown in the screenshot below:
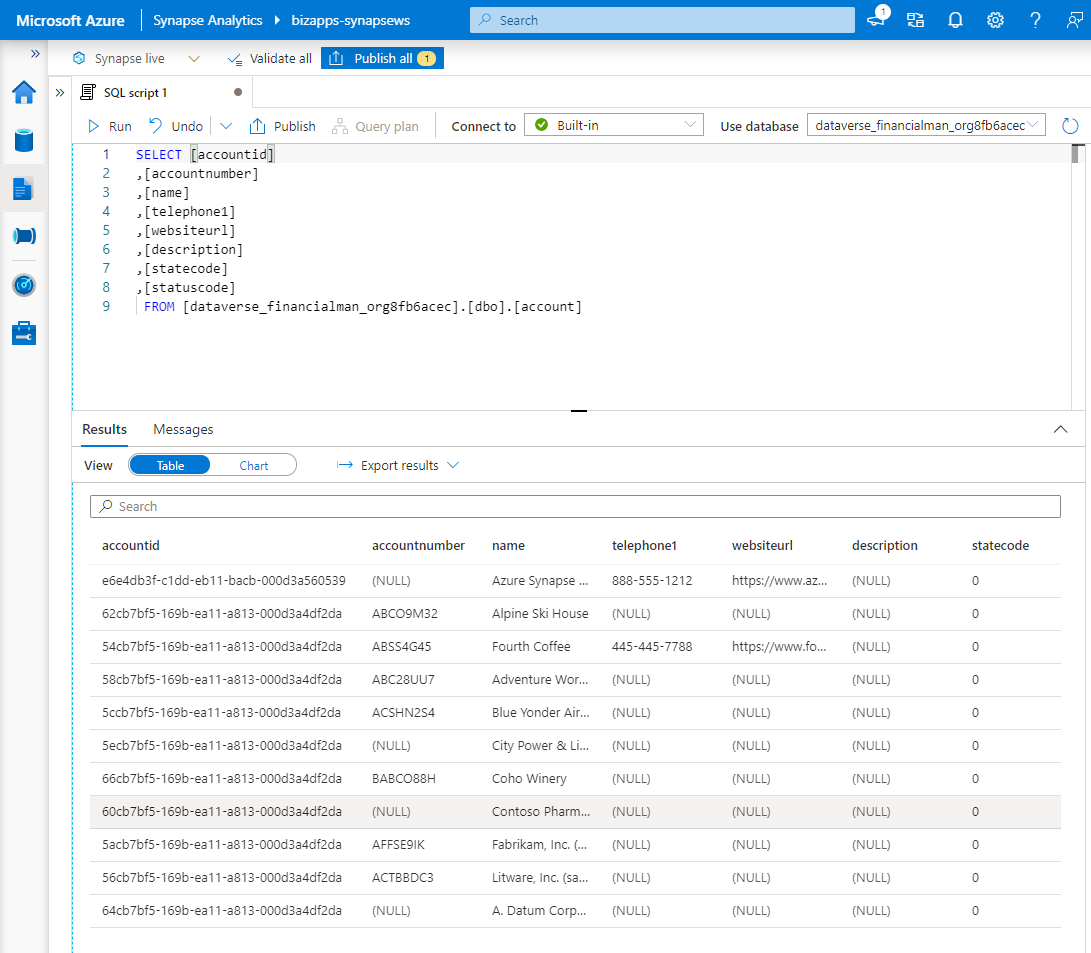
When we click on the Run button we will be able to see the results as shown below.
There are a lot more possibilities and options that are available for how to use Azure Synapse Link and Azure Synapse Analytics and accessing the data from different sources. This articles provides the basic review on how to configure them and make them work for your Dataverse environment. I hope this was helpful.