
On one of our recent projects, we had a requirement to only allow valid Tax Id Numbers on that field. There are various ways of implementing this, but as the direction seems to be to shift the development of these kind of features to custom controls, we decided to implement it as a PCF custom control.
Since this might be a requirement that would come back for similar types of controls, we determined that building a control that would use regular expressions instead of hard coding the logic inside the control would be beneficial. This allowed us to pass the Regular Expression as an input parameter, and while doing this we also passed a string for an error message in case an invalid value is entered that does not match the expression.
If this is the first PCF control that you will be developing, I recommend that you read my PCF Control Guide, or watch the video https://www.youtube.com/watch?v=FxWF-LCCB4g&t=1s for step by step instructions on how to create your first PCF Custom Control.
Now that we have done all the prep work, we are ready to start creating our new PowerApps Component Framework custom control. In this post, I will go through a step by step explanation create the PCF control and deploy it to your Model-Driven app/CDS environment.
First we will configure the Manifest file. You will notice that the manifest file has three properties. The first property is the bound control, while the second and the third are the Regular Expression and the text to display in the control in case of an error.

Our purpose for this custom control was for Tax Id validation, but since it is using Regular Expressions and a custom message, it can technically be used for any type of expression.
The declarations part of the index.ts file contains the regular declarations. I used common names and these can be used for different types of controls.
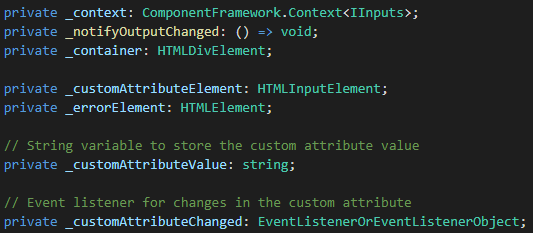
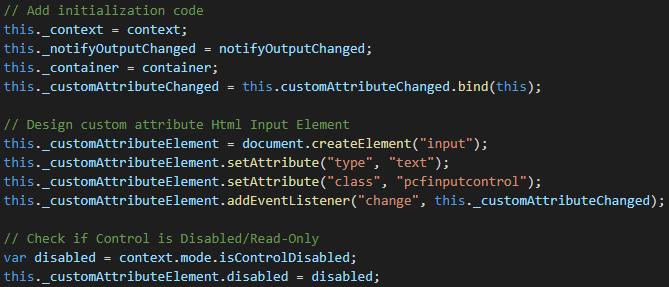
Next we need to write the code for the init function to initialize the control. We set the global control values, design the custom control attribute and finally, we need to check whether the form is read-only or not. This was something that we added later in development as our QA found a bug that the field was still editable when the form was read-only.
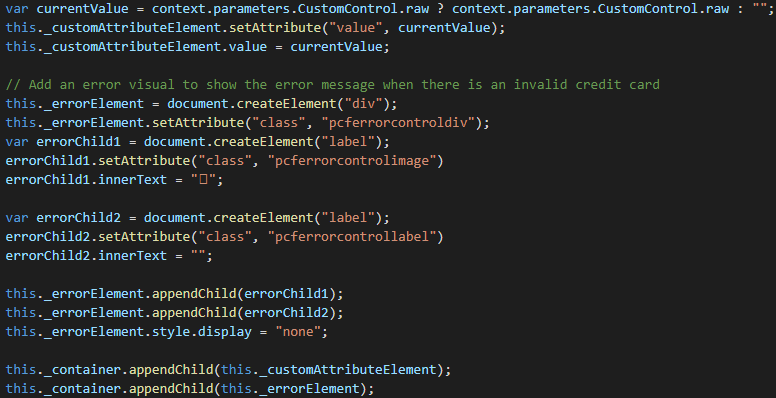
Still within the init function we configure the current value and error Element. The current value is taking the current value from the attribute, and setting the value in the custom control. We then create the error message (to display like the rest of the controls of the form when an error occurs).
In the updateView function we modify the value and verify if there are errors in the control. We also set the error message in the header to only display for 5 seconds. This can be modified to display it constantly and remove when the error is fixed.
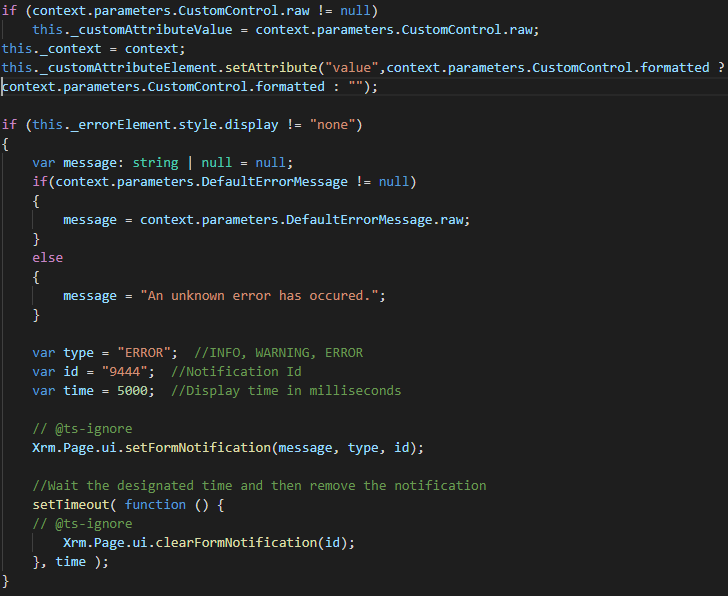
The getOutputs function simply returns the value of the attribute. The customAttributeChanged event checks if the value matches the regular expression using the RegEx.test function to determine.
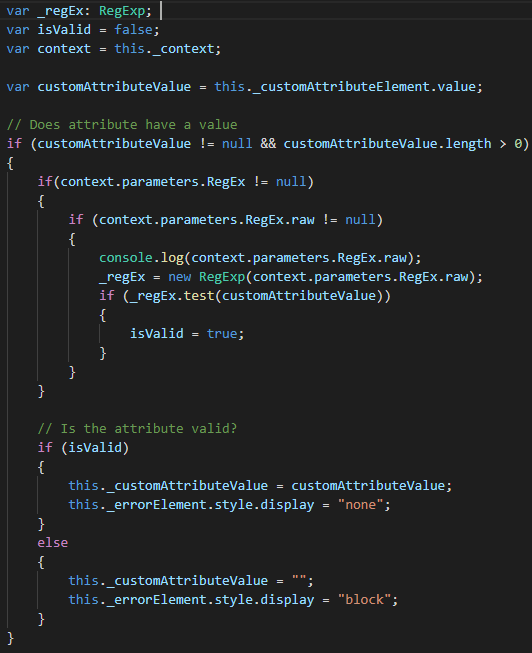
If the Regular Expression text is valid, we set the value of the custom Attribute and hide the error message. If the test is not valid we display the error message.
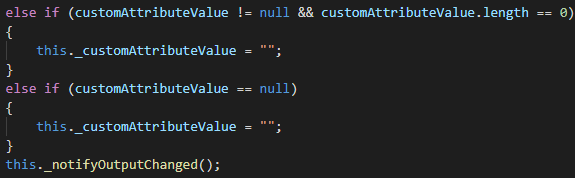
Note that we also need to add logic to validate what happens in the case the custom attribute is null or has a length of 0 so that we can do not display any error in those situations where the user has actually delete those values, and of course we need to call the notifyOutputChanged event at the end.
Once all the code is done, build and test the control and then deploy it in your environment. You can follow the instructions of building and testing the control by clicking on the link of the guide at the top of this post.
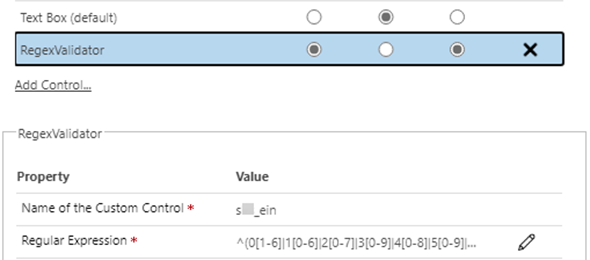
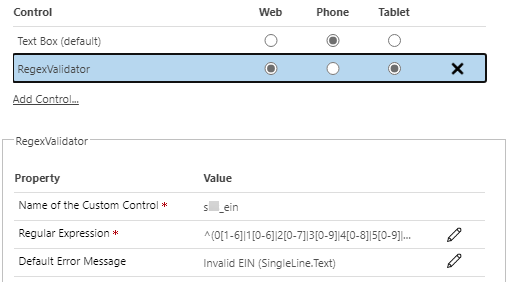
Once the control is deployed, we can set it up in field properties by adding the Control, designating on whether it will be used for Web, Tablet or Phone (or all of them), and setting the properties of the control. The image bellows shows the regular expression and the default error message that will be displayed.
Although not completely verified, but it seems that the maximum length of the value that you can enter for a particular property is 100 characters. Some Regular Expressions are longer than that, so you might need to use other alternatives.
You can download the source code of the control from github by clicking on the link below.
https://github.com/ariclevin/PowerPlatform/tree/master/PCF/RegexValidator