Last week, on June 6th, Microsoft announced the General Availability of the new data focused experiences, which aligns it with some of the functionality that has been availability in Dataverse for Teams for quite some time. This includes the new table hub, table designer the redesign of the columns and data types, the ability to edit choice columns in the maker portal and some advanced table tools.
In this post I will go over these enhancements. Let’s go ahead and start with the new table hub.
Table Hub
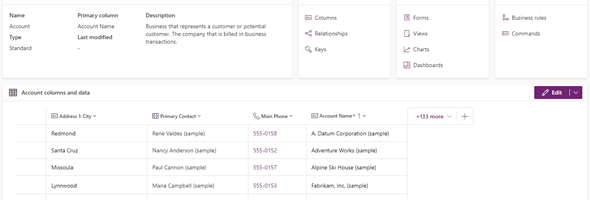
The new table hub, gives us a new summary page that provides us easy ability to modify table properties and advanced options as well as access to making changes to schema (columns, relationships and keys), data experiences (forms, views, charts and dashboards) and customizations (business rules and commands). The bottom section of the table provides us with a list of records that make up the table with the ability to the alter the columns and data in the table. The screenshot below shows us the new table hub for the Account table.
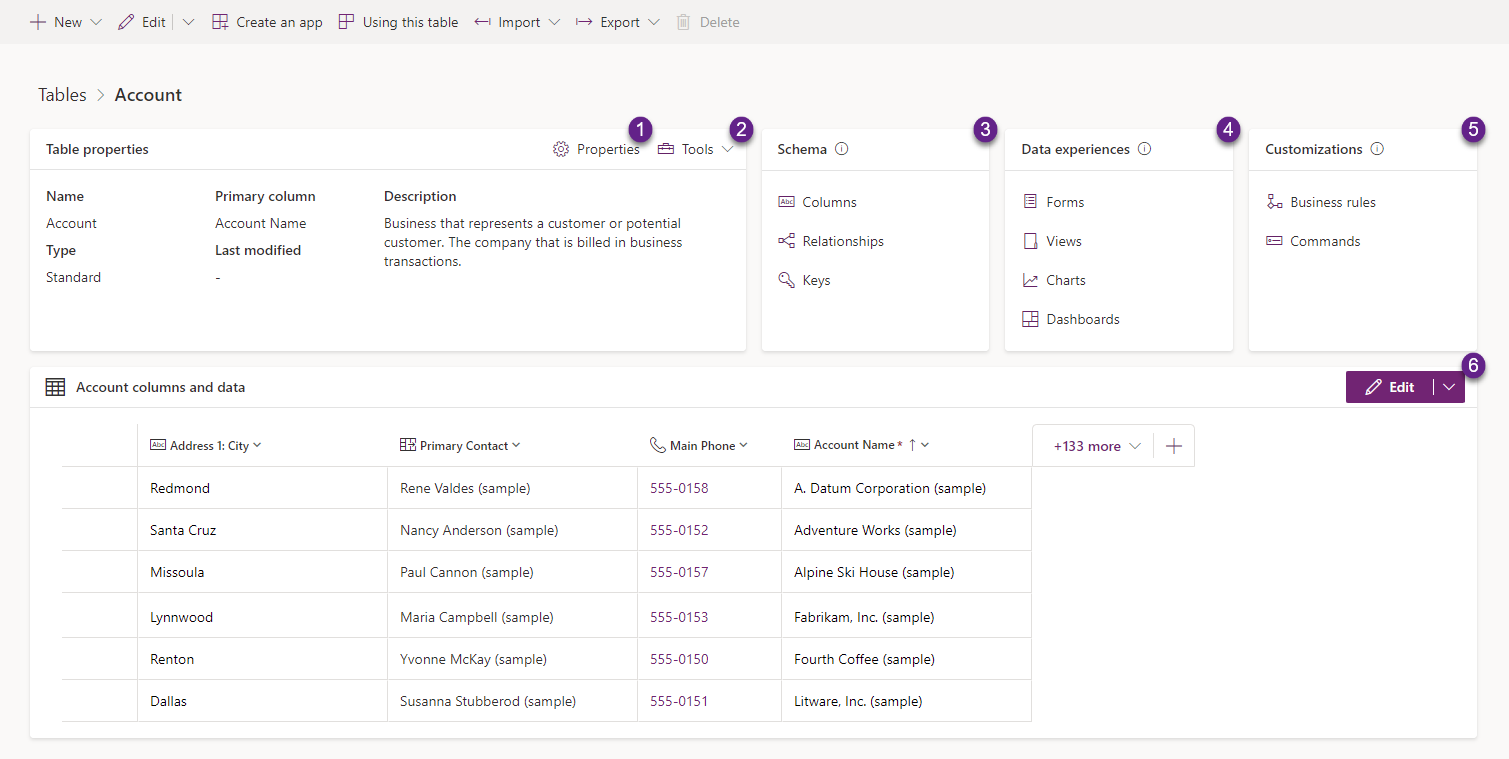
In the table properties area we a Properties button (shown as #1) and the Tools dropdown button (shows as #2). The Properties button gives us the ability to change the Display Name, Plural Name and Description of the table as well as making changes to the Advanced options which include most of the previous features but with some naming changes such as Duplicate Detection Rules, Auditing, Quick Create form and others.
The tools dropdown, has three copy options which allows us to copy the Set Name, Schema Name and Logical name, as well as two additional options to get the JSON formatting of the table definition and the table data. These can later be used if required to call the API on the table.
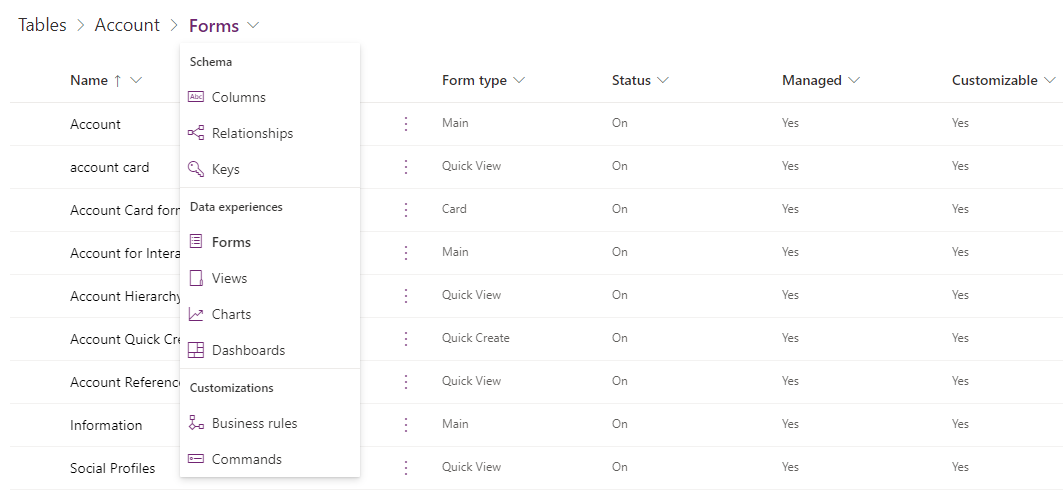
The next three areas: Schema (shown as #3), Data experiences (shown as #4) and Customizations (shown as #5) are links to the different areas that have been previously available, but now separated by logic. The schema area provides links to columns relationships and keys, the data experiences provides links to forms, views, charts and dashboards and so on. The main difference is that when you navigate to a particular area (for example to forms in the screenshot below), you will able to navigate back to other areas of the table by clicking on the drop down next to the Forms (or other table component). If you are going to want to navigate back to the table hub, clicking on the table name will get you there.
Finally, the last part of the table hub (shown as #6) is the column and data view (or table designer). This allows you to see the data from the table in an Excel like format. You can add additional columns to the existing view and make changes to the data directly from the column/data view. The table designer can be modified on the table hub screens or popped into a separate window where it can be customized in more detail.
Column Designer
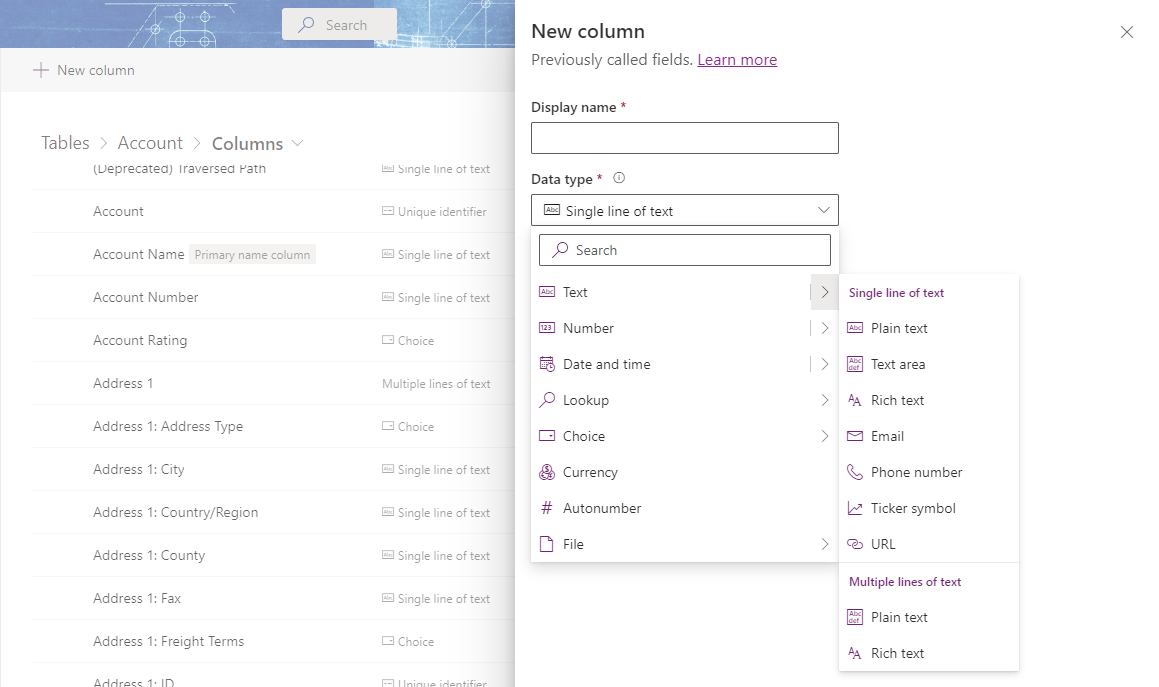
The column designer has gone through some enhancements as well. The first is that the columns to be added have been categories by data type, so that you can more easily select from the available data types. When creating a new column, we will now see the Data Types grouped by text, number, data and time, lookup, choice or file in the case when more than one option exists. The image below shows the pane that is displayed when the new column is selected.
The advanced options allows us to update the Schema name (during create) the character count as well as setting whether this is a security enabled column and requires auditing.
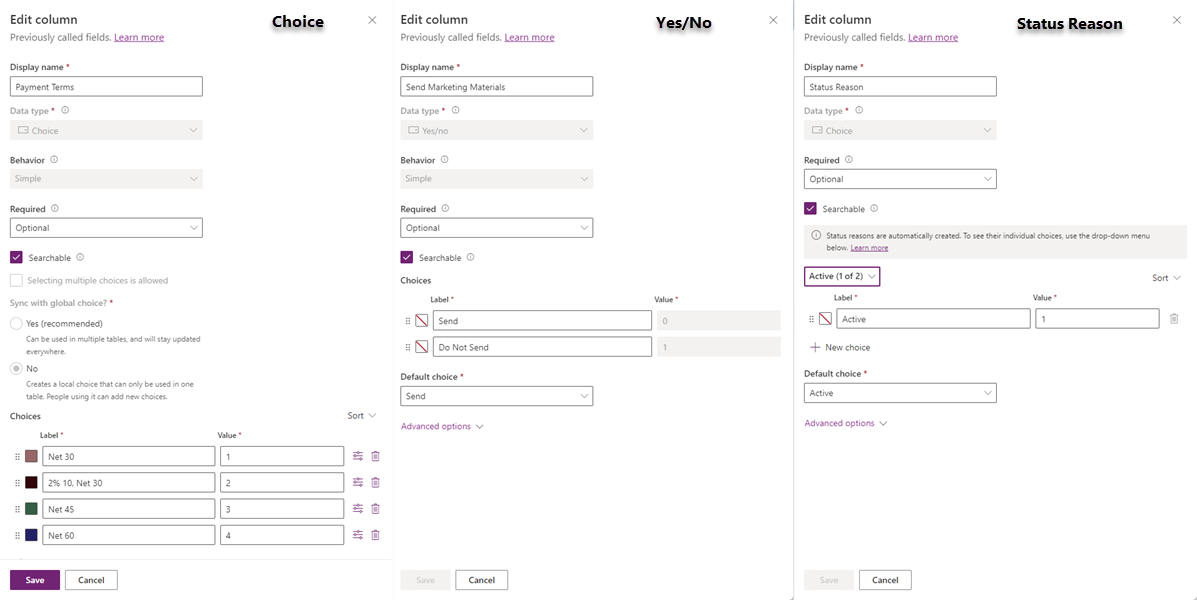
Choice, Yes/No and Status Reason columns
The Choice, Yes/No and Status Reason columns have also received a makeover. We are now able to make changes to our Choice columns by modifying the labels, values, colors directly in the maker portal, as well as adding new choice to each set, and linking or synching them with a global choice. For the Yes/No columns, we can only change the labels and the colors and set the default choice. The Status Reason column allows us to make changes to the Active and Inactive Status Reasons and their values, with the ability to select the Status and then see the associated Status Reasons. The image below shows all of these options.