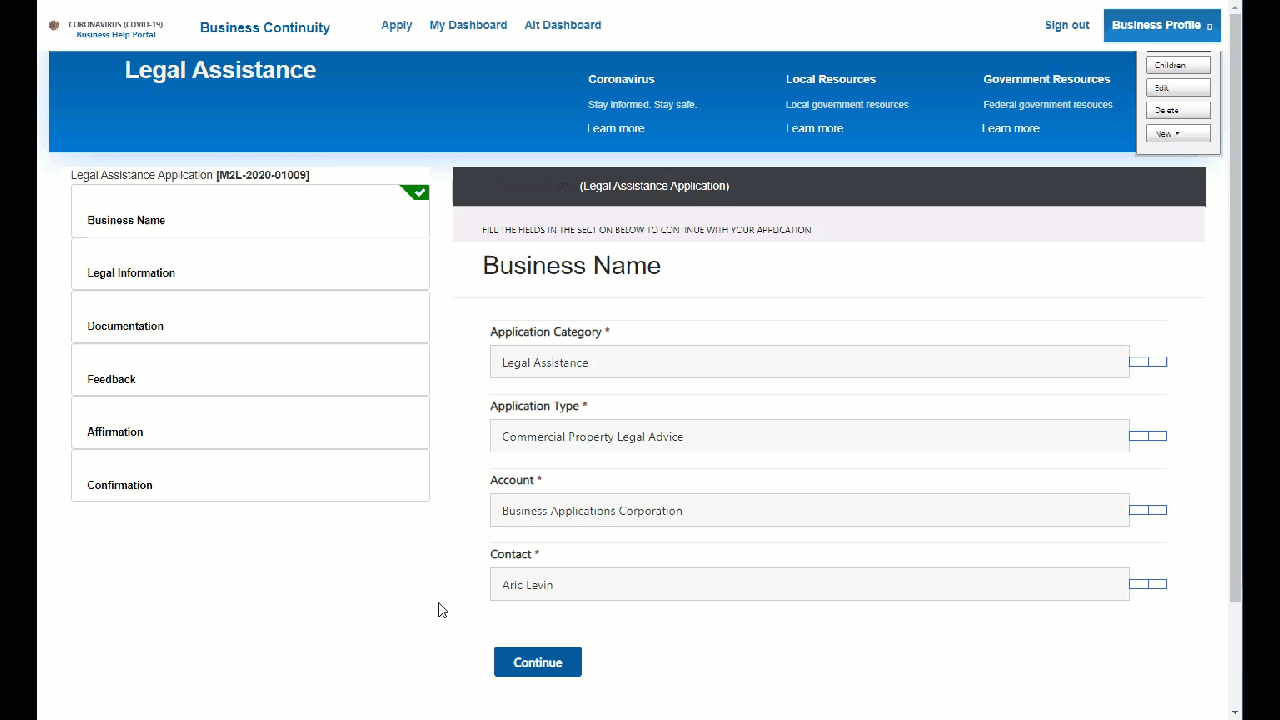
Creating navigation in a Power Apps portal application is straight forward, and can easily be done using Web Link Sets, but how about showing to the user where they are in the process and modifying the style of each element once the user has finished entering the data for that page. We have done this a few times and this involves the combination of liquid and JavaScript code on the different pages.
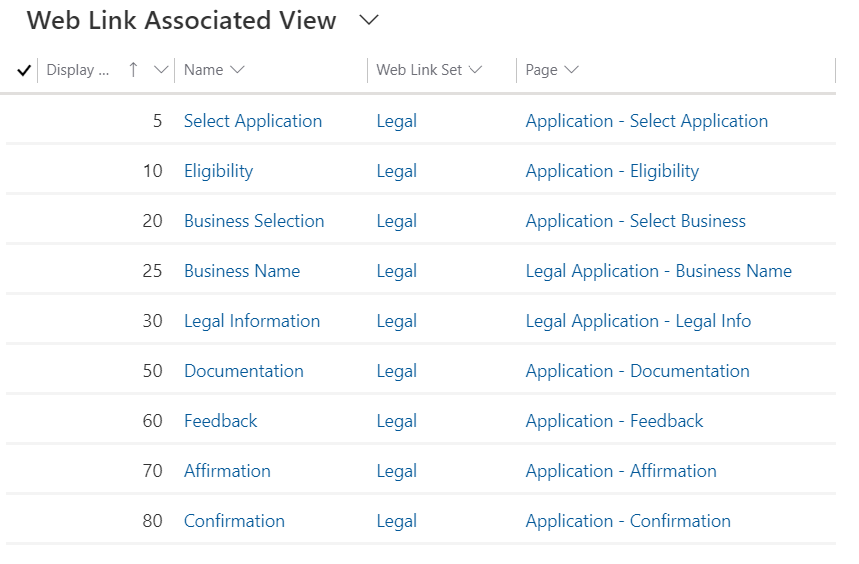
Let’s start from the beginning. The first thing that we need to do is to create the Web Link Set that we are going to use. In our case, we are using a web link set called Legal. Notice that the Display Order is important, because we are going to write that back to the record every time we navigate from one page to the next.
The screenshot below shows a sample of the Web Link view for our Legal Web Link Set.
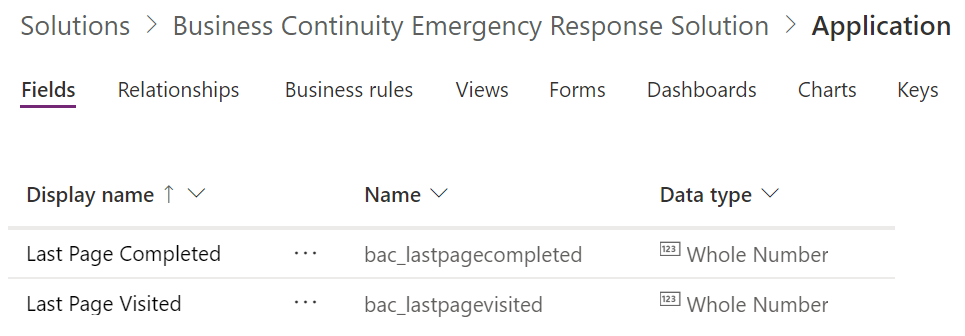
The next thing that we want to do is create the field on the entity that will capture that page that we are currently on (or the change of the record during submission. We will need to add the field to the entity, but also add the field to every tab (entity form) that is displayed on the application. The first screenshot shows the field that is created on the Application entity. For our purpose we used two field, but only the Last Page completed field is required.
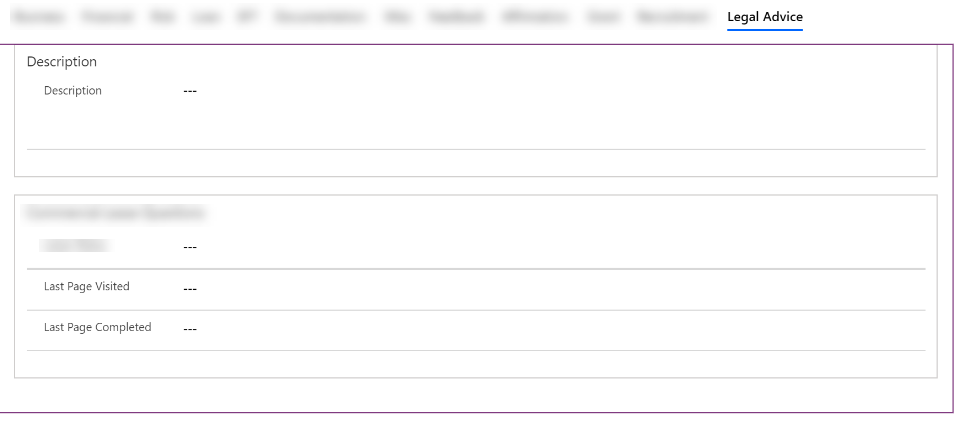
Once the field is created, we will add that field to all of the tabs that are displayed in Entity forms. We have a custom form called Portal Application, where everything that is displayed on the portal is set. In our Legal Advice page for example, you can see that the page contains the Last Page Visited and Last Page Completed so that they can be populated on the portal form.
We have a web template that displays the navigation area of the application. In that web template, we are retrieving the value of the last page completed, and will perform some logic on it.
We start by verifying the template has a unique identifier that will allow us to retrieve the application, and assigning the app variable to the application entity, and then setting the category and the last page completed fields to the assigned variables.
{% if request.params.id != null and request.params.id != empty %}
   {% assign app = entities["bac_application"][request.params.id] %}
   {% assign application_category = app["bac_applicationcategoryid"].name %}
   {% assign last_page_completed = app["bac_lastpagecompleted"] %}
{% endif %}
We then retrieve the Web Link set for the category that we specified
{% case application_category %}
  {% when 'Legal Assistance' %}
    {% assign app_nav = weblinks["Legal"] %}
  {% else %}
    {% assign app_nav = weblinks["General"] %}
{% endcase %}
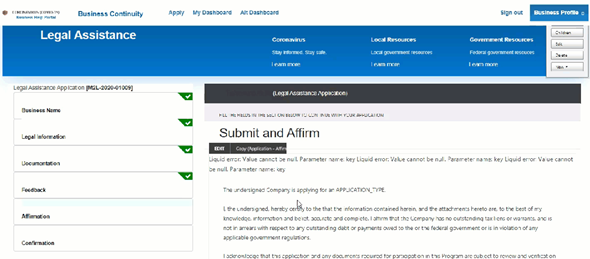
Now that we have the Web Link Set and the Last page completed, we will loop through the Web Link Set and perform a few checks. We will check the application status to verify if the application has been completed or not and check the value of the last page completed to verify whether or not we have already reached a particular page. We will also check if the current page is the same as the Url of the page on linkset so that we can have different style for the current page to notify the user this is the page we are on.
In every condition we include a link to the Navigation Item which contains that code to the styling of the link, passing the style that the link should display. The loop code is displayed below:
{% if app_nav %}
    {% for link in app_nav.weblinks %}
        {% if request.params.id != null and request.params.id != empty %}
            {% if link.adx_displayorder > 20 %}
                {% if link.adx_displayorder <= last_page_completed %}
                    {% if (application_status == 'In Progress') %}
                        {% include 'Application Navigation Item' with link, special_class: ' cvd-list-row-thread-completed'  %}
                    {% else %}
                        {% include 'Application Navigation Item' with link, special_class: ' cvd-list-row-thread-submitted'  %}
                    {% endif %}
                {% else %}
                    {% if link.url == request.path %}
                        {% if forloop.last %}
                            {% if (application_status == 'In Progress') %}
                                {% include 'Application Navigation Item' with link, special_class: ' cvd-list-row-thread-completed'  %}
                            {% else %}
                                {% include 'Application Navigation Item' with link, special_class: ' cvd-list-row-thread-submitted'  %}
                            {% endif %}
                        {% else %}
                            {% include 'Application Navigation Item' with link, special_class: ' cvd-thread-current'  %}
                        {% endif %}
                    {% else %}
                        {% include 'Application Navigation Item' with link, special_class: ' '  %}
                    {% endif %}
                {% endif %}
            {% endif %} <!-- link.adx_displayorder > 20 -->
    {% endfor %}
{% endif %}
Since we are also displaying the controls on the form, we need to add JavaScript code to hide the controls and set the value of the next page on the last page completed, so that when the page is submitted that will be written to the entity record. The code below shows the JavaScript.
$(document).ready(function () {
   var url = window.location.href;
   $("#bac_lastpagecompleted").parent().parent().hide();
   $("a").filter(".page-link.cvd-link-navigation.cvd-custom-event").each(function () {
      if (this.href == url) {
         var maxPageNumber = 0;
         if ($("#bac_lastpagecompleted").val() != "")
            maxPageNumber = parseInt($("#bac_lastpagecompleted").val());
         var displayOrder = parseInt($(this).attr("adx_displayorder"));
         var nextPage = displayOrder;
         if (nextPage > maxPageNumber)
            $("#bac_lastpagecompleted").val(nextPage);
      }
   });
});
Now that we have completed our review, we can take a look at the final result.