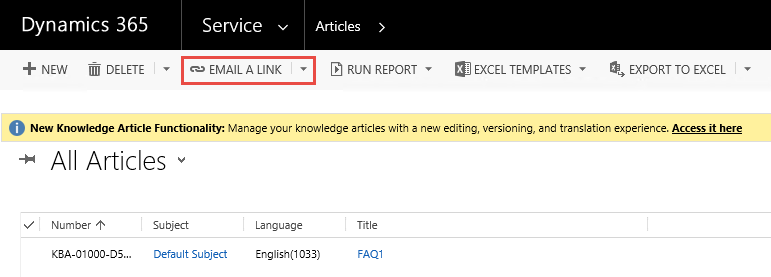
Recently somebody asked, why does the KB Article home page view does not have an option to Email a Link to multiple records like a lot of the other entities do, In looking at the Ribbon Xml, we notice that is true and there is no Email a Link split button to display that, so we were looking at the best approach to implement this.
We will be cover an mixed way of doing this with Ribbon Workbench and customizing this with the Customizations.xml file that is part of the part of an export solution.
In order to get this working, the first thing that we need to do is take a look at how this is implemented in an entity that the Split button exists, such as the Contact or Account entity.
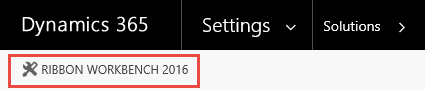
First we are going to create a new solution, and include only the Contact entity in it. You can include All Assets. Launch Ribbon Workbench, and then choose the solution that you just created.
In the home page command bar of Ribbon Workbench, right click on the Email A Link button, and then select Customize Button. Repeat the same and select Customize Command. This will load all the button and customizations of the Email A Link button for the Contact Entity.
Click on the Xml tab in the solution area of Ribbon Workbench, and then click on the Refresh button. This will show you the Xml portion of your Email A Link button and command. Copy the Xml to a text editor, and do the follow steps:
- Remove the Xml element line from the file
- In the RibbonDiffXml section start tag, remove any namespaces, so that it only shows
- Replace within the file all occurences of contact with kbarticle
You can close Ribbon Workbench. In your solutions area, create a new solution and add the KB Article Entity to the solution. Include All Assets. Export the solution as an unmanaged solution.
Extract the unmanaged solution that you created, and in the extracted folder open the customizations.xml file in a text editor. Navigate to the RibbonDiffXml section of the customizations file, and replace it with the RibbonDiffXml that you modified from what you copied from Ribbon Workbench. The following is a sample of the RibbonDiffXml section of the file:
>

    "Mscrm.HomepageGrid.kbarticle.Send.CustomAction" Location="Mscrm.HomepageGrid.kbarticle.MainTab.Collaborate.Controls._children" Sequence="61">

        "Mscrm.SendShortcutSelected.AlwaysEnabled" Id="Mscrm.HomepageGrid.kbarticle.Send" Image32by32="/_imgs/ribbon/SendShortcut_32.png" Image16by16="/_imgs/ribbon/EmailLink_16.png" LabelText="$Resources:Ribbon.HomepageGrid.Record.Shortcut.Send" Sequence="61" TemplateAlias="o2" ToolTipTitle="$Resources:Ribbon.HomepageGrid.Record.Shortcut.Send" ToolTipDescription="$Resources:Mscrm_HomepageGrid_Other_MainTab_ExportData_Send_ToolTipDescription" ModernImage="EmailLink">
    "Mscrm.Templates" />


    "Mscrm.SendShortcutSelected.AlwaysEnabled">

        "Mscrm.Enabled" />
        "Mscrm.IsValidForHierarchyView" />


        "Mscrm.HideOnModern" />


        "Mscrm.CommandBarActions.sendSelectedRecordsUrl" Library="/_static/_common/scripts/CommandBarActions.js">
          "true" />
          "SelectedControlSelectedItemReferences" />
          "SelectedEntityTypeCode" />


      "Mscrm.HideOnModern">
        "Modern" InvertResult="true" />


      "Mscrm.Enabled">
        "Mscrm.CommandBarActions.alwaysEnabled" Library="/_static/_common/scripts/CommandBarActions.js" />

      "Mscrm.IsValidForHierarchyView">
        "Mscrm.CommandBarActions.isValidForHierarchyView" Library="/_static/_common/scripts/CommandBarActions.js" />
Save your changes of the Customizations.xml file. Re-compress the extracted file, and import the created zip file into your solutions. Publish your changes.
Navigate to Articles, and you will see that the Email A Link button is visible and enabled on the form.