

In one of our recent requirements, we had to log changes to certain fields in a few different entities. Since we needed the value of the field before and after the change, the logical option was to use plugins and adding a pre-image step to it in order to save that data.
There are however other alternatives, that might make more sense, especially if you want to minimize the amount of code and plugins that are accessible within the system.
The solution is simple. We create a Webhook and add to it the corresponding step and Pre-Image, and upon execution it will be triggering a Cloud flow where we can use the values from the Input Parameters and the Pre-Entity Image.
Let’s go ahead and see how we implement this. The first step is to create a Cloud flow, and set the trigger to When a HTTP request is received.
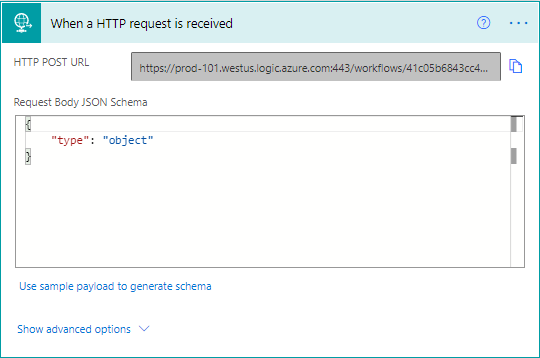
The HTTP POST URL is not available until the flow is saved, so enter the request Body JSON Schema. You will need to enter an action to Save the Flow, so you can enter an Initialize Variable, which we will use later set a name for the flow and Save the record. Once the record is saved, the HTTP POST URL will be filled in and you will be able to configure the Webhook. Copy the HTTP POST URL and paste it in NotePad or other text editor. The result should be similar to what you see below:
https://prod-XXX.westus.logic.azure.com:443/workflows/41e03b6243cc47273a71f827fb3bd29b/triggers/manual/paths/invoke?api-version=2016-06-01&sp=%2Ftriggers%2Fmanual%2Frun&sv=1.0&sig=e5138Klq7cOcbG1RJ2bXA42et4vFM0-kZ3k8jyK7Txs
Add new lines between the url and the query string parameters and remove the separators so that it looks like this:
https://prod-XXX.westus.logic.azure.com:443/workflows/41e03b6243cc47273a71f827fb3bd29b/triggers/manual/paths/invoke
api-version=2016-06-01
sp=%2Ftriggers%2Fmanual%2Frun
sv=1.0
sig=e5138Klq7cOcbG1RJ2bXA42et4vFM0-kZ3k8jyK7Txs
Replace all the %2F encodings with the corresponding character (/). This will change that line to look like this: sp=/triggers/manual/run
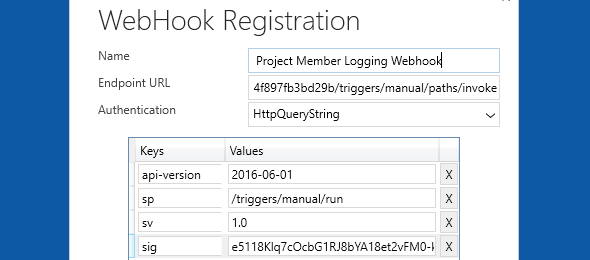
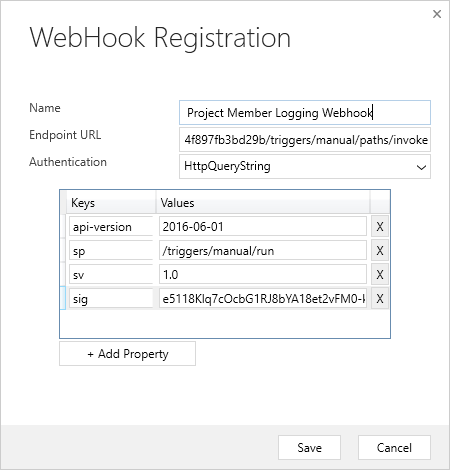
Now, let’s go and open the Plugin Registration Tool, and click on the Register drop down and select Register New Web Hook, or CTRL+W for short.
This will open the Register New Web Hook dialog when we will enter the HTTP URL and the different parameters that we specified above as shown in the screenshot below.
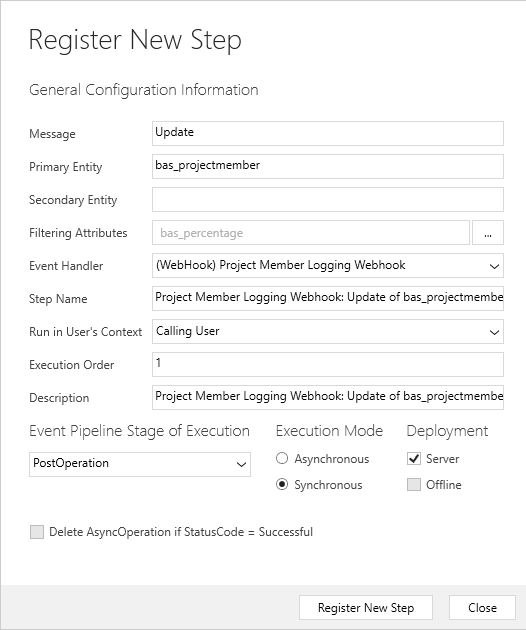
Now that we have registered the Web Hook, you should be able to see the new Web Hook in the list of Registered Plugins. Select the Web Hook, and select Register New Step (either by Right Clicking on the Web Hook and selecting Register New Step or from the top tab menu).
Just as you would perform this step registration process for a plugin, do the same for the Web Hook. Select the Message, Primary Entity and Filtering Attributes as shown in the image below. Of course you should customize this for your own message..
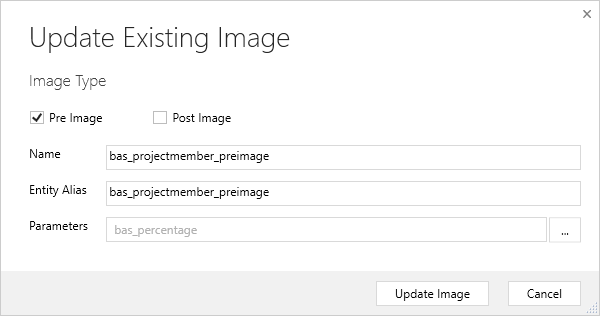
Since we want to get the value before the change and after the change, we need to register a new image for the step of type Pre Image, as shown in the screenshot below. Add the name and entity alias, and specify the parameters that you want for you Pre Image.
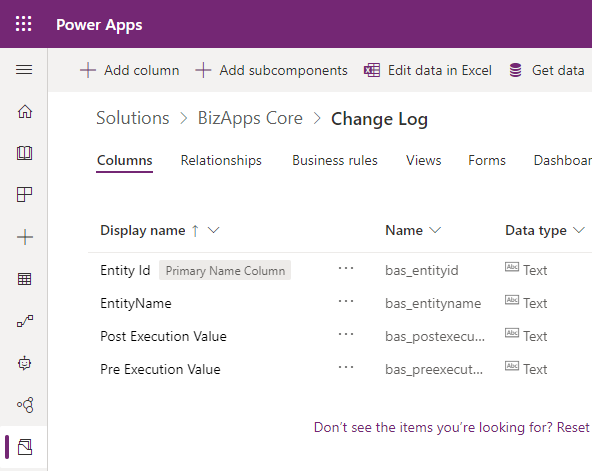
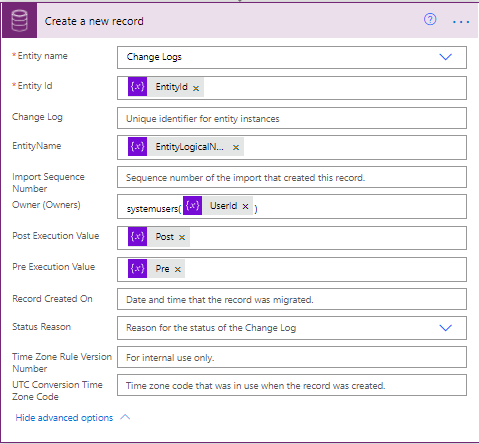
Now that we are done with the configuration within the Plugin Registration Tool, let’s take a look at where this data will be stored. We created a new entity called Change Log that contains information about the entity and the record that was modified, along with fields to store the values before and after the change.
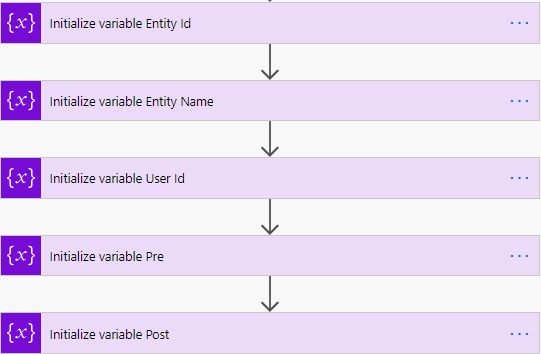
Next, let’s go back the flow that we created. We will start by initializing a few variables that will be used to store some of the values, and then retrieve the values from the HTTP Post method.
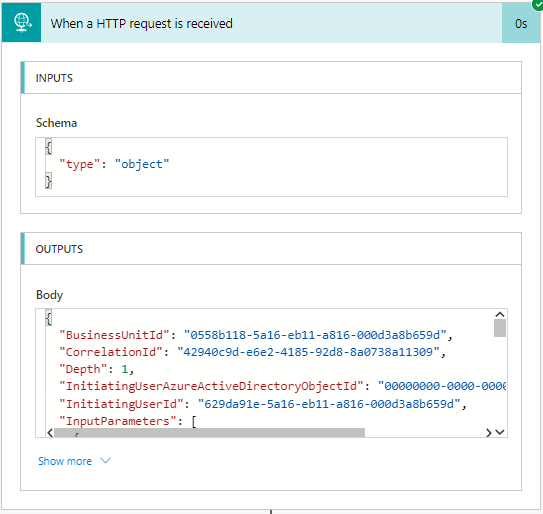
It is a good idea to run the flow once so that you can review the Outputs of the When a HTTP request is received trigger, and that will help you with constructing the expressions needed for the different steps.
The variables are shown in the image below. The Pre and Post variables will be added later, while the Entity Id, Entity Name and User Id can be filled out during the initialization as follows:
- triggerBody()?[‘PrimaryEntityId’]
- triggerBody()?[‘PrimaryEntityName’]
- triggerBody()?[‘UserId’]
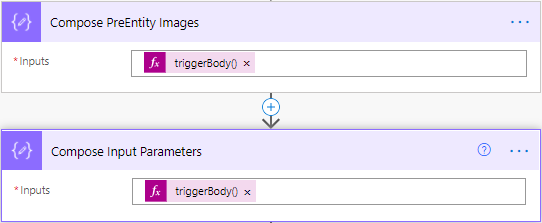
Since getting the values from the Input Parameters and the PreImage is a little more complex, I used two compose actions for these, and set the Inputs to as follows:
- triggerBody()?[‘InputParameters’][0][‘value’][‘Attributes’]
- triggerBody()?[‘PreEntityImages’][0][‘value’][‘Attributes’]
The final step before storing the record is doing an Apply to each of the Input parameters and check the value corresponding to the attribute that was changed. We run this for both the PreEntity image results and the Input Parameter results and have a condition to check for the Input Parameter.
The Condition logic expression is: items(‘Apply_to_each_PreEntity_Image’)?[‘key’], and the Set Variable Pre contains the following expression: items(‘Apply_to_each_PreEntity_Image’)?[‘value’]
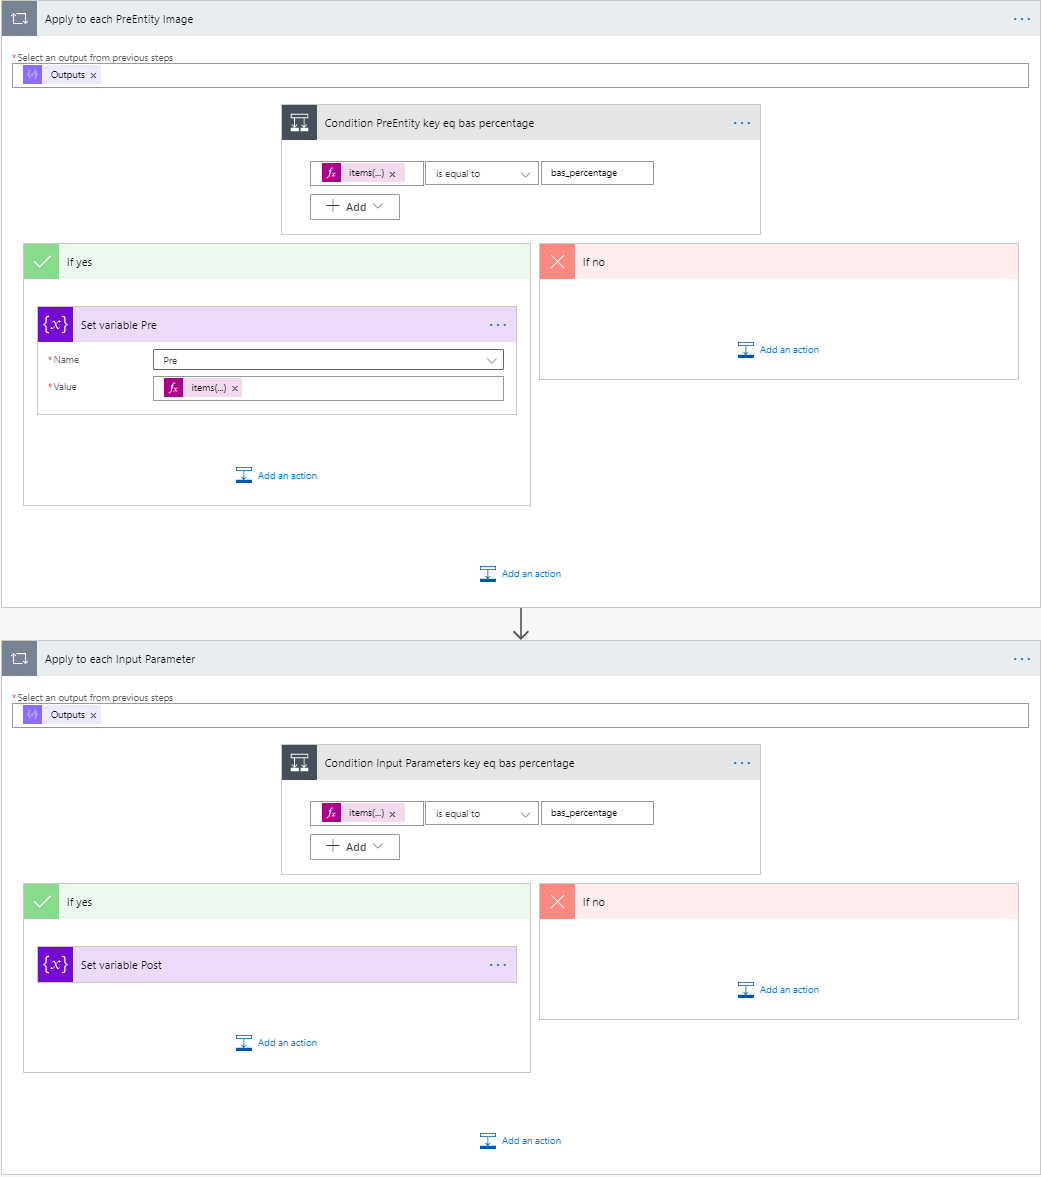
The same applies to the other apply to each action. Once we have retrieved all the information that we need, the change log record will be created.
The results will look like this:
