
In a recent blog I posted a few days ago, I posted how to use Azure Service Bus and a Listener application to integrate between the Common Data Service (Dynamics 365 or Power Apps Model Driven Application) and an On Premise SQL Service database. As mentioned that there are a few easier ways to implement this, I wanted to demonstrate how easy it would be to perform similar functionality using a Microsoft Power Automate Flow that connects to the On-Premise Data Gateway
The steps to implement this are much fewer and simpler, and there is actually no code required in order to implement this solution. What is required is to install the On-Premise Data Gateway, and create a Flow that will be executed when a new record is created. All the rest is handled by the platform.
The logic of this article will be as follows: When a contact record gets created or updated, it will call the Power Automate Flow in order to update an On-Premise SQL database that a new record is created or an existing record got updated.
Configuring the SQL database
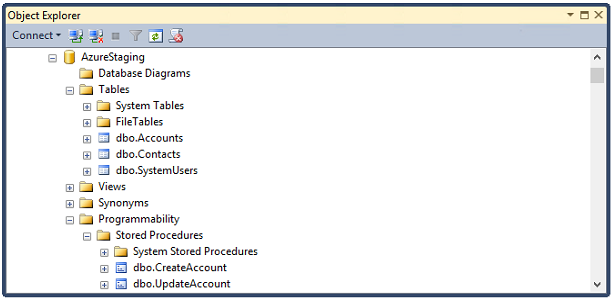
We will start with the first step which is the configuration of the database. Since we already created the database and the tables in a previous post, we can skip this step. The image below shows the structure of the SQL database. For the purpose of this post we only need the Contacts table, but can be done with any table.
Installing and Configuring the On-Premise Data Gateway
The first thing that we need to do is download the On-Premise Data Gateway and install in on the required computer (workstation or server), where the Gateway will run from. Prior to installing the gateway, notice that there is a pre-requisite that the .NET Framework 4.7.2 has to be installed on the computer where the Gateway will be running from.
If it is not installed, you can download the .NET Framework 4.7.2 from the following link:
http://go.microsoft.com/fwlink/?linkid=863265
The On-Premise Data Gateway can be downloaded from the link below.
https://www.microsoft.com/en-us/download/details.aspx?id=53127
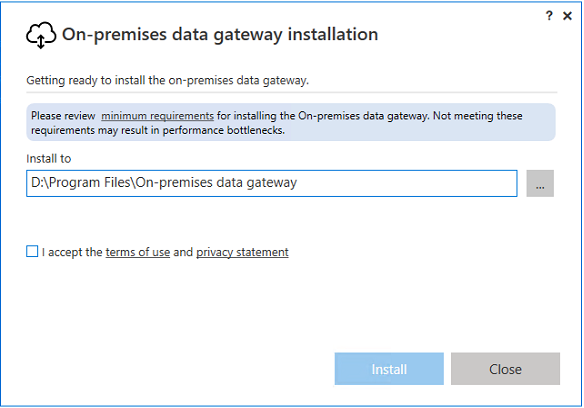
After the download, run the installation executable for the Data Gateway (file called GatewayInstall.exe). The installation will request an installation directory and the acceptance of terms of use and privacy statement.
Click on the Install button to start with the installation. The installation takes a few minutes. Once it is done, the installer will close, and re-open. If for any reason the Installer does not re-open, you should be able to re-open it from the Start Menu.
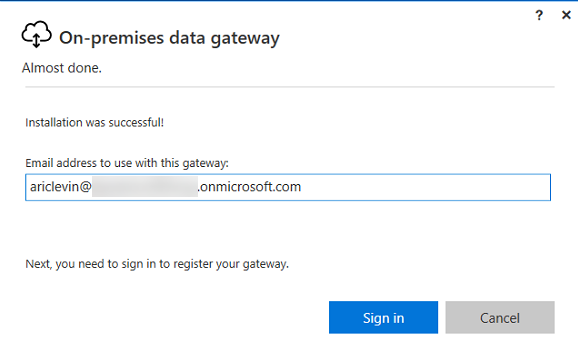
Enter your Email Address and click on Sign in. This will open the Microsoft Login window requesting the password for the account that you entered. As part of the process, you will be asked to provide a Name for the Gateway and a recovery key (Save the recovery key in a safe place). For step by step instructions on the installation of the On-Premise Data Gateway and the options for configuration, you can refer to the following document:
https://docs.microsoft.com/en-us/azure/analysis-services/analysis-services-gateway-install
Creating your Flow
The flow that has to be created is very simple. It only contains a trigger using the Common Data Service (current environment) and an Insert Row (V2) action for SQL Server. We create the When a record is created, updated or deleted trigger to retrieve the data from the Contacts entity (or another entity) when the record is Created or Updates (as shown in the image below):
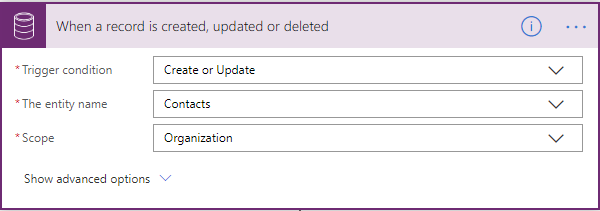
This will execute any time a new contact is created or updated.
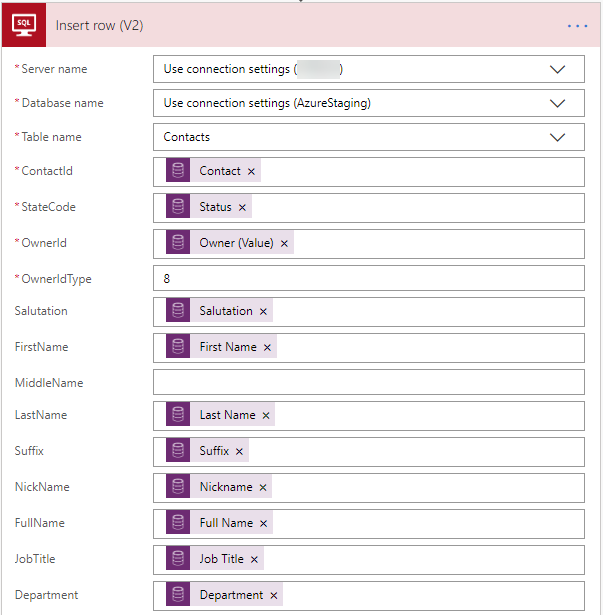
Next we need to store this in our On-Premise SQL Server database. Since the database was previously created, and we installed the Azure On-Premise Data Gateway, we can directly connect to the database from here. When we select Insert Row (V2), in the Server Name drop down, we will see an option “Use connection settings (SERVERNAME)”. This tells the flow that this will use the On-Prem data connector to connect to our On-Premise SQL Server Database.
Once selected, in the Database Name field, we have a similar value: “Use connection settings (DATABASENAME)”. This will allow connection to the On Premise Database on the previously specified Server. Finally in the Table name property, we select the Table from Our On-Premise SQL Server. This will show the available tables that are available in the database that we selected. In our case we will select Contacts.
Once selected, the flow action will expand and show all the fields in the database table. At that point you can just add the dynamics data types from the trigger as shown below. We will actually have to replicate this step into two steps, one for newly created records and one for updated records.
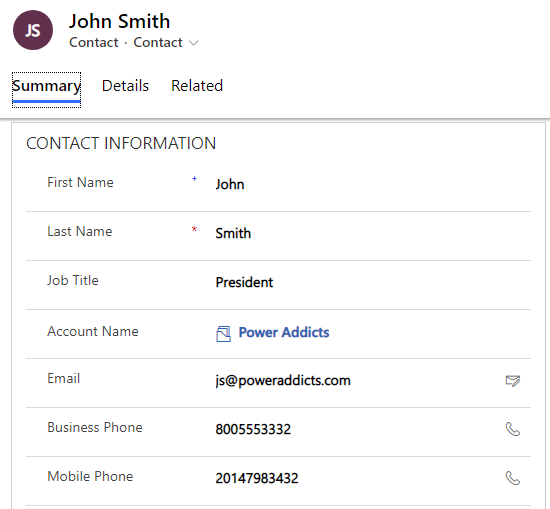
The last step to complete is to test the flow. We will create a new contact record in our Model-Driven app, and see the flow results below.
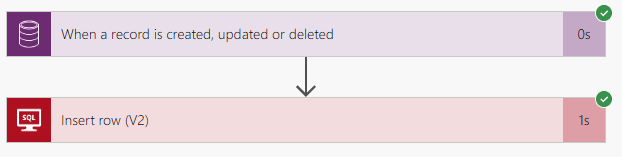
The flow execution results are displayed below, showing a successful execution. You will also notice that this process is much faster than running this using Azure Service Bus with Plugin and Listener.
If we look at the body from the outputs, we see the following results:
The output that we received from the test of the Common Data Service Trigger is displayed below:
{
“mobilephone”: “20147983432”,
“gendercode”: 1,
“_gendercode_label”: “Male”,
“emailaddress1”: “js@poweraddicts.com”,
“lastname”: “Smith”,
“telephone1”: “8005553332”,
“_ownerid_value”: “4adab678-4d21-4b12-9f1e-412f75118983”,
“_ownerid_type”: “systemusers”,
“description”: “Recently elected as president of Power Addicts”,
“firstname”: “John”,
“fullname”: “John Smith”,
“statuscode”: 1,
“_statuscode_label”: “Active”,
“jobtitle”: “President”,
“familystatuscode”: 2,
“_familystatuscode_label”: “Married”,
“_parentcustomerid_value”: “e106c667-6c2f-ea11-a810-000d3a5a1477”,
“_parentcustomerid_type”: “accounts”,
“spousesname”: “Jaqueline”,
“contactid”: “aa3062e0-2030-ea11-a810-000d3a5a1477”,
“statecode”: 0,
“_statecode_label”: “Active”
}
Then, we can look at the test results output from the SQL Server database:
{
“@odata.context”: “https://sql-ncus.azconn-ncus.p.azurewebsites.net/v2/$metadata#datasets(‘default%2Cdefault’)/tables(‘%255Bdbo%255D.%255BContacts%255D’)/items/$entity”,
“ContactId”: “AA3062E0-2030-EA11-A810-000D3A5A1477”,
“FirstName”: “John”,
“LastName”: “Smith”,
“FullName”: “John Smith”,
“JobTitle”: “President”,
“Description”: “Recently elected as president of Power Addicts”,
“GenderCode”: 1,
“FamilyStatusCode”: 2,
“SpousesName”: “Jaqueline”,
“EMailAddress1”: “js@poweraddicts.com”,
“CreatedBy”: “4ADAB678-4D21-4B12-9F1E-412F75118983”,
“ModifiedBy”: “4ADAB678-4D21-4B12-9F1E-412F75118983”,
“MobilePhone”: “20147983432”,
“Telephone1”: “8005553332”,
“StateCode”: 0,
“StatusCode”: 1,
“OwnerId”: “4ADAB678-4D21-4B12-9F1E-412F75118983”,
“ParentAccountId”: “E106C667-6C2F-EA11-A810-000D3A5A1477”,
“OwnerIdType”: 8
}
Finally we can see that the data is inserted into SQL Server by Querying the SQL database. The amount of work implementing this compared to Azure Service Bus with a Plugin and Listener applications seems like a no brainer almost. The only issue is that sometimes Azure On-Premise Data Gateway, Logic Apps or other technologies which make this implementation possible are not always available or provided by the organizational IT department.