

As part of the 2023 Wave 1 Release Plan, Microsoft simplified the process of connecting to external data and creating virtual tables from within the Maker portal. This process makes creating these connections very easy, and results can be seen in a manner of minutes. Configuration is now at the fingertips of citizen developers as well.
This new functionality is currently to allow makers to connect to existing data source such as SQL or SharePoint. Additional data sources should be come available at a later stage, but for the time being only connection to SQL Server and Microsoft SharePoint are available from the Maker Portal.
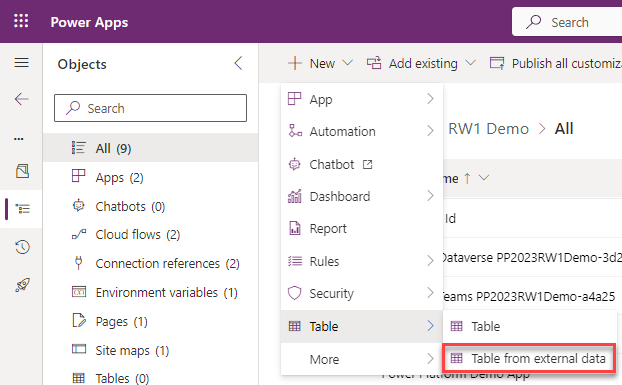
To start creating a new connection, navigate to your solution in Maker Portal, and click on the new button to add a new table. You will see that there are two available options: Table and Table from external data. We will need to select the Table from external data option to start the New table from external data wizard. The image below shows the selection.
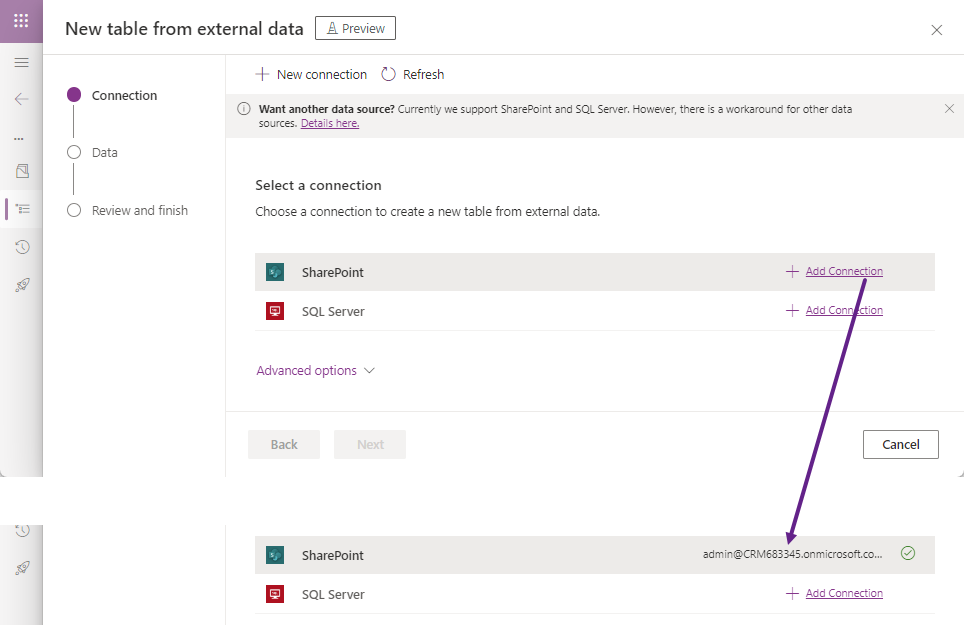
The first thing that we need to do is select the Connection. As previously mentioned, in this Preview feature only the SharePoint and SQL Server connections are available. Once you know which connection you want to use, click on the + Add Connection link to connect to the external source. You will be able to connect using your AD credentials or using a Gateway. Once you have established the connection, you will see the credentials showing up in the Select a connection section which a green arrow next to it if the connection was successful.
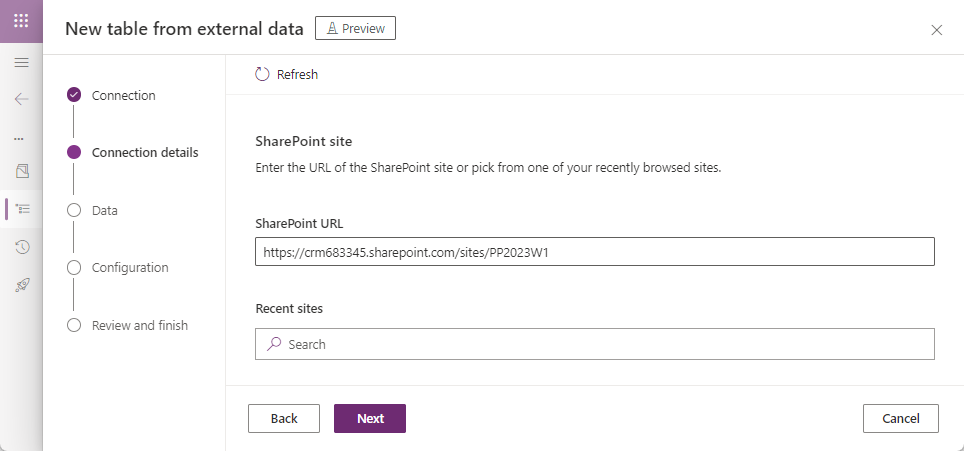
The next button will be enabled now, and we can go ahead and click on it to navigate to the Connection Details screen. For SharePoint connection, in the Connection Details screen, we will need to enter the Url of the SharePoint site that we are trying to connect to. If we have used this Wizard previously, we should be able to see and search for Recent sites as well in case we have multiple sites we can choose the source from. Clicking on the Next button, we allow us to select the Data source for our connection, which is basically the list we are going to use.
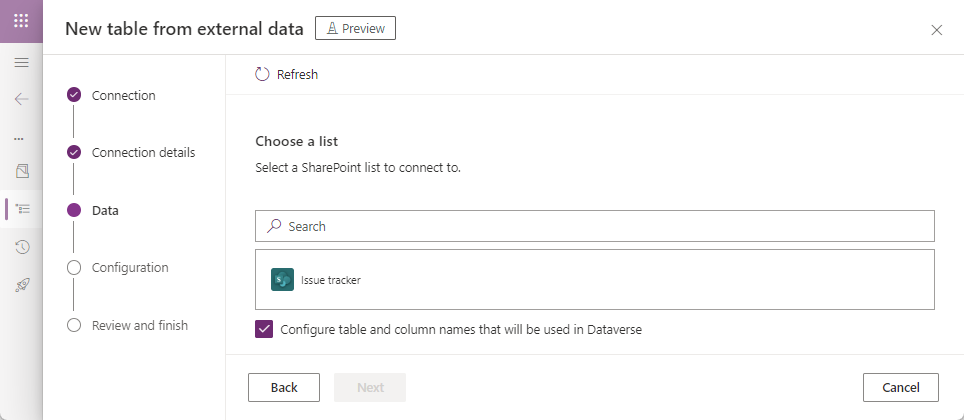
After we click Next in the Connection details, we will see in the Data section a list of all the SharePoint lists that we can use for the creation of Virtual Tables. In the image below we only have a single list called Issue Tracker. This list will be used to create the virtual table in Dataverse and make the connection between the SharePoint list and the Dataverse table. Select the list and click next to configure the table.
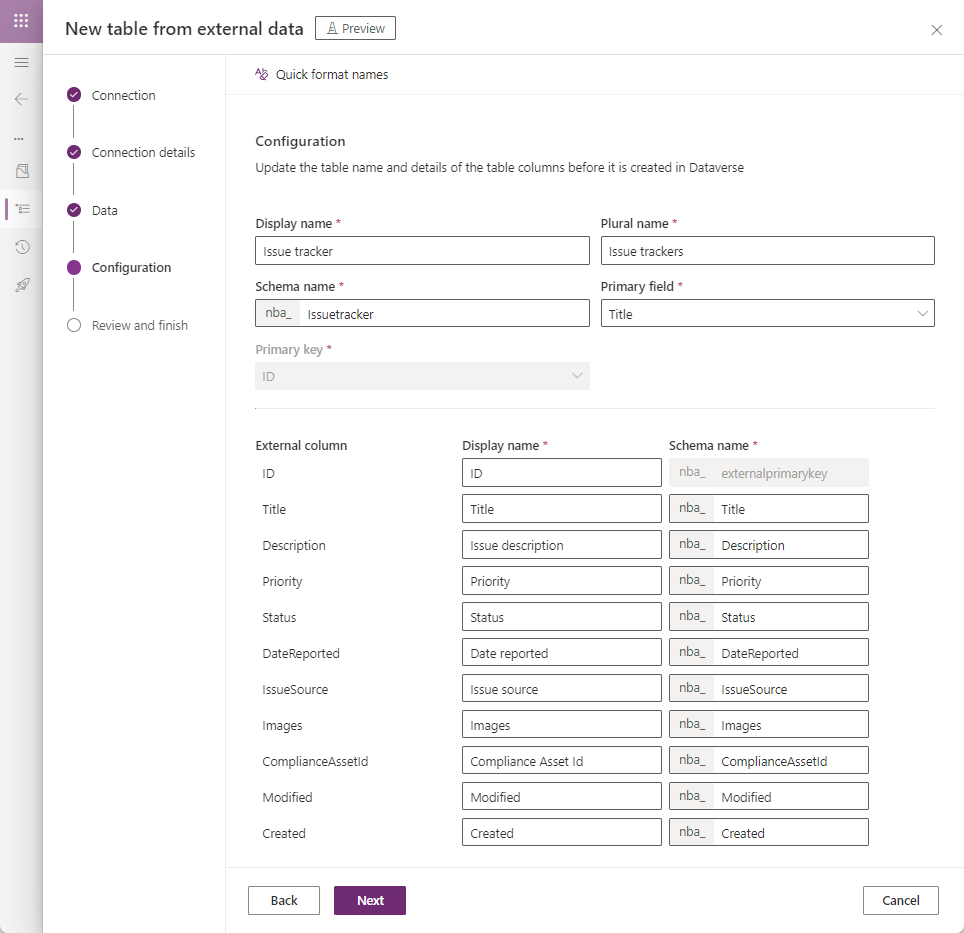
We should now see details about the list (table) that we are going to be connecting to. We see the Display Name, Plural Name, Schema Name and Primary field the same as we would when we create a regular table. You will notice that the Primary key is greyed out, and that the schema name for that is externalprimarykey. All the columns from the SharePoint list will be displayed in the table with the columns under the Configuration section.
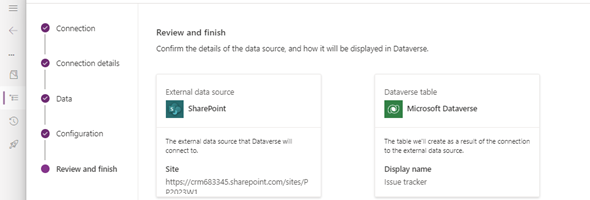
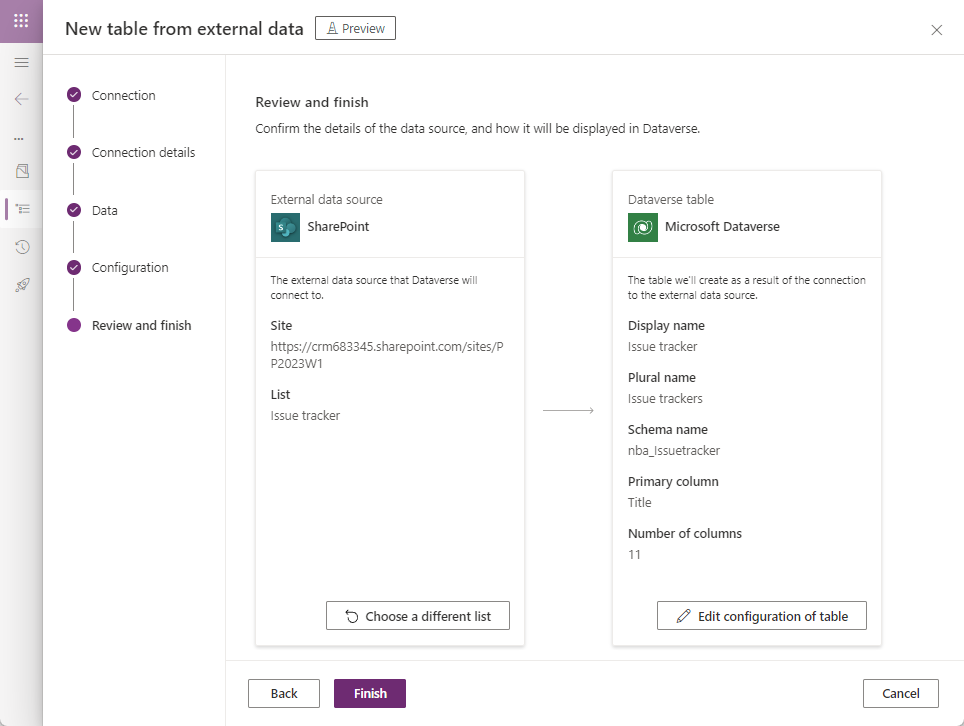
Clicking on the Next button will navigate to the final screen called Review and finish. This will show you the details of the External source and the Dataverse table so that you can make any changes if needed before the creation of the Virtual table. By clicking on the Finish button, the process will start of the creation of the virtual table.
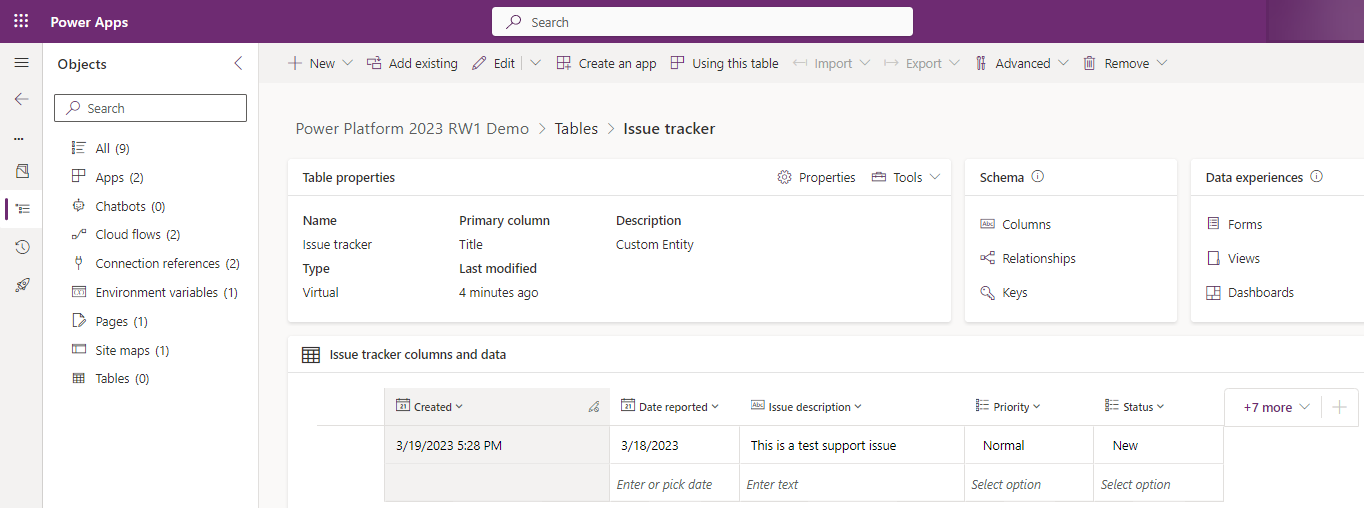
If the process takes too long, you might see an error message. You can most likely ignore the error and just wait a couple of extra minutes to make sure the process is complete. Refreshing the solution should now show you the table that you created in Dataverse.
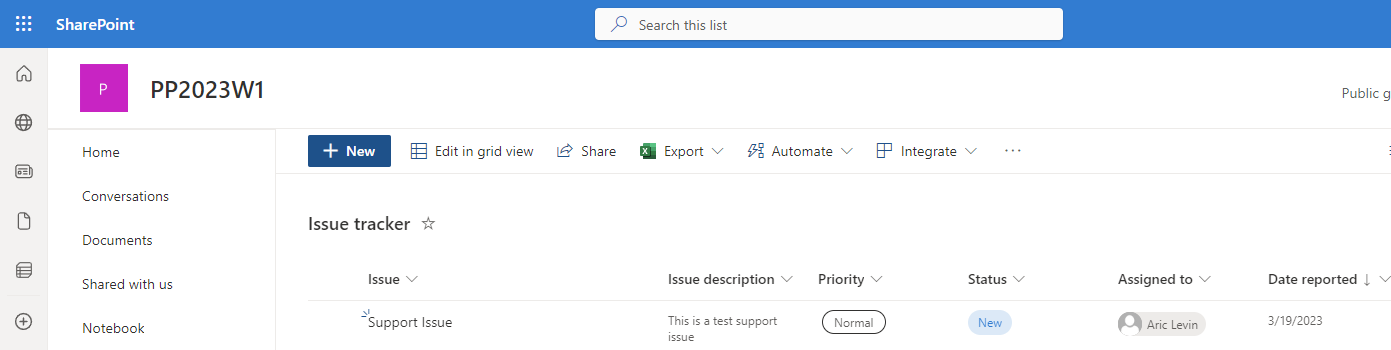
To test this functionality, you can go ahead and create a record in SharePoint. You should be able to see that the record is visible in Dataverse as well. The two images below show you the same record that is created in SharePoint and Dataverse.
I will be creating a similar post for this process using a SQL Server database instead of a SharePoint connection.