

Last week, March 1, Microsoft announced the General Availability of Pipelines within the Power Platform, which will bring deployment automation capabilities into managed environments to better support makers, admins and developers. In this post, I will go over how to enable the managed environments within your tenant and configure Power Platform Pipelines for your deployment.
To start, you will need to navigate to the Power Platform Admin Center (aka.ms/ppac), and click on the Environments left hand navigation item. This will list all of the environments within your tenant. Note that you have to be a Global Admin, Power Platform Service Admin or Dynamics 365 Admin to enable the Managed Environments.
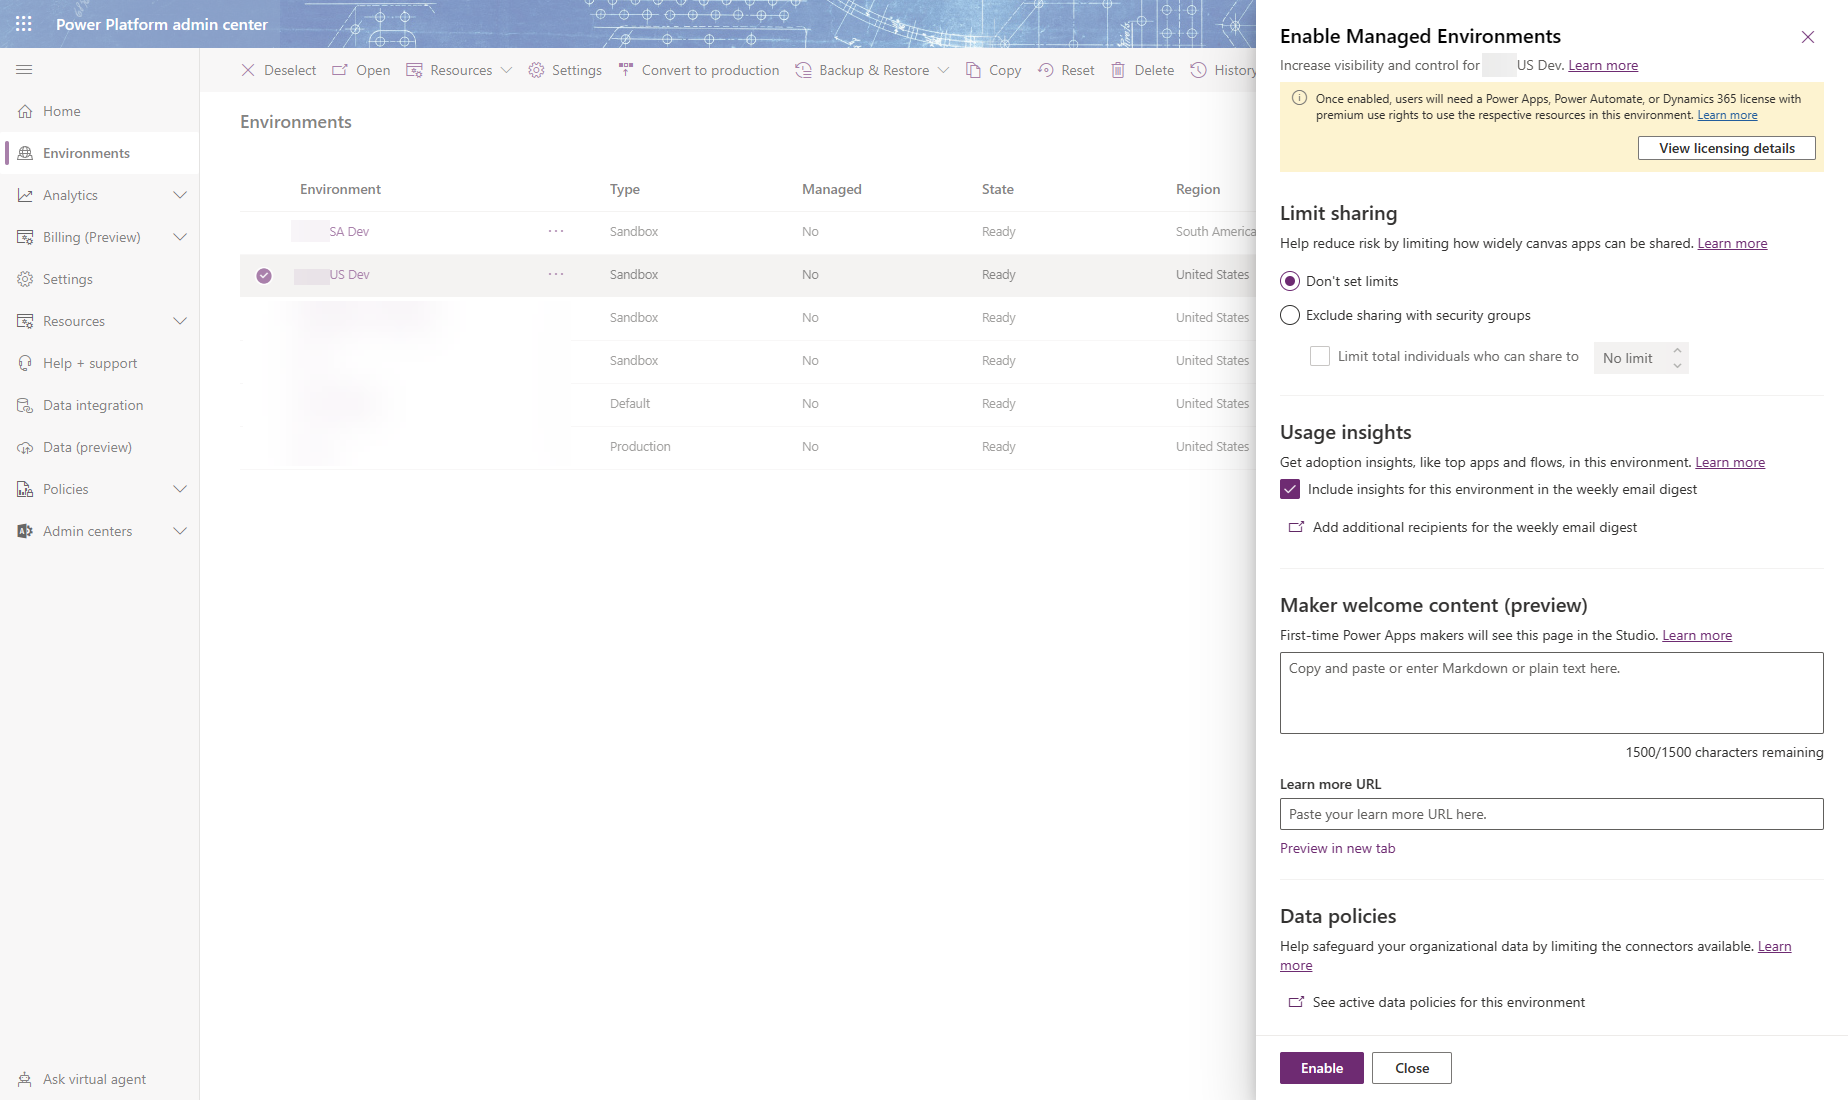
Select the environment that you want to make managed, and click on the Enable Managed Environments button as shown in the image below. You can repeat this for all of the environments that you want to convert to managed environments.

Once you click on the Enable Managed Environments, the right navigation pane will open with options for enabling the environment. Note that once you enable the environment as a managed environment, there are some licensing requirements that take effect. Users accessing managed environments will need a Power Apps, Power Automate of Dynamics 365 license with premium use rights. The image below shows the panel that opens up when you click on the Enable Managed Environments.
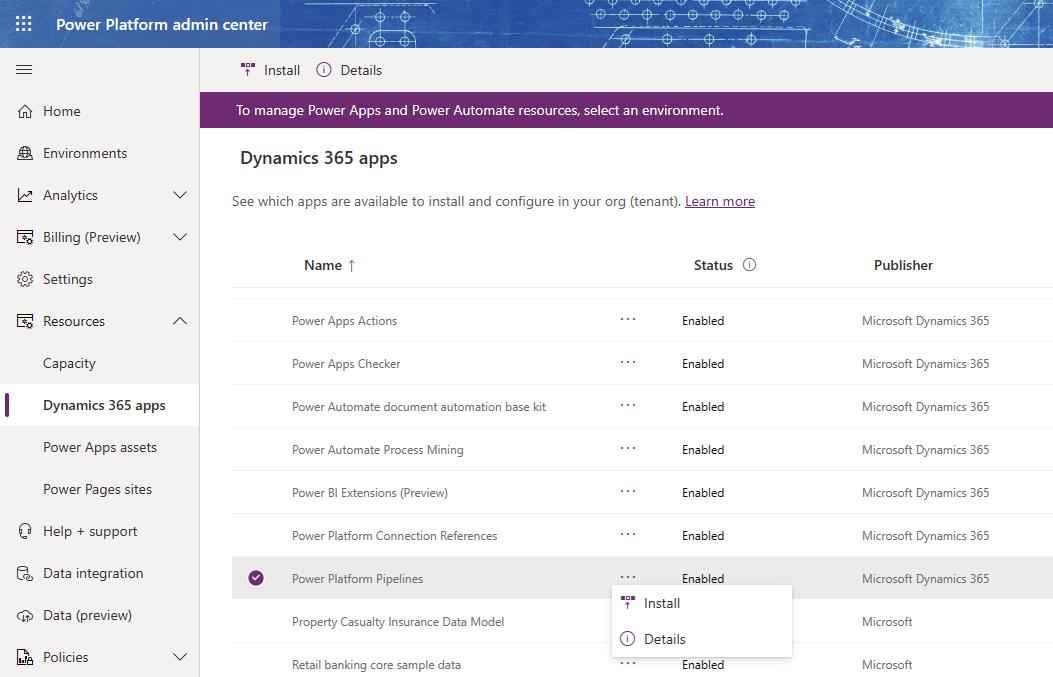
In addition to your managed environments containing the solution files, you will also need to create or configure a Host environment. This Host environment will host your pipelines. In order to create your host environment, you need to install the Power Platform Pipelines app from within the Power Platform Admin Center resources area, under Dynamics 365 apps. The image below shows the app that needs to be installed. Once you install this in your Host environment, you can start configuring your pipelines.
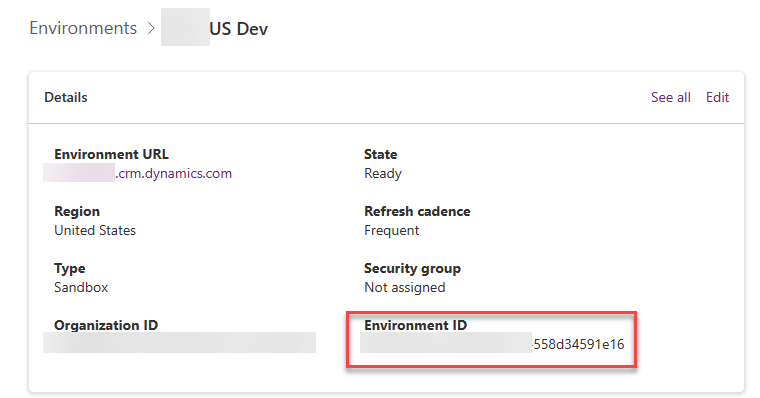
Before you start creating the pipelines, copy the environment ids of all environments participating in the pipline. If you have a dev, qa and production, you will need to copy down these three urls. Use Notepad or Notepad++ to keep this handy.
Next, navigate to the Maker portal (make.powerapps.com) for your host environment, select apps and launch the Deployment Pipeline Configuration app. When the app runs, click on the Environments Navigation pane to show the Environments list view, and click on the New command bar to create a new environment. This will launch the new Deployment environment form. Enter the Name, Environment Type (Development or Target), the Environment Id and Save the record. Wait a few seconds and refresh the form. You should see that the Validation status should be success at this point in time.
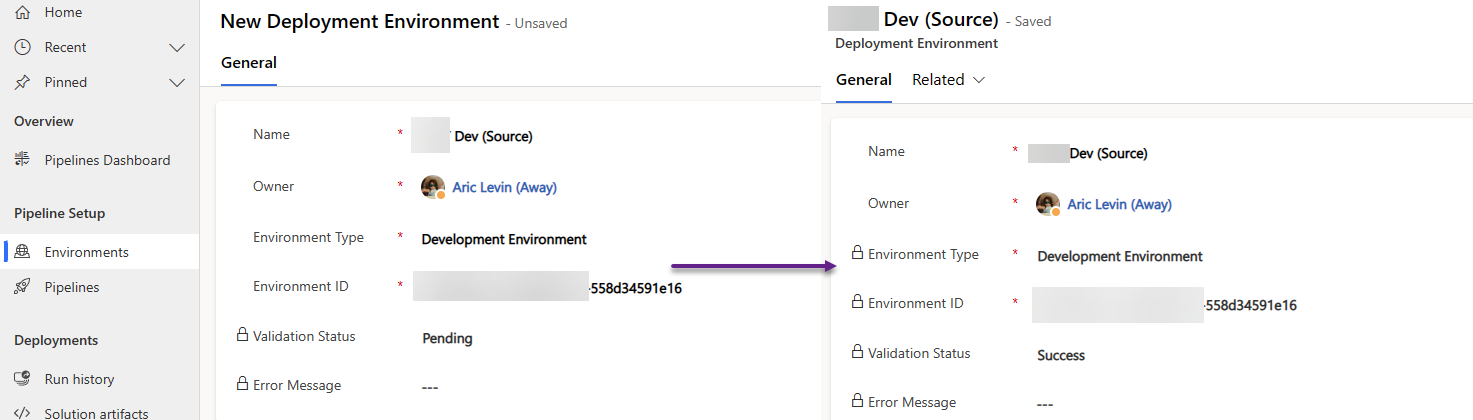
Repeat the same for your target environments. It is important to know that all of your environments must be in the same Geographical location, or your validation will fail with an error message of The environment needs to be present in the same geo as the project host location.
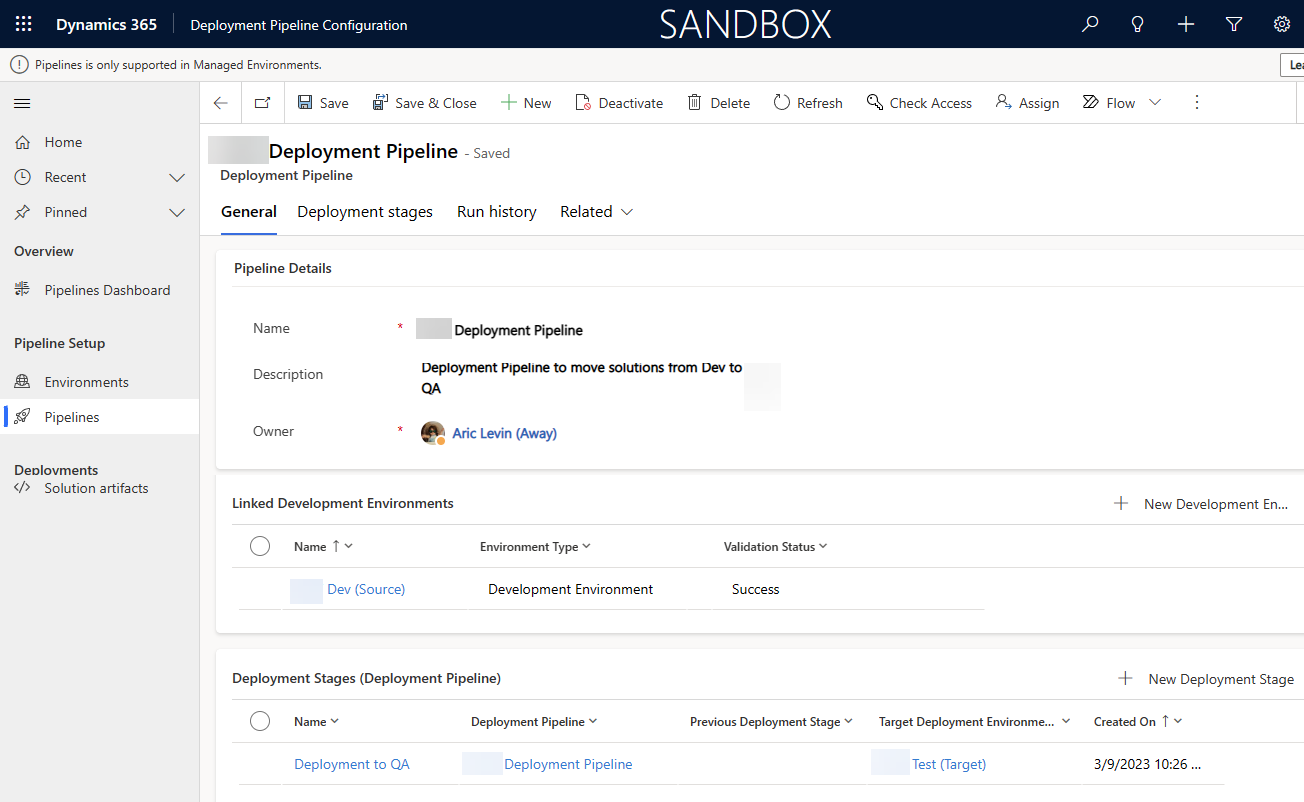
The next step is to add the Deployment Pipeline. Here we have to specify the link between the Source environment and the Target environment or environments, so that the application knows which environments the solution has to be deployed to. For the first managed environment (QA/Test for example), the Previous Deployment Stage will contain no data as shown below.
The last step that has to be performed within the Host environment is to assign security to the Makers of the solution. This includes 3 steps:
. The pipeline records that was created above also needs to be shared with the makers or an AD group. The Read permissions is all that is required to view and run the pipeline from a development environment.
- Give the makers the Deployment Pipeline User security role, which is installed with the Power Platform Pipelines application
- The pipeline records that was created above also needs to be shared with the makers or an AD group. The Read permissions is all that is required to view and run the pipeline from a development environment.
- Make sure that the Makers have the access to export solutions from the Source environment and Import solutions to the target environments
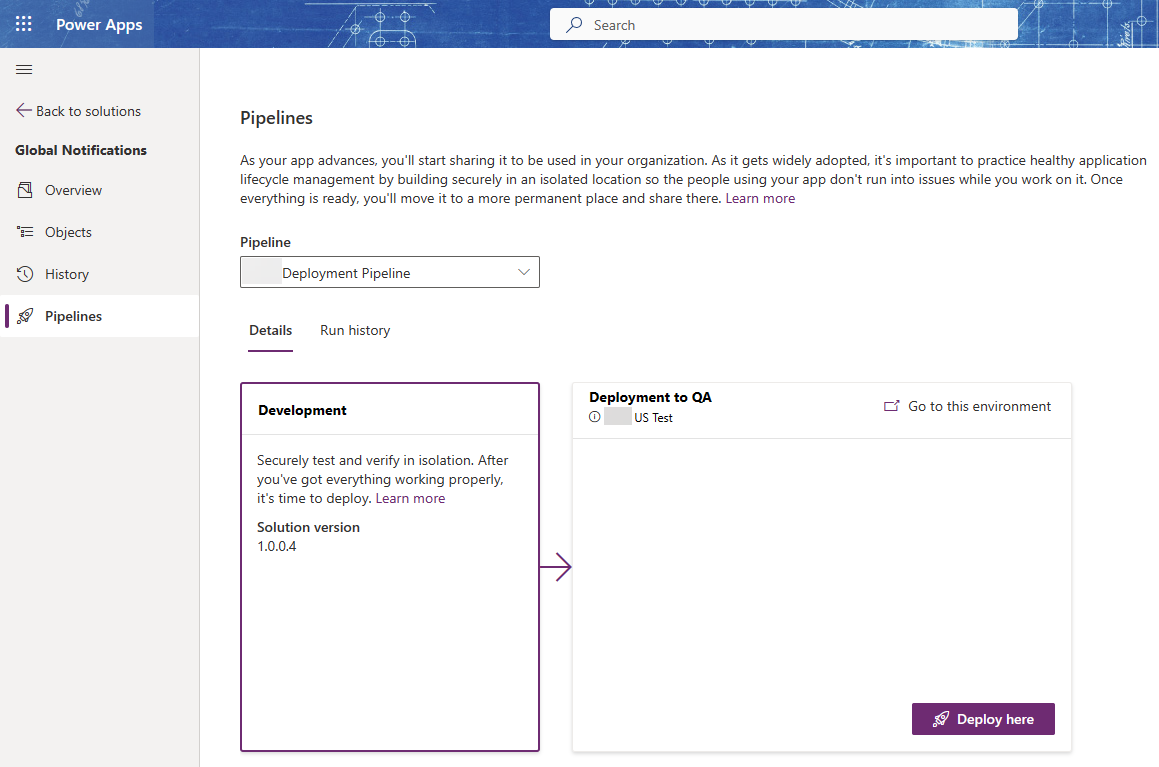
Once all the configuration has been completed, you can go into your Source environment’ solution and click on the Pipelines link on the navigation area to see and deploy the pipelines. You will see here the steps of your deployment from one environment to another. The screenshot below shows the Pipelines view within your solution in the Maker portal. This screen will only appear once you have completed all the pre-configuration steps above.
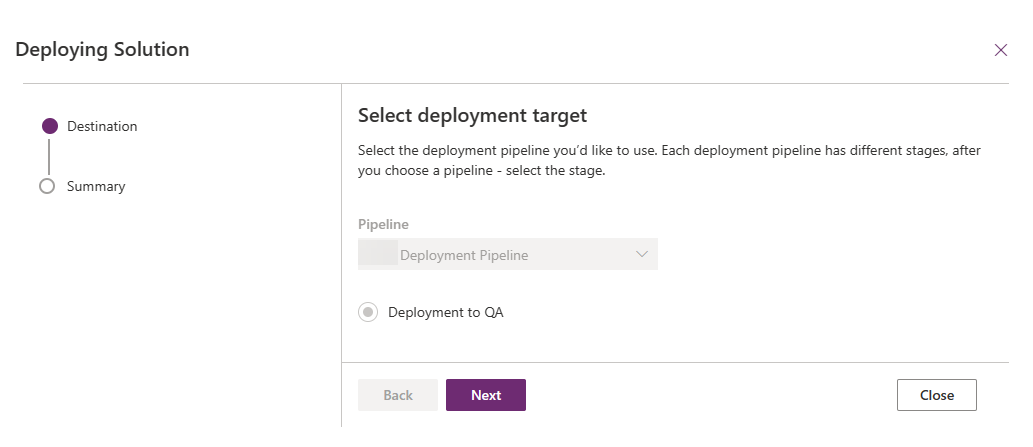
Once you click the Deploy here button, the Deployment wizard pane will show up. The first page of the pane will show the destination, the pipelines that will be used and the environment that this will be deployed to.
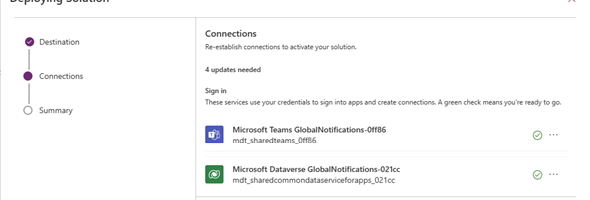
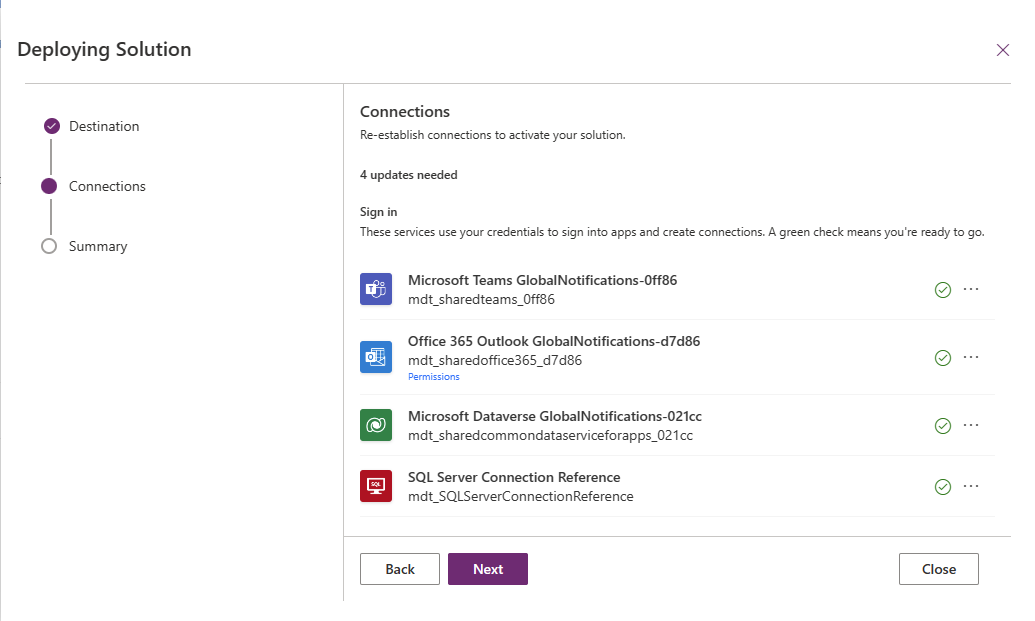
If you any connections, when you click on the next button, it will expand the wizard and show the connections that are being used in your solution. For most connections you will just need to sign in, but for some connections you might have to enter additional credentials such as SQL Server (if using SQL authentication). The image below shows the Connections page within the wizard.
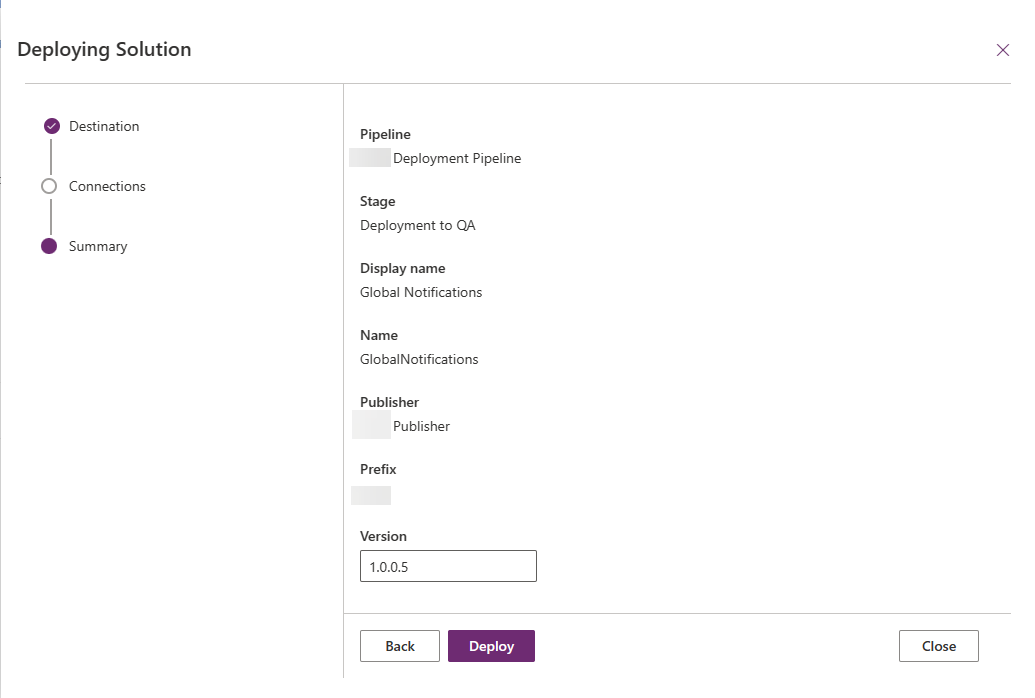
When you click on the Next button here, it will navigate to the Summary pane. The summary will show you the pipeline name, the target stage, the solution name, publisher details and the version number to deploy. Clicking on the deploy button will start the deployment process.
Once the deploy button is clicked, you will be navigated back to the main pipelines screen that will show the deployment is in progress.
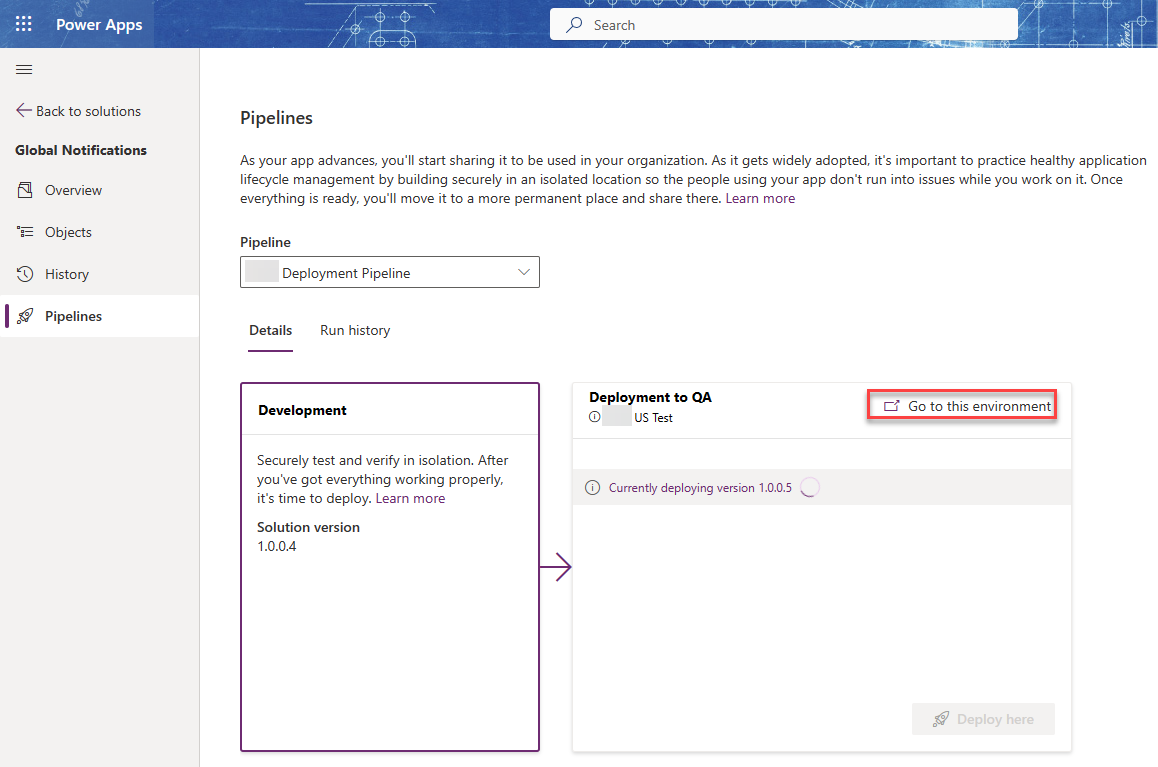
When the deployment is complete you will see a message with the last successful installed version in the target environment and the date and time of that deployment. You can then click on the Go to this environment link to navigate to the target environment and see the solution there.
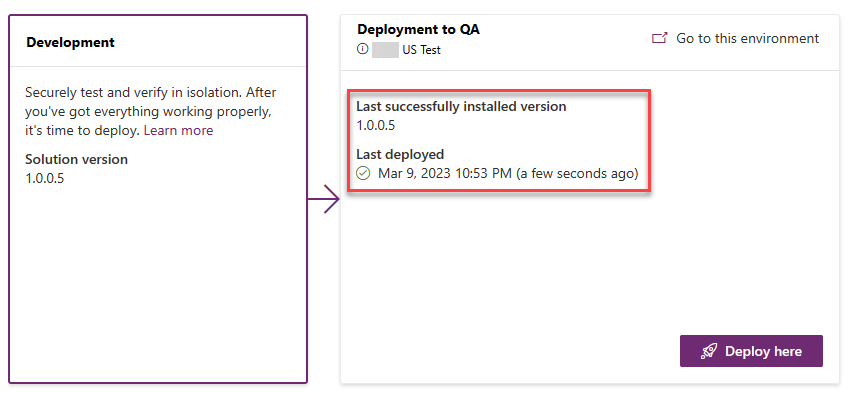
When you navigate to your target environment, you will see that the solution is deployed there as a managed solution and you can test it out. If your pipelines also has a production environment or additional environments you can continue your deployment there after testing.
Below, you can find the link to the Pipelines announcement within Microsoft Power Apps blog
Pipelines in Power Platform is Generally Available (GA) | Microsoft Power Apps