

In the second part of the installation of configuration of Azure Logic Apps with the On-Premise Data Gateway, we will review the requirements that are need inside of the Azure Portal. This will cover the creation of the Data Gateway resource, the Logic app and the creation of the Trigger and Action inside of the Logic App designer.
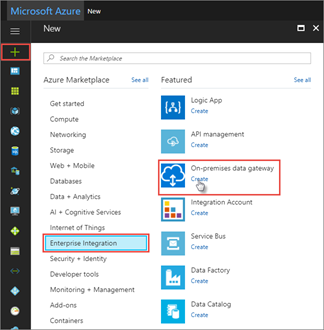
The first thing that has to be done is the Creation of the Azure Gateway resource. In Microsoft Azure, click on the + button in the left navigation area, and under Enterprise Integration select On-premises data gateway (as shown in the image below). This will allow the creation of the gateway that will be used for the connection and logic app.
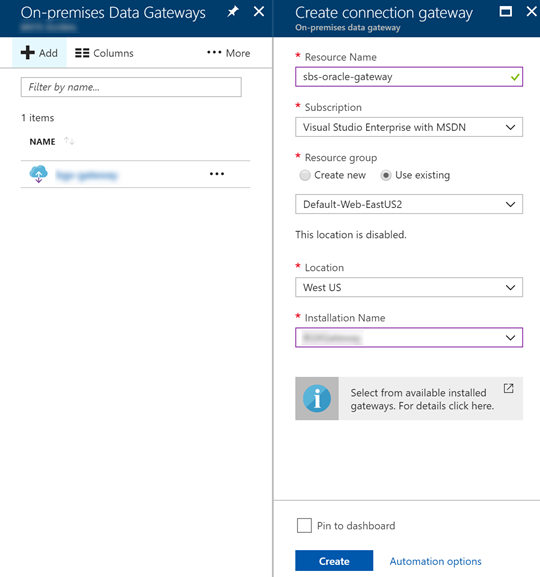
To create the new Gateway, we will need to provide the following information:
· Name: Enter a name for your gateway resource.
· Subscription: Select the Azure subscription to associate with your gateway resource. The default subscription is based on the Azure account that you used to sign in.
· Resource group: Create a resource group or select an existing resource group.
· Location: Select the region you registered your gateway in.
· Installation Name: If your gateway installation isn’t already selected, select the gateway registered.
The screenshot below shows the Create Connection Gateway screen for the new On-Premise data gateway:
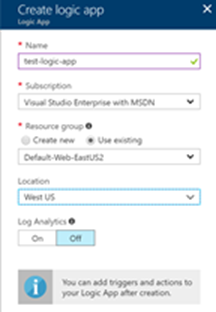
Next, we have to create the new Logic App. To create a Logic app, navigate against to New Resource and select Enterprise Integration. From there select Logic App in order to create a new logic app. You will need to provide the name of the Logic App, Subscription, Resource Group and Location:
Once you click on the Create button of the Logic App, the Logic App will be created, and we will then need to launch the designer. When the Logic App launches select the Start with Empty Designer option to create a new designer. Since we are using SQL Server as the source for this process, we will need to choose a SQL Server Triger. From the list of available connectors, select SQL Server. If you don’t see it in the list, in the search options enter SQL Server in order to show all the triggers and actions for SQL Server. The screenshot below shows the trigger and actions results that we will see:
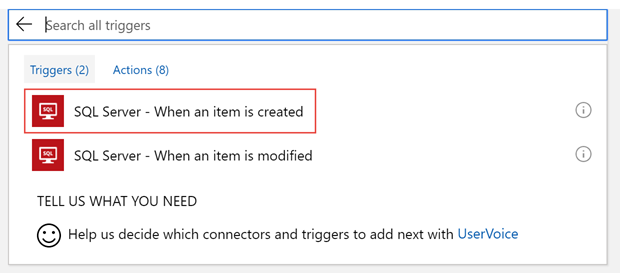
Select the SQL Server – When an item is created Trigger. We will need to update the trigger to specify the conditions that we are looking for. This will include the name of the SQL Server table and the interval in which we will want to query the table for additions. This means that if we want the Logic App to check SQL Server for any additions every 2 minutes, we will enter 2 in the interval box, and set the frequency to minutes. The frequency can be adjusted to seconds, minutes, days, months, etc… If you want to select a different connection than the connection that is selected, you can click on the Change Connection link to select a different location (as shown below):

After the Trigger has been established, we need to add a new step in the Logic App Designer. This step can be a condition (if we need to branch out and allow several options), or we can select an action directly. In our case we will select an Action for Dynamics 365. The logic will basically be as follows: When a new record is created in my On-Premises SQL Server database, create a Contact record in Dynamics 365 (Online).
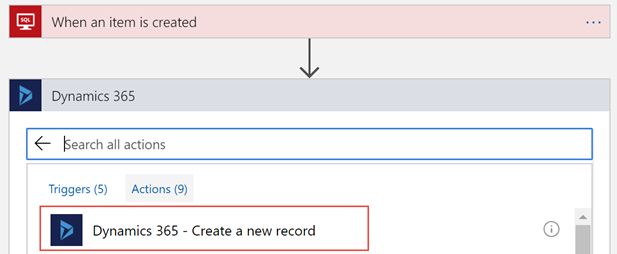
In the search window for adding the new step/action type Dynamics 365 to select Dynamics 365 as the connection for an Action. Under the Actions tab/link select Dynamics 365 – Create a new record.
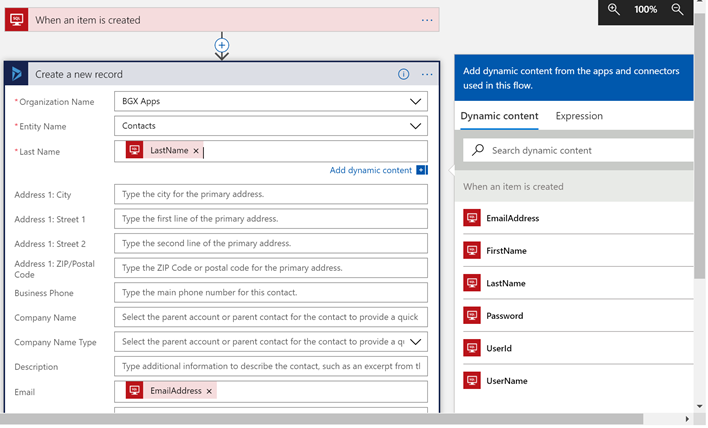
This will open the Create new record window. If we have mulitple instances (organizations) in our Dynamics tenant, we need to select which instance we want to perform the action against, and select the name of the entity (Entity Name). If we want to enter regular text in any of the fields shown in the designer, we can simply type the text in those fields.
If we need to enter data from the SQL Server table (source/trigger), we can use the Dynamic Content link to add the content from the created SQL database record, by click on the cell, and selecting the appropriate fields from the Dynamic Content Pane. We can also enter expressions from the Dynamic Content Pane.
After all the required fields have been added to the designer, save the changes and run the Logic App.
Nothing will happen in Dynamics 365 under a record is created in the SQL Server database, which will synchronize the data during the time interval specified.
In order to test the process, create a record in the SQL Server database that you created. Wait for a couple minutes (based on the interval specified), and navigate to the CRM instance that you specified. You should see the newly created record there.