
We recently had a requirement to add an approval process to an entity in CRM. This was a custom entity (Comment), where most of the fields were prepopulated from the web, but had a response field that had to go through multiple layers of approval/review. The review process was once the comment was received it would be assigned to a responder, which would then go through manager, legal and director approvals.
We first created a field in CRM called Review Stage that would hold the value of the review stage.
Added Submit for Approval, Approve and Lock/Unlock buttons using Ribbon Workbench. Thank you Scott DuBrow.
![]()
The next step is that we needed to provide custom privileges for the users. Some users would have multiple roles and particular rights that had to be validated before a particular action would need to be performed. Although this could have been done via Security Roles, the restrictions had to be per user, so we added certain security rights to the User Entity. We also considered doing this in custom entity, but since there were not that many specials privileges, we ended up adding the fields to the user entity.
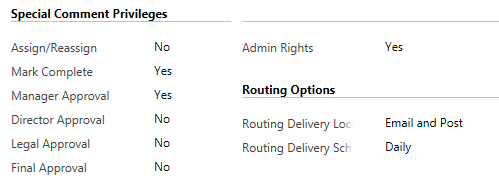
The different roles of the users required particular rights, such as which users could assign or reassign a record to another user, which users could submit for approval (mark complete), and who can approve. The main reasoning behind this, is that users could perform multiple actions (such as being a responder and a manager, or being a manager and a director).
There were three main Actions (or custom messages) that would be called from the Comment record.
These would be Assign, Submit for Approval and Approve. Each of these functions would call the Action Process via JavaScript and would then execute the Plugin Message code.
The following is an example of the Approve Comment Action that is being called via JavaScript.
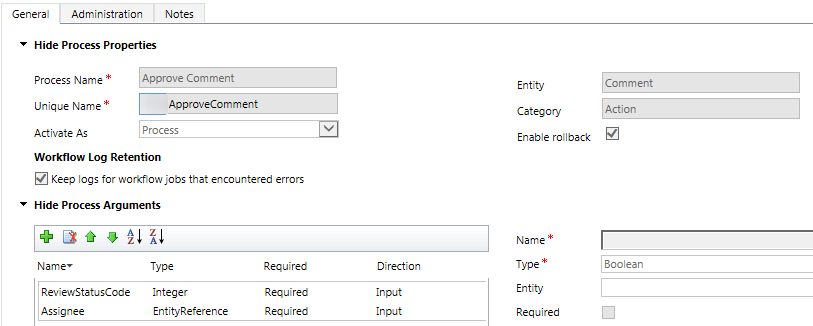
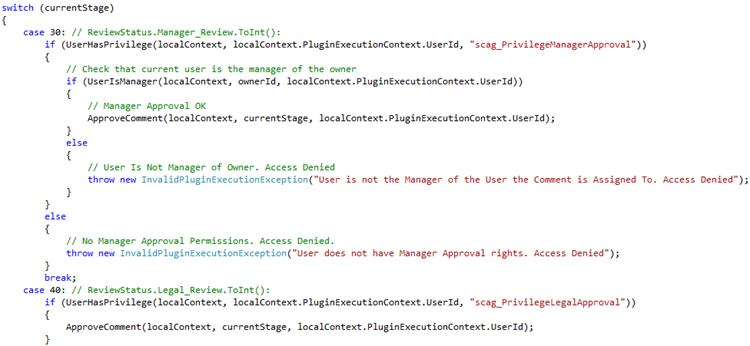
Once the Action is called, it will execute the Plugin code, which would validate whether the user has the proper privileges, and whether the user is the proper user in the chain of approvals.
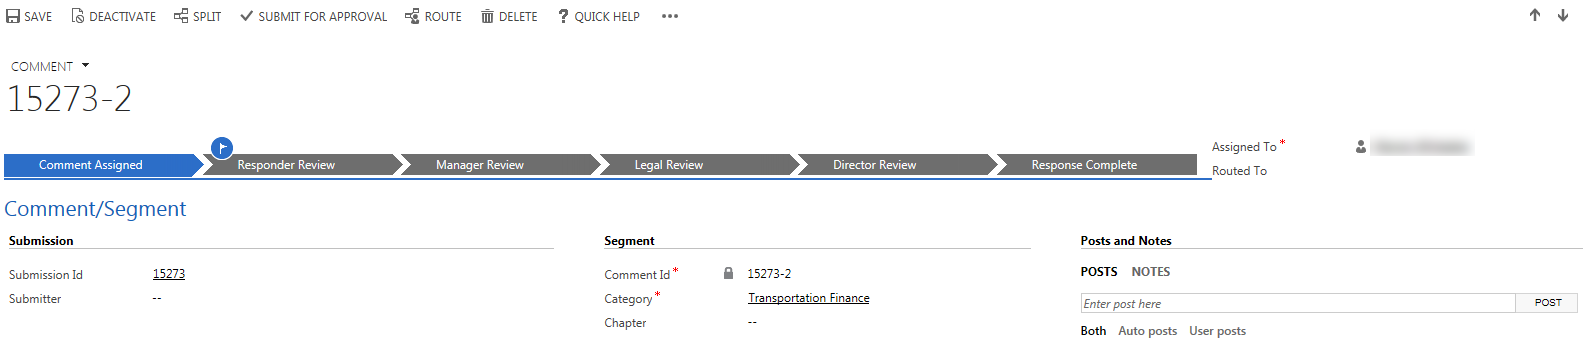
When the plugin code finished executing, the form would refresh, and show the user that the process has advances to the next stage. We did this by creating a custom wizard web resource (looks similar to the Business Process Flow, but without all the bells and whistles). This would also allow us to lock down records once it reached certain stages of the approval process.
![]()
Since Directors are not really used to going through hundreds of records in CRM, we created an Export Process for them, that will allow them to export their comments to Excel. We restricted the user of the out-of-the-box Export to Excel feature, since we needed the Excel workbook to be protected/restricted to only certain columns. We created a process Console application called by a Task scheduler running on a separate application server. This process would check for requests from users for Excel exports and would generate the files and send them to the users via email. The process was implemented using the Infragistics Excel framework (an easier way to generate Excel files then using the Excel object model). The files would be locked for editing with the exception of the columns/rows that we needed.
We then created an SSIS import package using the SSIS Integration Toolkit for Microsoft Dynamics CRM (by Kingswaysoft) that allowed us to validate and upload the changes from the high level approvers that wanted to go over the responses in back into CRM.