

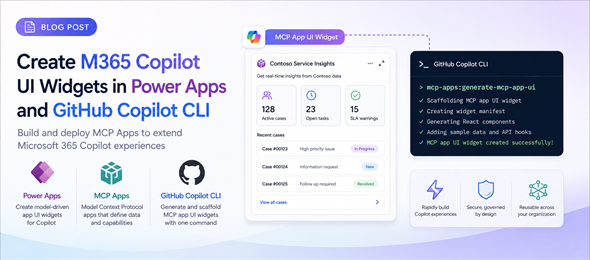
In this post, I will demonstrate a new concept called MCP Apps and show how to build an Interactive Widget in Power Apps and use it in Copilot. This is game changing as Copilot will no longer be limited to only text based responses, but can provide you the response as a UI component.
Dataverse Solution
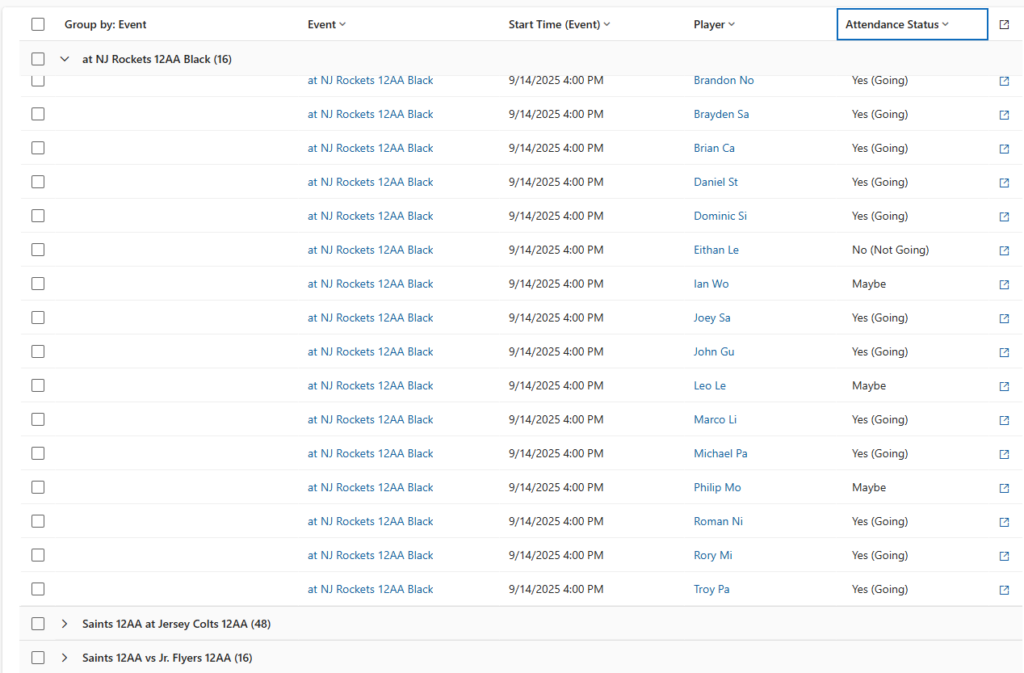
Let’s navigate to our Maker Portal (make.powerapps.com). We can use an existing solution or make a new one. In this particular case, I am using my Hockey App which tracks players on the team and their assignments. We will be using the tables called Contact (for the Player), Event and Event Attendance. The image below shows the Event Attendance table containing the Event, Player and Attendance Status as well as the Start Time stored on the Event table.
Setting up the MCP Server for Power Apps and adding the Custom Tool
In the Model Driven App designer in the Maker Portal, you will now be able to see icon on the left navigation called App MCP. This will open the App MCP (preview) pane, and we can start setting up our App MCP by clicking on the Set up MCP button in the pane as shown below:
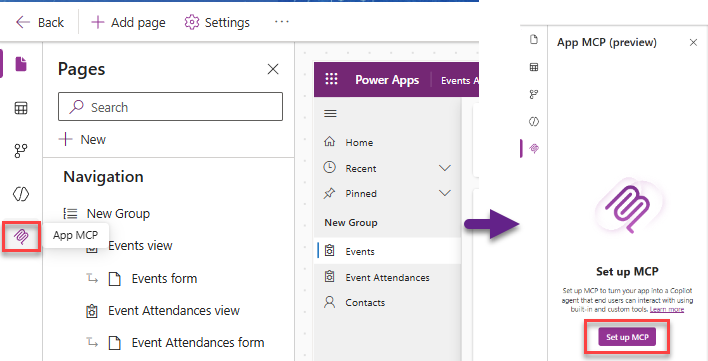
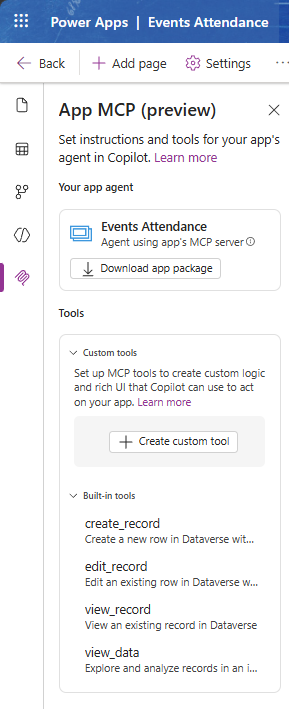
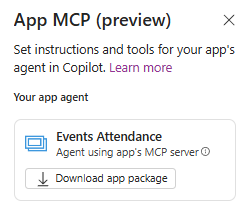
Once we click on the Set up MCP button, Power Apps will start getting to work and will create a new app agent where we can download the package for. It will also show the custom tools and build in tools (containing the options for create record, edit record, view record and view data) as well as the ability to create a new tool right from Power Apps.
We will now go ahead and click on the create custom tool button. This will show the Create a new tool wizard.
We will need to provide this new tool a name, description and instructions and select the appropriate model as follows:
Tool Name: Game Attendance by Player
Tool Description: This tool displays player game attendance in a calendar like visual to help team managers and coaches understand the attendance per schedule
Model: GPT-5 chat
In the instructions we will provide an Input for the Event and then return JSON with an array of all players with the associated event and the attendance status. The text below shows a sample of the instructions.
It is also recommended to change the number of records returned by clicking on the … on the Instructions pane and selecting Settings. In the Settings, change the record retrieval value to the number of records retrieved for this knowledge source. At this time the max is set to 1000.
Get all event attendance records for a given Game Type.

Return a JSON object with an array of players and these properties:
Contact.First Name
Contact.Position

Inside the Contact property also include an array of game assignments along with the schedule dates and other
Event.Name
Event.Game Location
Event.Venue (Venue).City
Event.Start Time
Event.Event Type
Event.Game Type

Event Attendance.Attendance Status

Additional rules:
- output dates in the format mm/dd/yyyy and do not include time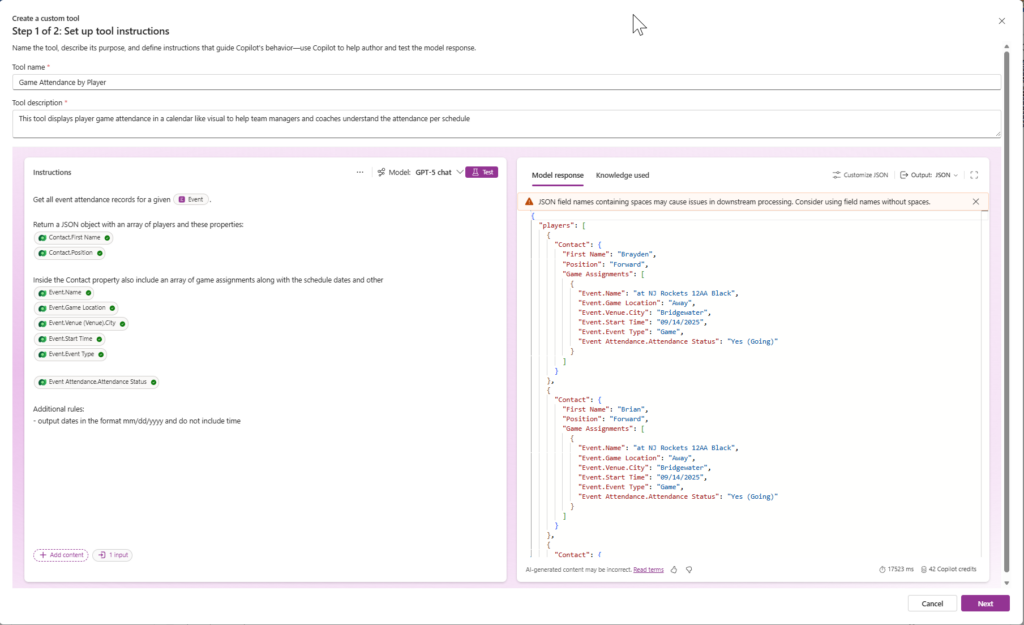
Copy the JSON output into Notepad or another editor as you will need it in upcoming steps. You can always come back here and click on the Test button again to regenerate the JSON results.
Clicking Next will navigate to the next page where we need to paste our UI code. In order to do that we will first need to go and create that UI code using our Coding agent, such as Github Copilot CLI in our case.
Install the Power Apps Skill in Github Copilot CLI
Open VS Code and in the Terminal window type copilot. If Github Copilot CLI is not installed, you will be asked if you want to install it.
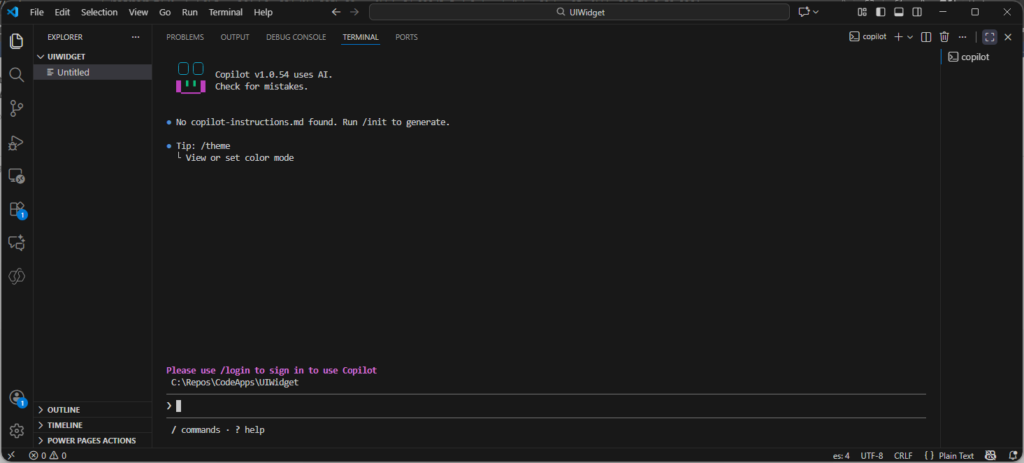
Next we will be wanting to add a skill, that was created by the team that created this feature in Power Apps. In order to add a skill we will have to enter the required command in our Copilot CLI. In order to get that command, we will navigate to the Generate MCP App widgets with AI code generation tools page on Microsoft Learn, and run the following two commands.
The first command automatically detects available tools and installs all the Power Platform plugins including the generate-mcp-app-ui. If you only need to install the MCP App widget skill, run only the second command.
/plugin marketplace add microsoft/power-platform-skills

/plugin install mcp-apps@power-platform-skills
Once installed, you will notice that the plugin “mcp-apps” installed successfully message in your Terminal window.

In the copilot terminal window, type /mcp-apps and that will show you the available skills that are available as part of the plugin, and we will type the /mcp-apps:generate-mcp-app-ui command. The command will show you the appropriate skill, and will request the JSON that was generated from your Power Apps. Once the JSON is provided the plugin will specify that it has the data shape and it needs the visual direction to generate the HTML widget. You can select from the preselected options or type your own:
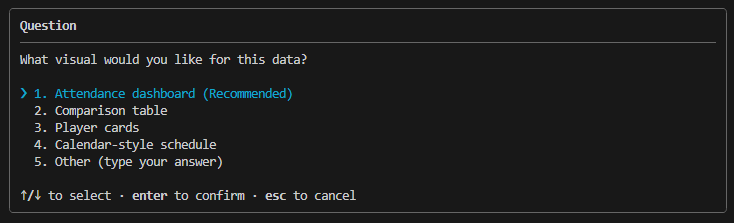
In our case, we will create our own visual description as described below:
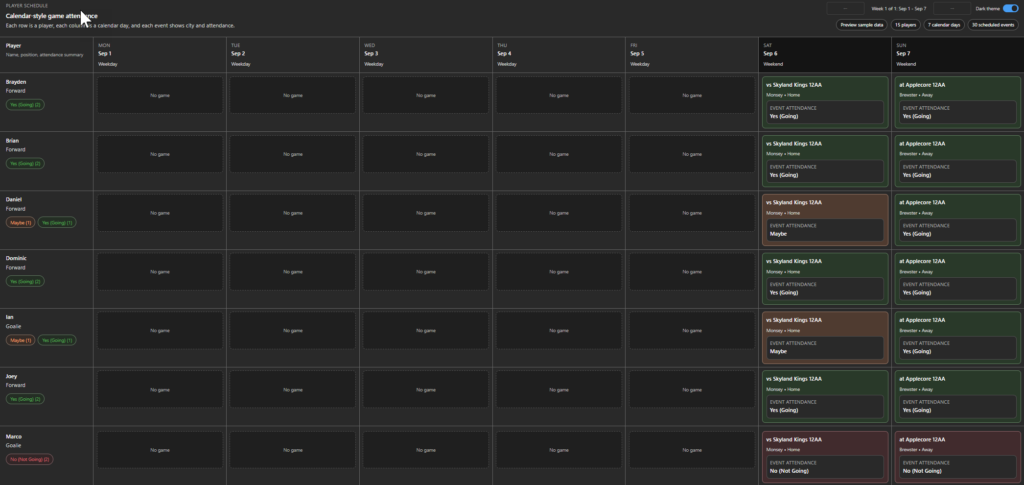
Visualize the game schedule by using a calendar style display where each row is a player and each column is a day in the calendar. Each event on the calendar will be shown for a player. Include the Player name, their position and attendance status on each row. For the event, include the Event Name and City. On the calendar display both weekdays and weekends.
Copilot will then start to build the calendar widget that I asked it to build. Once complete, you will be able to preview the results using the start command with the path of the html page that was created in a PowerShell terminal window or just opening the html page. You can also use an extension like live server to view the file as well. The image below displays a sample of the result. I added on a second iteration dark mode and arrows for navigation.
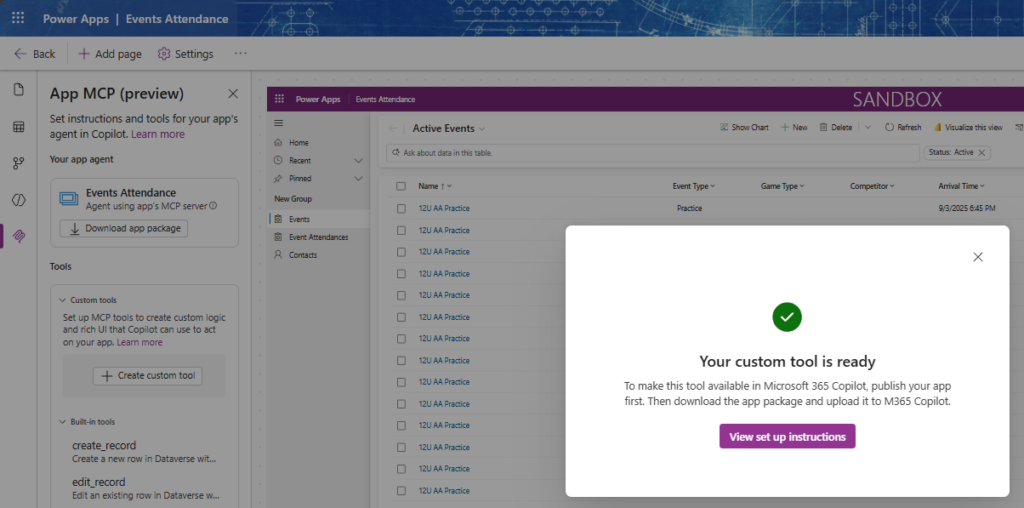
We can now go back to our App MCP in Power Apps and in Step 2 of 2, we will paste the code that was generated using to copilot plugin. After you paste your code, click on save, and you will see a message that says that your tools is available for use. Make sure you publish you app after the tool is ready.
Downloading and Deploying the Agent
We can now go ahead and download our app package, by clicking on the button as shown below.
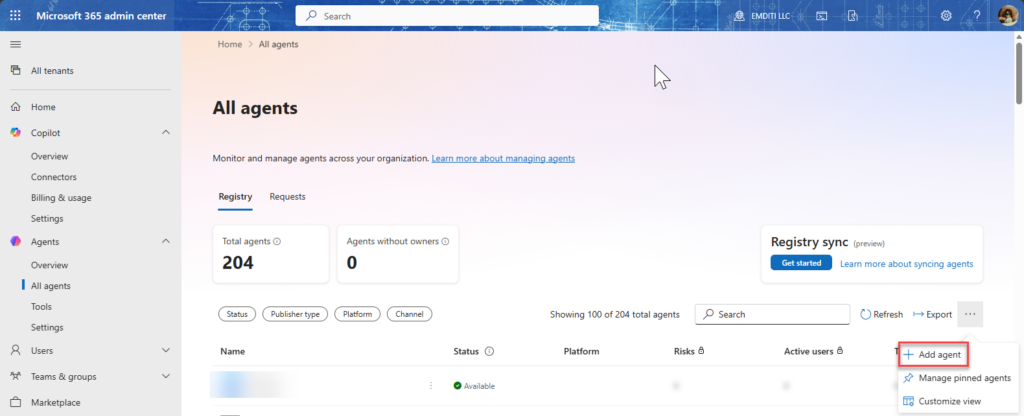
The package that we downloaded will contain the declarative agent which we will install to use within M365 Copilot. There are various ways to deploy the agent based on your organization wide permissions, either via admin.microsoft.com it can be installed via Microsoft Teams. Let’s go ahead and install the agent in the M365 admin center.
Under the agents tab, click on All agents, and on the more options (…) on the right hand side select the Add agent option from the menu.
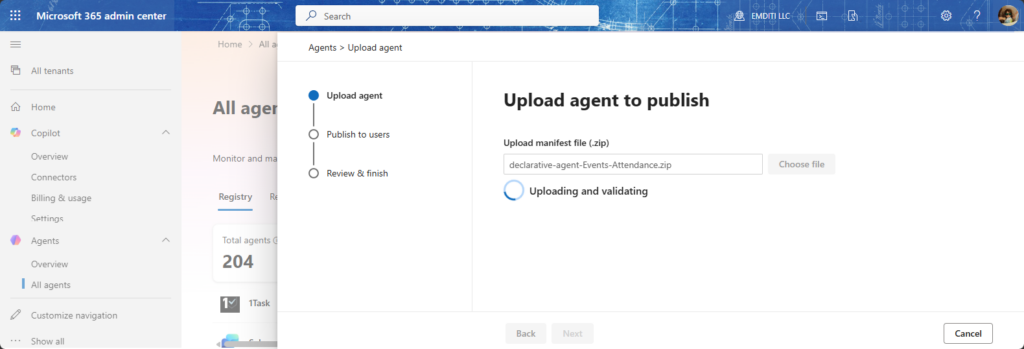
In the new pane that opens up to Upload agent to publish, select the package file that you downloaded in the previous steps. This will start the uploading and validation of the package file.
Select whether you want to publish or install the agent for all users or a selected list of users, and if required in the next steps you can apply a template and accept additional permissions.
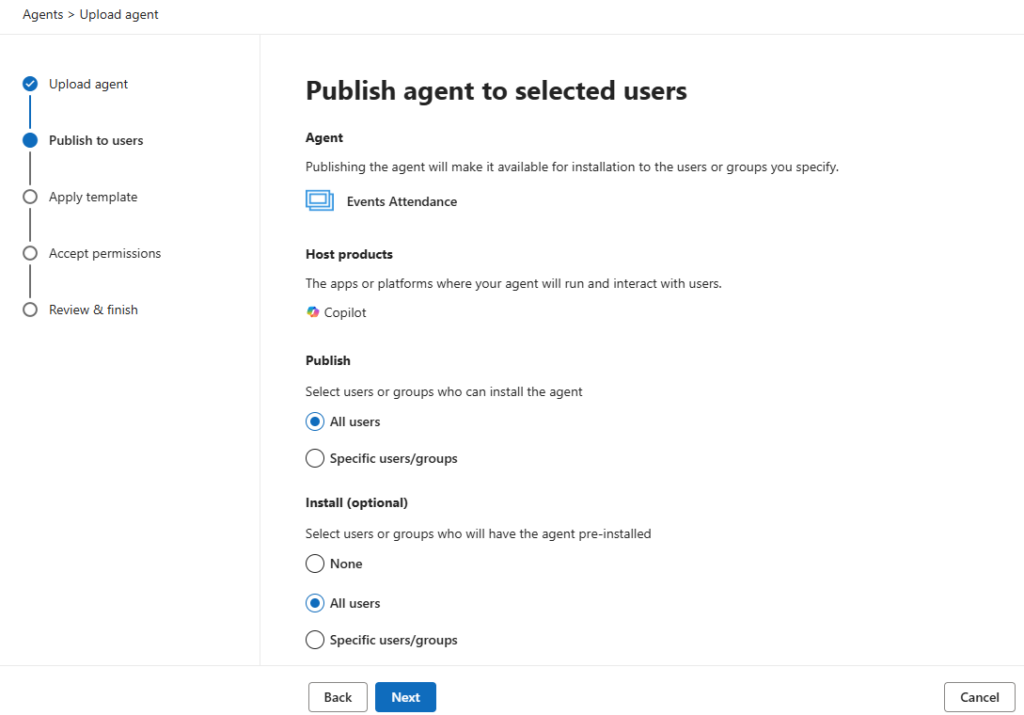
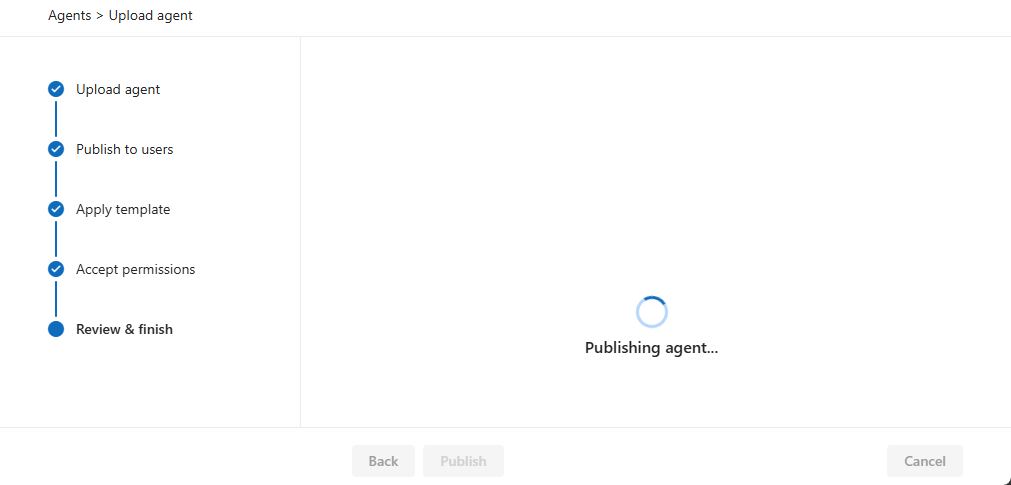
Once completed, click on the Publish button to publish the agent and install if required to the selected group of users.
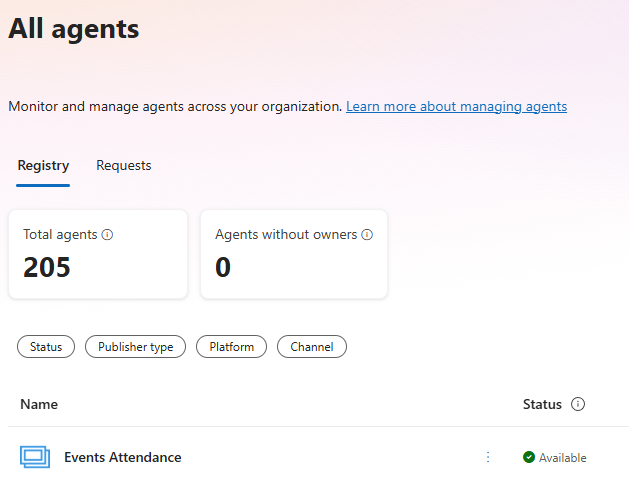
When the agent is installed it will appear in your list of agents and will be available for your users to use within M365 Copilot.
Good luck on creating your own MCP Apps and UI Widgets. A special thanks to Matthew Devaney for a great video on creating this step by step.
The shift from text-only responses to interactive UI widgets inside Copilot feels like a major step forward, especially for scenarios where users need to take action instead of just read information. I also liked how you tied the example back to Dataverse tables and the App MCP setup in the Maker Portal, because it makes the concept feel much more practical than theoretical. Curious to see how far this pattern can go for building richer business workflows directly inside Copilot conversations.