

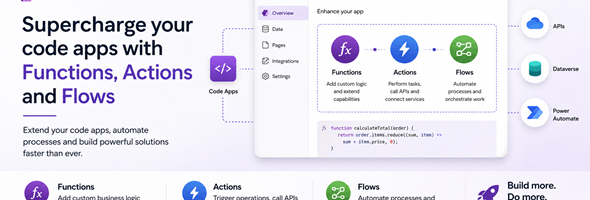
In a recent article I wrote about creating a code app and using a Dataverse table to populate data into the code app. In this post, I will go over adding actions, functions and cloud flows and calling them from your code app.
The content in this Post is in Preview
Before using the different operations of npx power-apps we need to create our code app and perform a few pre-requisites:
- Initialize our code app with the npx power-apps init command
- Add @microsoft/power-aspps version 1.1.1 or later to your package.json
- Have an authenticated CLI session
- Have access to the Dataverse environment that we want to access
Adding Dataverse Actions or Functions to Code Apps
The first step is to discover the available operations that we want to use. In order to do that we use the find-dataverse-api command with the search parameter. This command will return the Dataverse operations that match the criteria that we entered. The following examples shows the request and response for a simple WhoAmI or AddToQueue search.
Request:
npx power-apps find-dataverse-api --search "WhoAmI"

Response:
====================================================================================================
Dataverse Operations
====================================================================================================
  WhoAmI  (Function)
  Returns: mscrm.WhoAmIResponse
----------------------------------------------------------------------------------------------------
Total: 1 operation(s)
====================================================================================================
Request:
npx power-apps find-dataverse-api --search "AddToQueue"
Response:
====================================================================================================
Dataverse Operations
====================================================================================================
AddToQueue (Action)
Bound to: mscrm.queue
Parameters:
- Target: mscrm.crmbaseentity
- SourceQueue?: mscrm.queue
- QueueItemProperties?: mscrm.queueitem
Returns: mscrm.AddToQueueResponse
----------------------------------------------------------------------------------------------------
Total: 1 operation(s)
====================================================================================================You will notice a couple of differences from the examples above. The first is the name of the action will return in parenthesis where this is a Function or an Action. Also it will include any parameters in the operation and return values if such exists, as in the example of AddToQueue.
Next we want to add the operation to our code app. We do this by calling the add-dataverse-api command and passing the name of the action or function as the first parameter. The example below shows how to add the WhoAmI function to the code app
Using full parameter name:
npx power-apps add-dataverse-api --api-name WhoAmI

Using short alias:
npx power-apps add-dataverse-api -n WhoAmI
Once the command has been run a new typescript model and service class will be added to the generated folder (in addition to other project changes), and the generated service can be used in our code. The following shows how to use the WhoAmI function and AddToQueue action in our code app
Using WhoAmI function in our code App:
import { WhoAmIService } from './generated/services/WhoAmIService';

const result = await WhoAmIService.WhoAmI();
// result.value contains: { BusinessUnitId: string, UserId: string, OrganizationId: string }
import { AddToQueueService } from './generated/services/AddToQueueService';
const result = await AddToQueueService.AddToQueue(
queueId, // string (GUID of the destination queue)
target, // Record<string, unknown> (the activity to add)
sourceQueue, // Record<string, unknown> | undefined
queueItemProperties // Record<string, unknown> | undefined
);
// result.value contains: { QueueItemId: string }Adding Power Automate flows to code apps
NOTE: Only flows that use the Power Apps trigger are supported. All other flows with other trigger types cannot be added to code apps
Adding flows uses similar logic to the above. We still need to have an initialized code app and the @microsoft/power-apps package installed, but the important thing to remember is that only flows that are solution-aware will be available for use in the code app.
First we need to call the list-flows command to get the list of flows that we can use within our app. You can add a search parameter to filter the results if you do not want to retrieve the full list of flows. The code example below shows how to retrieve the list of flows so that we can get the flow id to add to our code app project.
Request:
npx power-apps list-flows

Request with filtering:
npx power-apps list-flows --search approval

Response:
Name                    Status   Modified On   Flow ID
──────────────────────────────────────────────────────────────────────────────
Approval Workflow       Started  2026-01-15    a0a0a0a0-bbbb-cccc-dddd-e1e1e1e1e1e1
Send Notification          Started  2026-02-01    b1b1b1b1-cccc-dddd-eeee-f2f2f2f2f2f2

Total flows: 2
Once we find the flow that we want to add to our code app and get the flow id, we can add it to our project by running the add-flow command and passing the flow id parameter as shown below:
Request Syntax:
npx power-apps add-flow --flow-id <flow-id>

Request with Flow Id:
npx power-apps add-flow --flow-id a0a0a0a0-bbbb-cccc-dddd-e1e1e1e1e1e1

Response:
Flow added successfully.
The add flow will generate the correct files that can be used in our code app and update the power.config.json file. In order to call the flow from the app, the generated service class exposes a Run static method. We call the Run method passing the required parameters if such are expected.
Flow with Input Parameters:
import { ApprovalWorkflowService } from './services/ApprovalWorkflowService';

const result = await ApprovalWorkflowService.Run({
  requester: 'Alex',
  amount: 1500,
});

if (result.success) {
  console.log('Flow triggered. Response:', result.data);
} else {
  console.error('Flow failed:', result.error);
}
Flow without Input Parameters:
import { SendNotificationService } from './services/SendNotificationService';
const result = await SendNotificationService.Run();
if (result.success) {
console.log('Flow triggered.');
}If your flow changes and you need to update the flow definition, you can run the add-flow command again and this will update the flow.
Once you have completed adding your functions, actions and flows you can deploy your app by running npm run build followed by npx power-apps push
Resources:
How to: Add a Dataverse action or function to your code app – Power Apps | Microsoft Learn
Add Power Automate flows to a code app (preview) – Power Apps | Microsoft Learn