

A couple of months ago, I wrote a post about changes on the creation of Application Users and the ability to manage this via the Power Platform Admin Center. Not much time has passed, and a few additions have been added to the Admin Center, which allows to manage Users, Teams and Security Roles. We are still missing some functionality to reach parity with the classic interface, but we are on our way.
Let’s go over and review these changes.
Let’s start and take a look at Security Roles. When you click on the Security Roles, you will be navigated to a screen containing a list of all the security roles within your organization, with the ability to filter by business unit, same as within the legacy/classic interface.
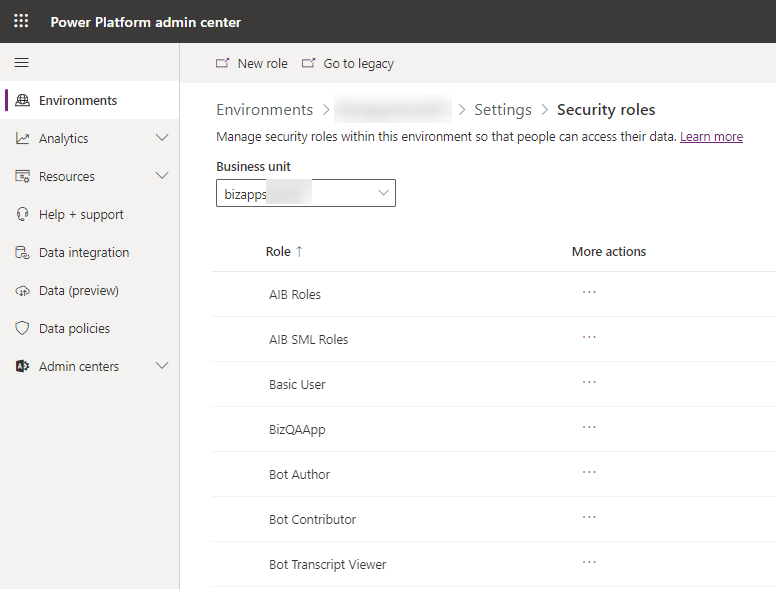
From here we have a few options, on the Command bar, we have the option to start creating a new role (which will take us to the classic interface), or just navigate to the classic interface.

If we select a particular role, we have some other options which are Copy, Edit or Delete. The Copy and Delete options are available from within the admin center, while the Edit will redirect us to the selected role from within the classic interface.

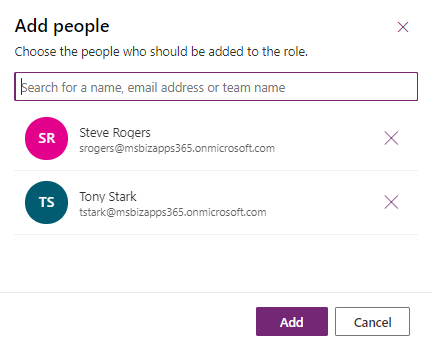
If we click on the actual Security Role name, this will redirect us to another page which will show us the users and teams that are part of this security role. In here you can add additional users to the security role or even teams, as well as remove existing ones. Clicking on the Add people button will open up a search panel where you can enter the name or email of a user and team, and select to add them to the Security Role.
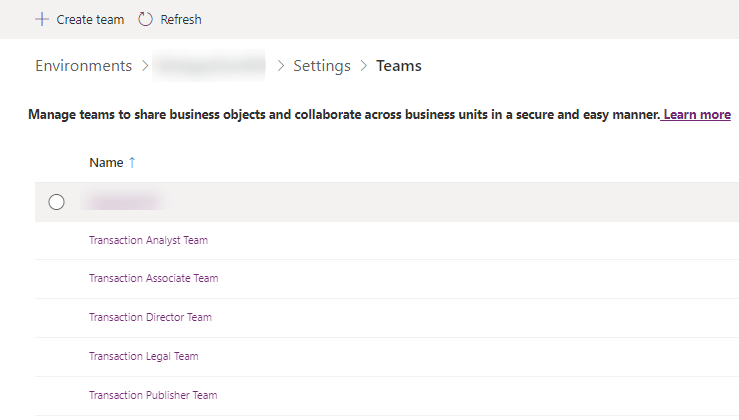
Next, let’s take a look at teams. When you click on the Teams link in the Settings page in Admin center you will be redirected to the Team page. There is quite a bit of functionality that has been added to the teams. The image below shows you the initial view of the teams page.
The first option of course is the ability to add new teams. This is the same as you would have in the classic interface. By clicking on the Create team button, we get a panel where we need to enter the basic team information, which includes the Team Name and Description, Owner, Business Unit and Team Type as shown in the image below. There are 4 Team types that we can select from, which are Owner, Access, AAD Security Group and AAD Office Group.
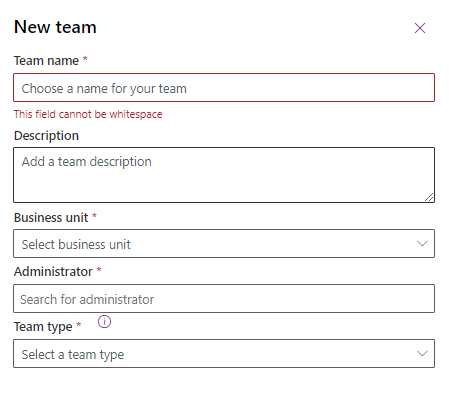
You can see the link below to learn more about the different types of teams.
https://docs.microsoft.com/en-us/power-platform/admin/manage-teams
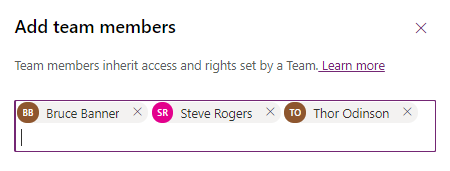
Once you have entered the basic team information, click on the Next button to select the members of the team. You can select multiple team members as shown in the image below:
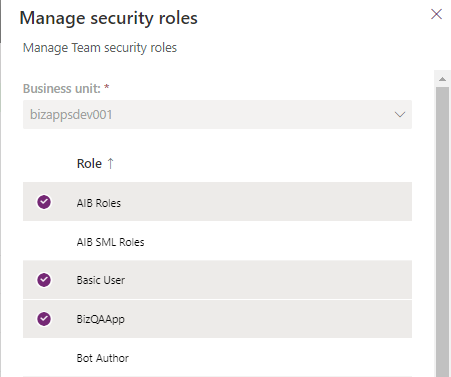
Finally, before the team creation can be completed, select the security roles that will correspond to the team. The image below shows how this is done. You can select multiple security roles for the creation of the team.
In addition to creating a new team, when you select an existing team from the list of teams that we showed in the images above, you have the same options.

From here, you can Edit the team, which will allow you to change the team name, description and administrator. The business unit and the team type cannot be modified once the team has been created. You can choose Manage Team members to either add new team members or remove existing members from the team, and you can select the Manage security role option to Change the security roles that are assigned to this team.
Finally, you also have the option to delete the selected team.
The users section is still missing some of the functionality that we expect, but there are a few available options such as the creation of new user accounts, and setting security roles for users.
Let’s start with the creation of a new user account. To create a new user account, we navigate to the User page, and click on the Add User button. We also have the option to Manage the users in Dynamics 365 which will navigate to the classic interface.
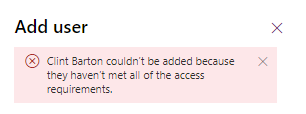
When we click on the Add user button, we get the Add User pane, where we can search for a user by Name or Email. There are some minimal requirements that must be met before a user can be added, which are that the User has to be enabled in Azure Active Directory, have an active license and be a member of the environment’s security group. The image below shows the add new user pane.
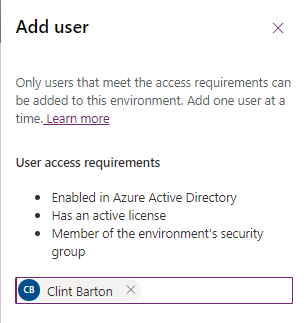
If you do not meet on of those requirements, a message will appear specifying that the user has not met all the requirements to be added.
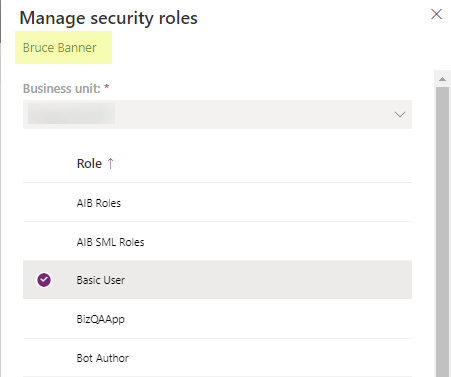
Finally, selecting an individual user and clicking on Manage Security roles will open a pane, where we have the ability to change the security configuration of the user, by adding or removing security roles.
For those interesting in viewing the previous post about Application Users, you can read more about that post in the link below.
Power Platform Admin Center – Application Users
It seems like little by little Microsoft is adding the required features that will allow us to achieve parity, especially with the announcement of deprecation of the classic interface sometime next year, and these features not available in UCI. Stay tuned for future updates.