
In late July, Microsoft announced the preview of Dependent Assemblies, which would allow the ability to register individual assemblies, and upload a nuget package that contains both the plugin assembly and the dependent assembly. Previously, the only way this was available was the use of the ILMerge tool to manually merge dependent assemblies.
With this new functionality, Microsoft is providing two ways to incorporate this:
- Packaging all assemblies into a nuget package and registering them using Power Platform Tools for Visual Studio
- Using the Power Apps Command Line Interface (CLI) and the Plug-in Registration tool (PRT)
In our last post, I showed how to incorporate this functionality using the Plug-in Registration tool. In this new post, I will cover using the Power Platform Tools for Visual Studio. Now let’s get started.
The first thing that is needed is to install the latest version of the Power Platform Tools for Visual Studio. At the time of writing of this article, the Power Platform Tools are only supported in Visual Studio 2019, and do not currently work on Visual Studio 2022. The scheduled date for this to be available in Visual Studio 2022 is around September 2022, but it might be slightly later in the year.
In the Visual Studio IDE, click on the Extensions menu, and select Manage Extensions. In the search bar, type Power Platform and show the results. You will notice the Power Platform Tools extension available. In the screenshot below, you will notice that it is already installed.
Select the Extension, and click on the download button. You will then have to restart Visual Studio to get the extension installed. For information on how to install the Power Platform Tools, you can review it in the following post: /powerapps/post/power-platform-tools-for-visual-studio/
Once the Power Platform Tools are installed, we need to make a few configuration changes which will allow use to deploy nuget packages to our Dataverse environments. To make these changes, navigate to your Visual Studio IDE, select the Tools menu and click on Options. Search for the Power Platform Tools options, and check the option that says Use nuget package for deploying Plugins to Dataverse. The options are shown in the screenshot below.
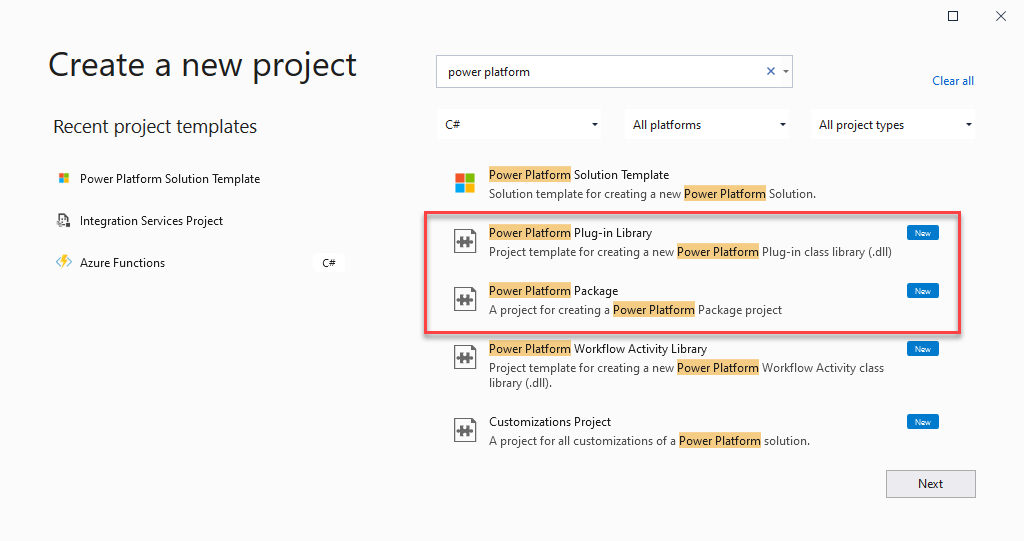
Let’s go ahead and create our Plug-in project using the Power Platform Tools. Launch Visual Studio, or if Visual Studio is already open, click on the File menu and select New -> Project. In the search bar, enter plugin or Power Platform, and select the Power Platform Plug-in Library as shown in the image below, and the click on the Next button.
In the Configure your new project window, enter your Project name, locations and select .NET Framework 4.6.2 as the framework version to use. Then you can click on the Create button. The image below shows you this screen. Once the Create button is clicked the new project will be created and you can start working on your plug-in.

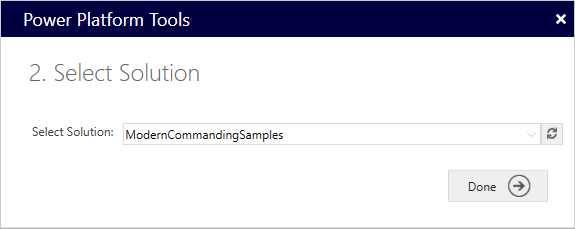
The next step will be to Connect to our Dataverse environment. In the Tools menu, you will see that we have the option to Connect to Dataverse. If you have previously used this tool and already Connect your will get a prompt with your previous connection settings, and you can go ahead and connect with those. If this is your first time connecting, you will need to enter your credentials to Connect to Dataverse. Once you are connected, you will need to specify the solution that you want to connect to, as the plug-in package will be added to that solution. See screenshot below.
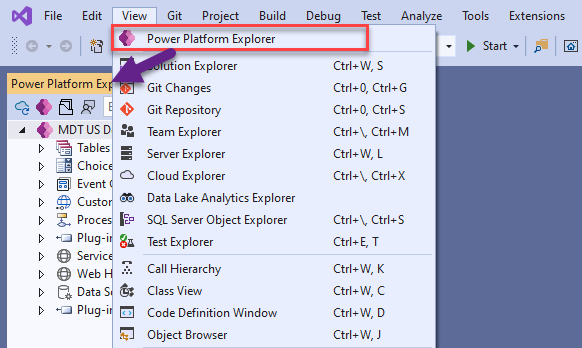
Now, that we are back in the IDE, we can go ahead and start creating the plugin. You will notice that on the left pane in your Visual Studio IDE, you now see the Power Platform Explorer. If you don’t see it, click on the View menu and select Power Platform explorer.
In the Power Platform Explorer, expand tables, and select the Create Plugin option. Not that if you have not added the Power Platform package project to your solution, you will get an error stating that you need to add a Power Platform package project.
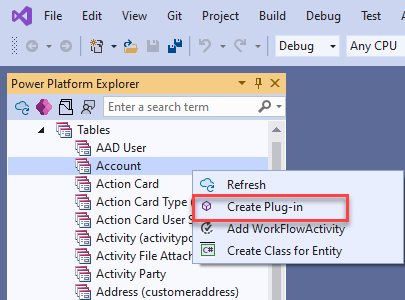
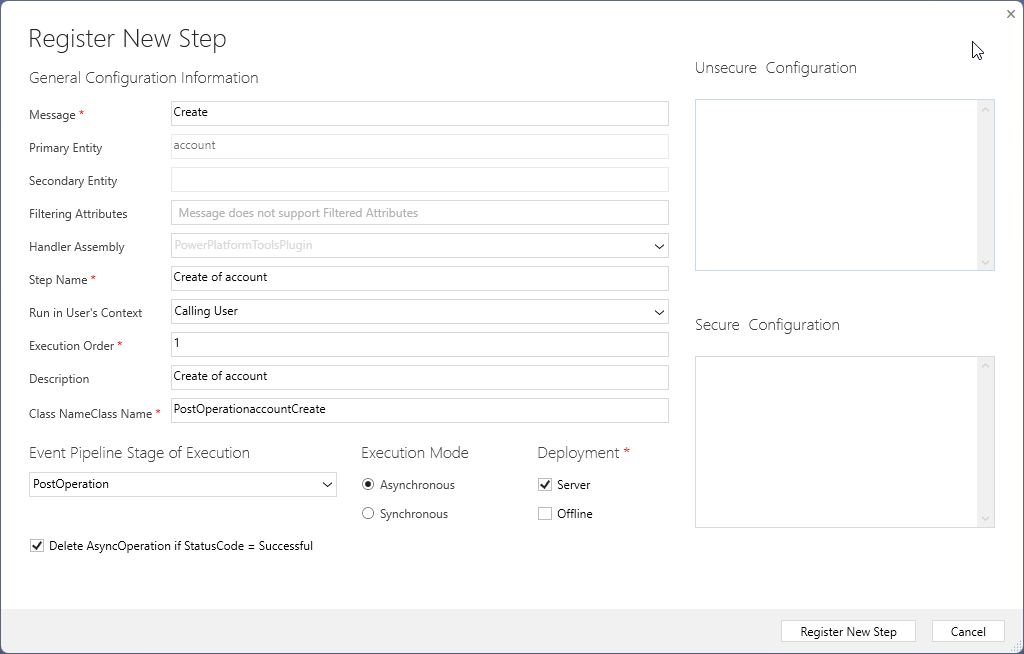
You will not get the Register New Step dialog where you can specify the message, filtering attributes, execution steps and so on. As we created this directly from the Power Platform Explorer, you will notice that the Primary account is preset and read only.
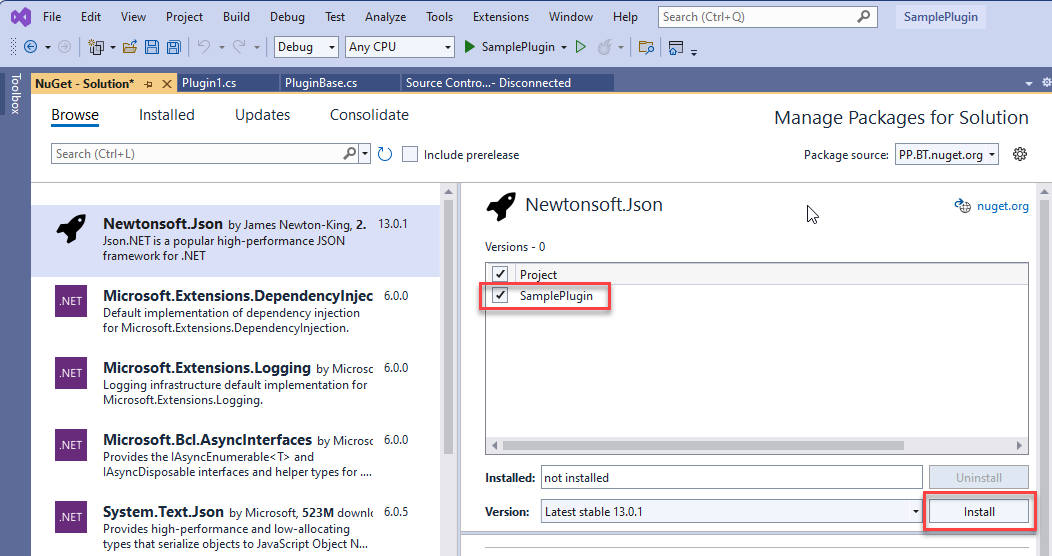
Once you click on the Register New Step button, a new class will be added to your plug-in project where you can start working on your plugin. As the purpose of this post is the use of Dependent Assemblies, we can now go ahead and add a dependent assembly to our project. In the Tools menu, we will navigate to Nuget Package Manager, and select the Manage Nuget Packages for Solution… option. in the Manage Packages tab, we can select a package (in this case the Newtonsoft.Json package), select the project and install as shown in the image below.
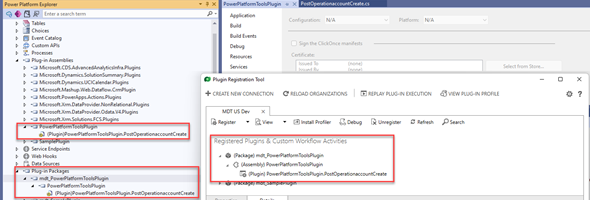
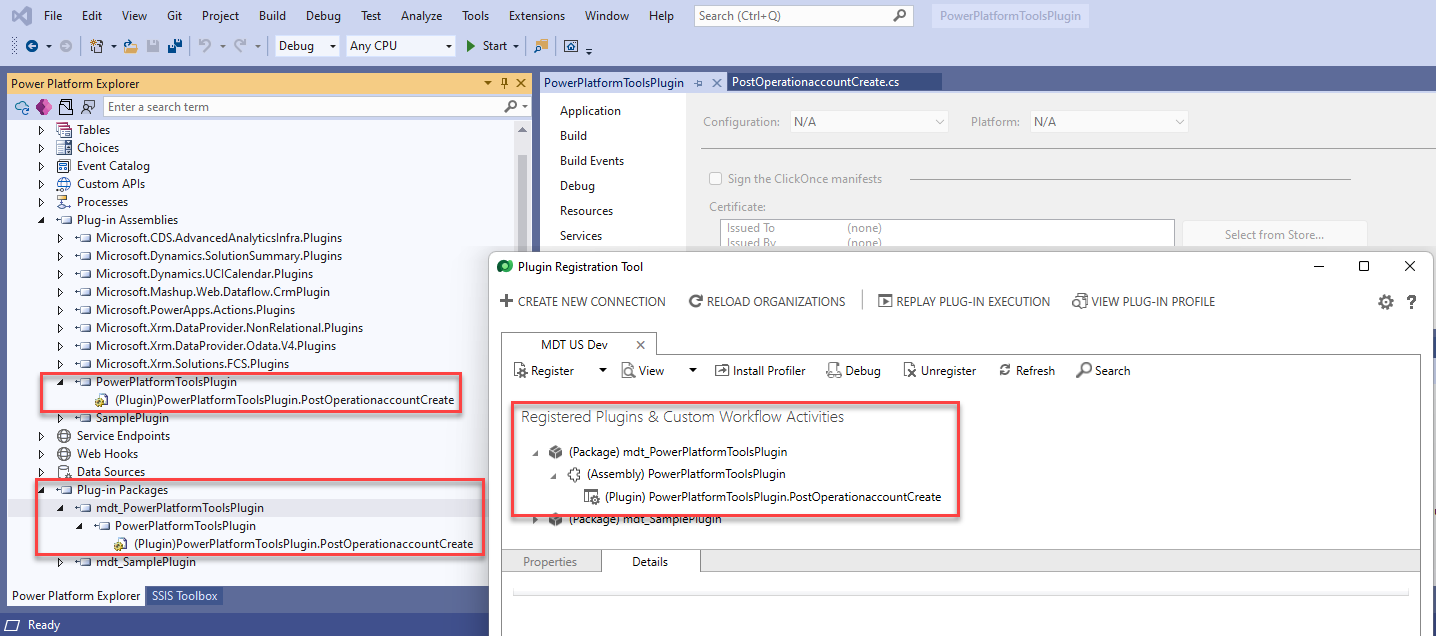
You can now start working on your plug-in solution and add the code that references the dependent library. When you are ready with your changes, you can right click on the solution and select Deploy solution (you can also right click on the project and select Deploy). Once deployment has been completed (and Visual Studio might freeze for a few seconds), you will be able to see that your new package has been deployed and showing in both the Power Platform Explorer in Visual Studio and the Plugin Registration Tool.
At this point your plugin is ready to use, and you can go ahead and test it out. I hope this information was useful to you.