
Recently someone asked if there is a way to add a child record to a Contract Line (contractdetail) entity for a record that has already been saved (and is set to read only/existing). We found that there are two parts to this solution. The first part of this article will focus on creating a button on the Contract Line entity, and calling logic to create a new record.
The first thing that we need to do is Create a Script library, JavaScript library, and upload it to our CRM environment. The file can be empty at that point, and logic can be added at the end. Once the script web resource has been added and published, we need to create an unmanaged solution and include the entity that we want to perform the logic on. This example covers adding a button to the Contract Line entity.
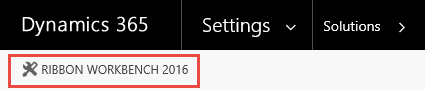
After the unmanaged solution containing the entity is created, we need to execute ribbon workbench (in our case Ribbon Workbench 2016). Under solutions, click on the Ribbon Workbench 2016 button:
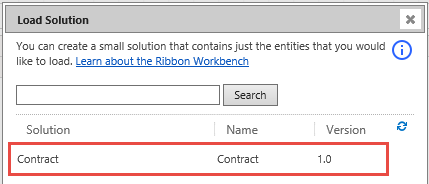
This will open Ribbon Workbench 2016 in a new tab. Once opened we will have to select the solution that we want to customize. Select the recently created solution that contains the Contract Line entity. The list of solutions will only display unmanaged solutions, since managed solution cannot be customized.
The solution will not be downloaded, and the Ribbon customizations displayed in the Ribbon Workbench application. Note that there are three different areas for customization, Home Page, Subgrid and Form. In this post we will be focusing on the Form customization changes.
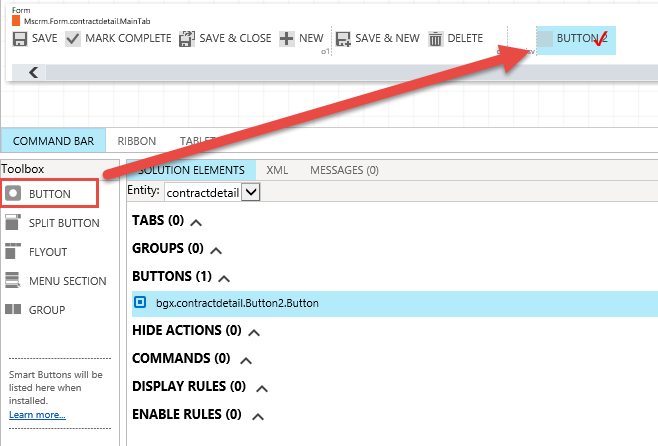
The first step will be to create a button. In order to create a button we will drag a button from the left hand side toolbox, and drag it to the form command bar. The ideal location to place this button will be under the ISV section.
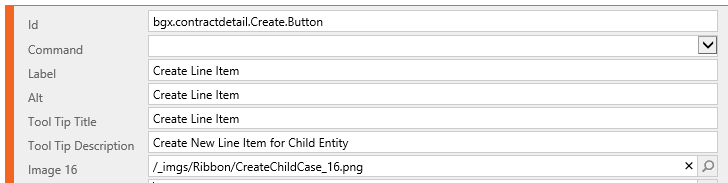
After the button is added to the Command bar, we will start setting the properties. The Id is automatically filled with the name of the button, but can be modified to better explain the functionality of the button. For example replace the Button2 portion of the name with Create to get a better understanding of what the button does. This logic should apply to everything we customize, but not required, just good practice. Add the Label, Alt, Tooltip Title, Tooltip Description and Image 16 properties as shown below:
In the center area of the application (between the toolbox and properties windows), we will now add a display rule and command, and the assign them to the button.
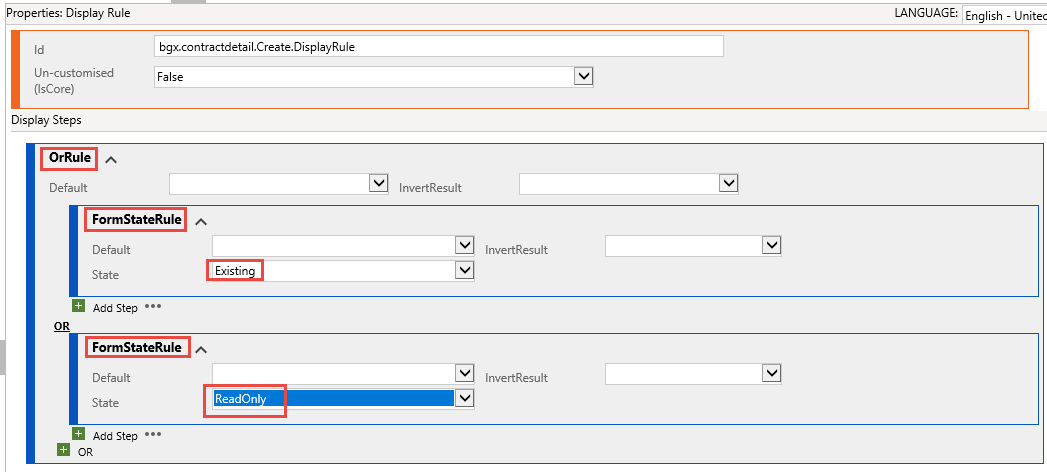
The display rule will show this button only in the case of an existing record. This means that we have to set the properties of the FormStateRule to Existing and ReadOnly. Since you can only set one property at a time, we will need to create an Or Rule, and then create a FormStateRule for Existing and a FormStateRule for ReadOnly as shown in the image below. Don’t forget to change the name of the Display Rule, and replace DisplayRule0 with Create.
After the Display Rule is created, we will create a Command. In the certain area, above the Display rule, we will click on the add (+) sign to add a new command. We will rename the command as we did with previous customizations.
To configure the command, we will Add the Display Rule that we created (1), under Actions click on Add Action (2) and select the Custom JavaScript Action (3). We will select the JavaScript library that we created earlier (4) and enter the name of the function that will handle the click event (5). Note that the JavaScript library will display $webresource as a prefix, but when search for your library, just type in the prefix (bgx in this case) and press enter, this will display all the JavaScript web resources that start with that prefix.
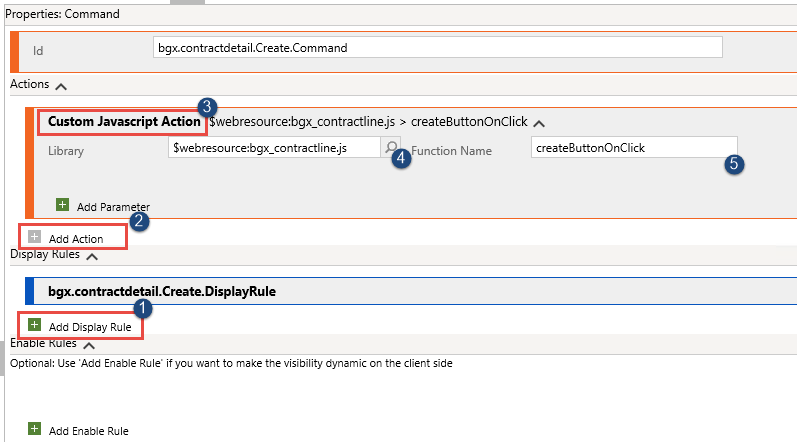
Remember the function name, as you will need to enter it in the JavaScript library that you created.
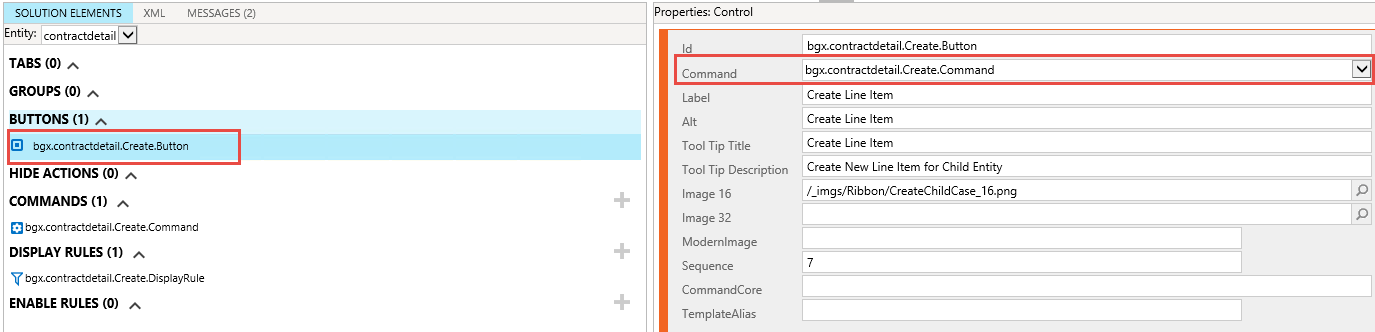
Not that we have created the command, we need to assign the command to the button. Click on the name of the button in the center area, and under Command dropdown, select the name of the Command (shown below)
After the Button Command has been set, we are ready to finish the process. On the top of the Ribbon Workbench window, click on the Publish button. The process will upload the changes to your solution and publish them.
Now that the customizations are done, we just need to complete the process by adding the code to our JavaScript file and adding the file to the form where we want it.
function createButtonOnClick()
{
   // Add Code to get values from form
   var entityId = Xrm.Page.data.entity.getId();
   var parameters = {};
   // Add Code to Save Parameters on Form
   Xrm.Utility.openEntityForm("bgx_mycustomentity", null, parameters);
}
Save and publish your JavaScript file.
Finally, open the Contract Line Entity, Navigate to forms. In the Form, click on the Form Properties window. In the Events tab, under form libraries, click Add, and add the JavaScript library to the form. You should now be able to test the button on the form.
