
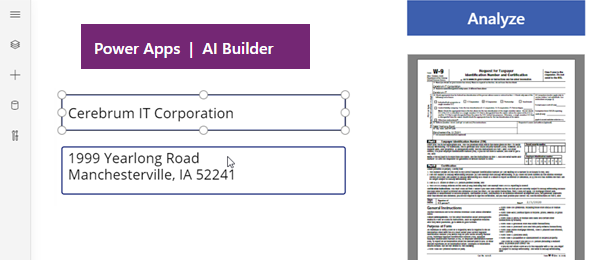
Over the past year, I played here and there with AI Builder, and particularly form processing, but have found that it was somewhat cumbersome for some of the forms that I wanted to build, especially when working a lot in the government space. Yesterday, May 4th, Microsoft announced some new changes to the AI Builder Form processing that allows recognition of undetected fields. I decided to test this out, and in order to implement this, used the IRS W-9 form, which is not such as easy form to implement.
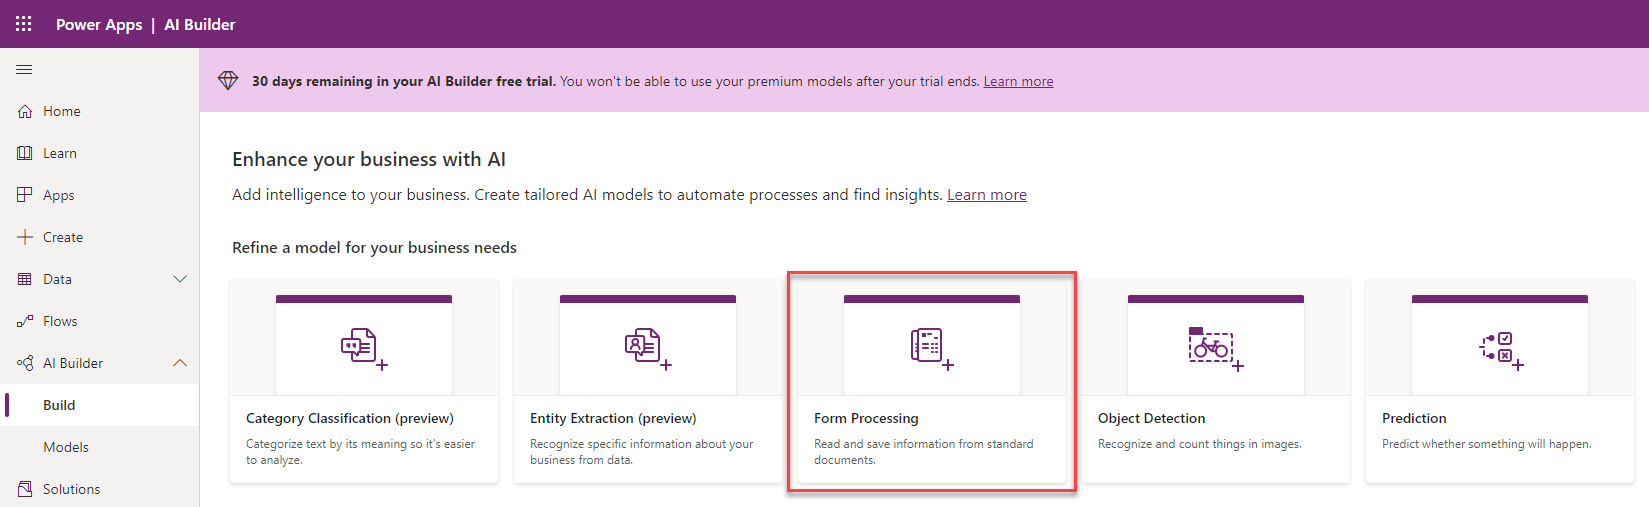
First thing is first, login to your Power Apps environment, and in the left navigation under AI Builder click on Build. This will show you the available models that you can use. In our case we will use the Form Processing Model which was recently updated.
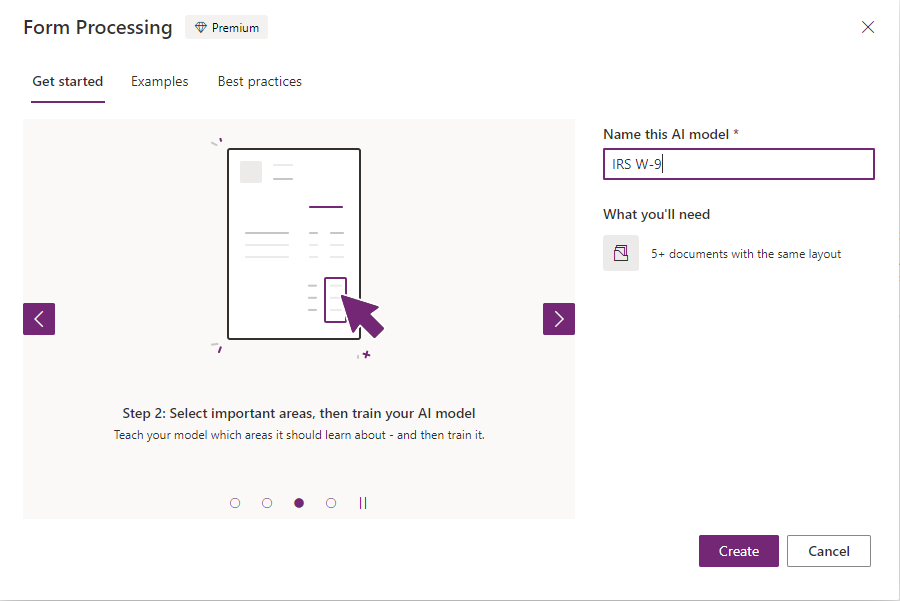
To get started we will provide a name to the AI model, and click on create. Notice that we will be required to provide 5 documents (or more) with the same layout.
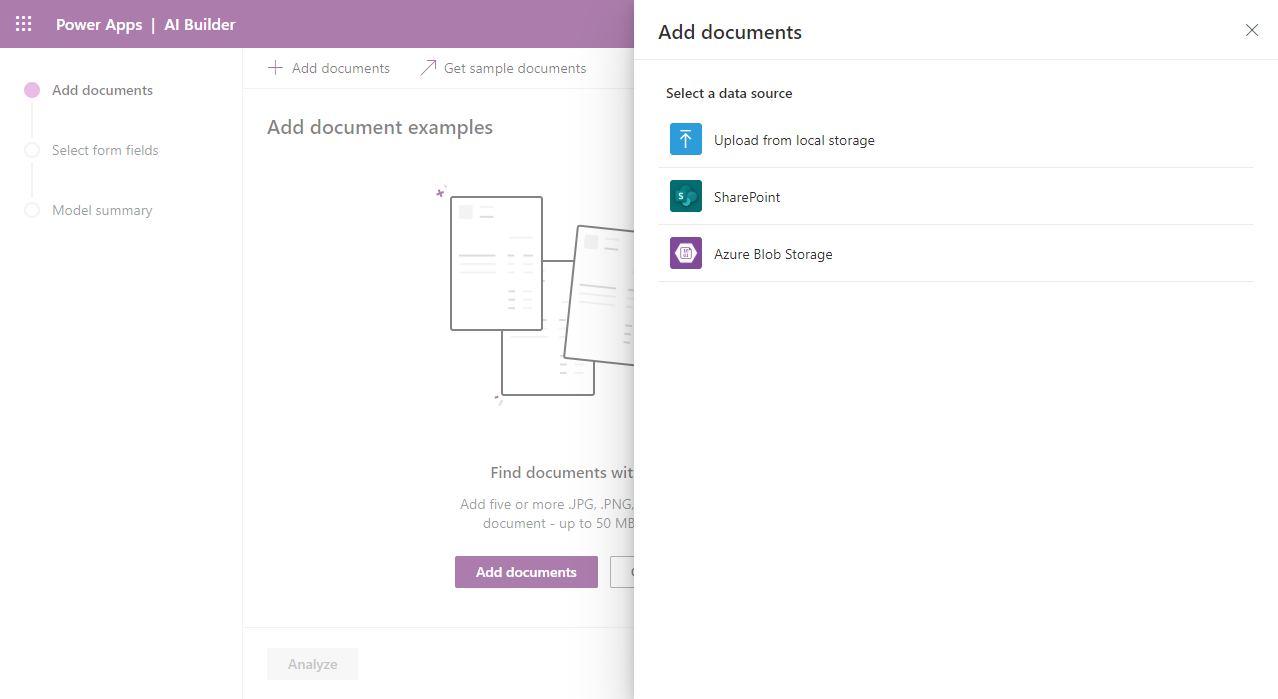
The AI Builder Model wizard will start and ask us to upload the documents. You can click on the Add documents button on the command bar or on the screen to start.
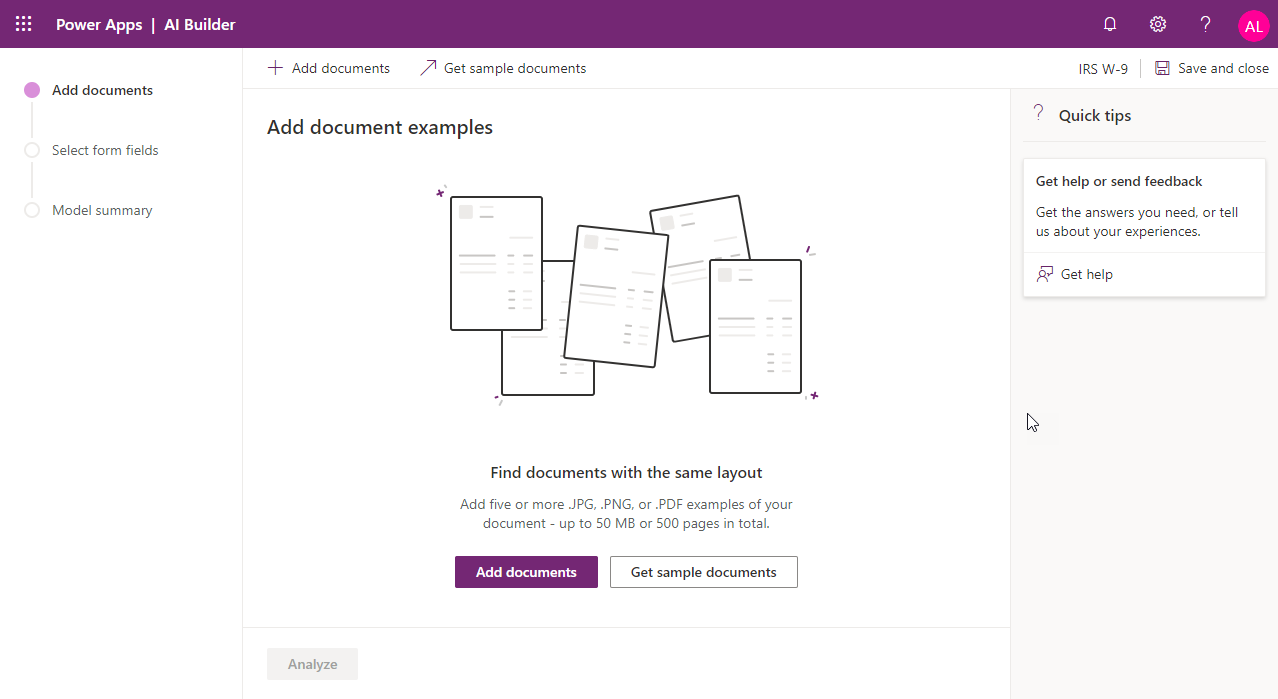
You can add your documents from local storage, SharePoint or an Azure Blob Storage, something that was not available in earlier releases.
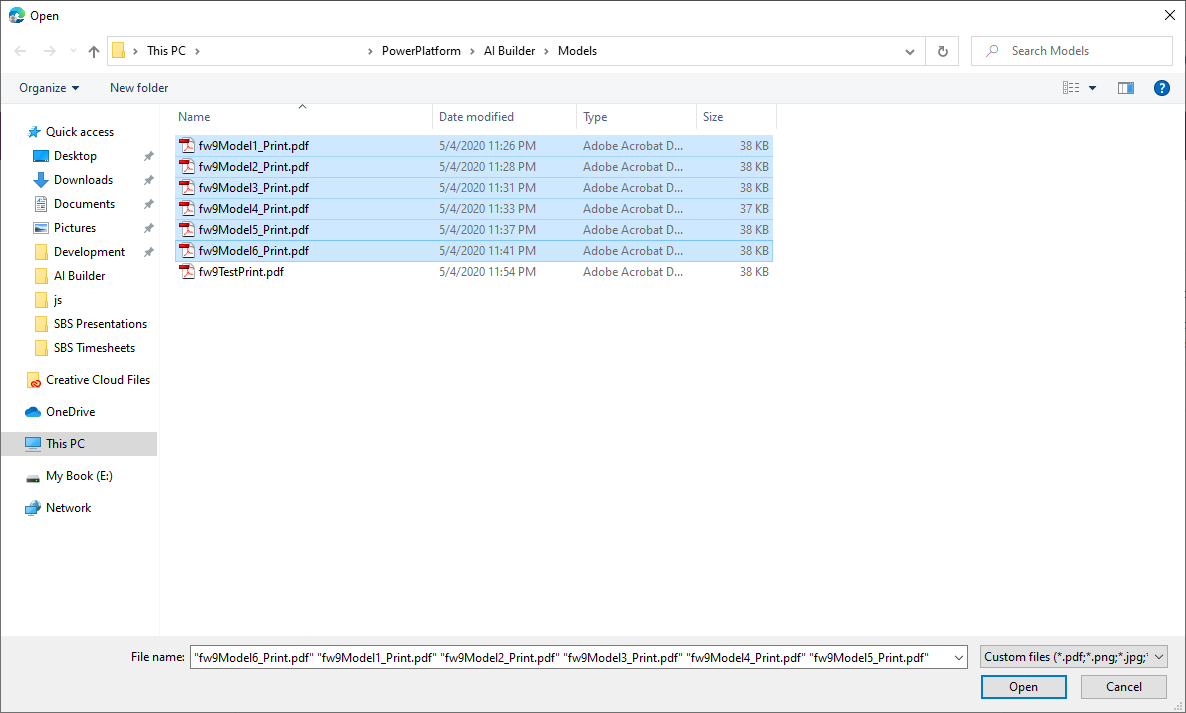
In my case, I had 6 documents of the IRS W-9 form that I prepared earlier available at local storage.
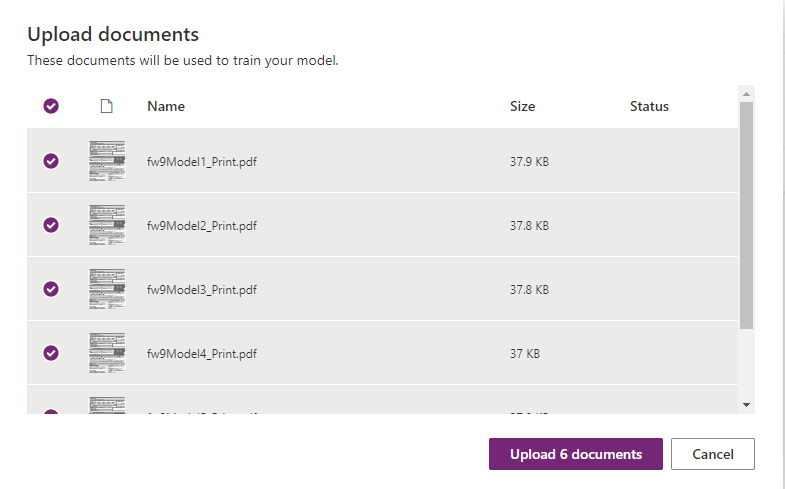
The wizard will then show you the list of documents that you selected. Make sure that you select at least 6 documents for this purpose. Click on the Upload documents button
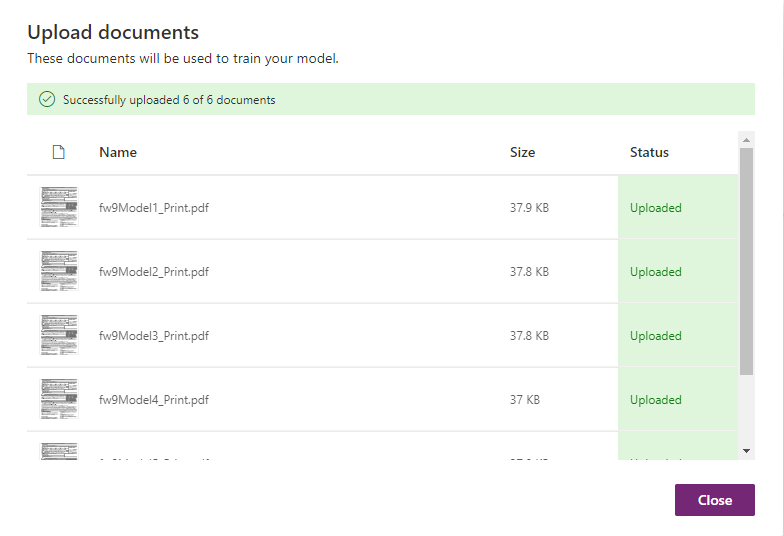
You will then see that the documents have been uploaded. Click on the Close button to continue with the wizard and analyze the document structure.
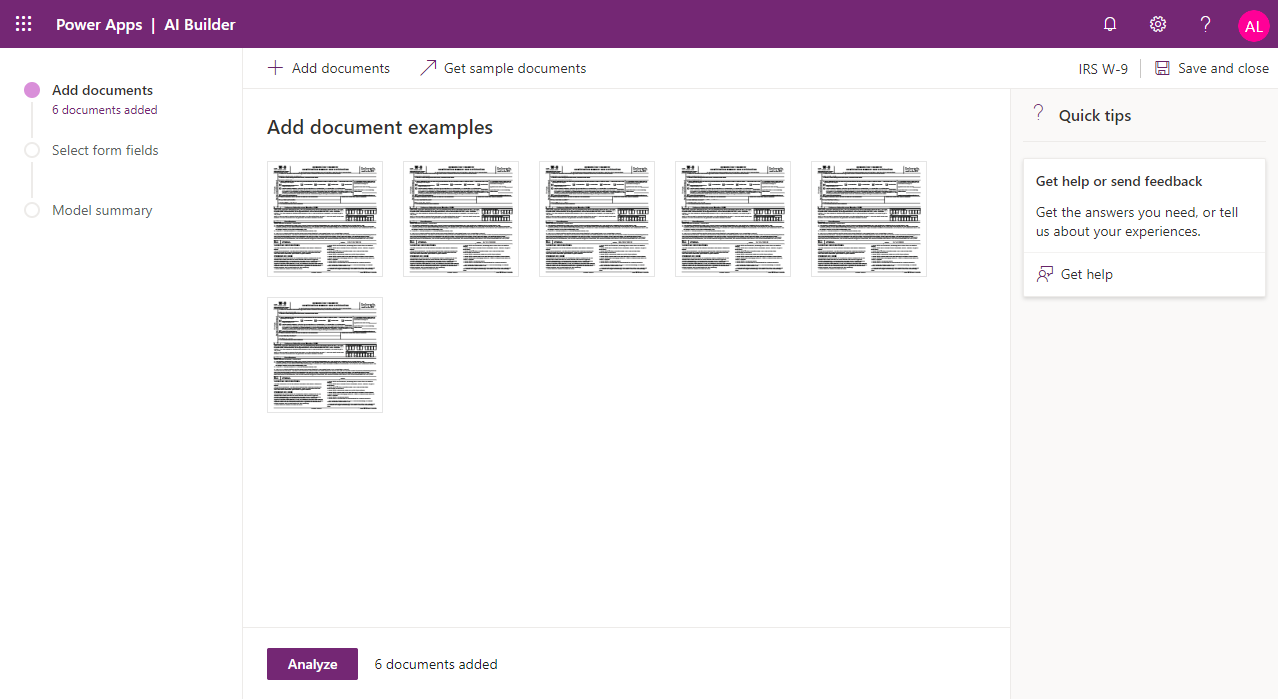
Next you will thumbnails of all the documents that you uploaded. To start analyzing the documents click on Analyze, or if you need to add additional documents, click on the Add documents button in the command bar.
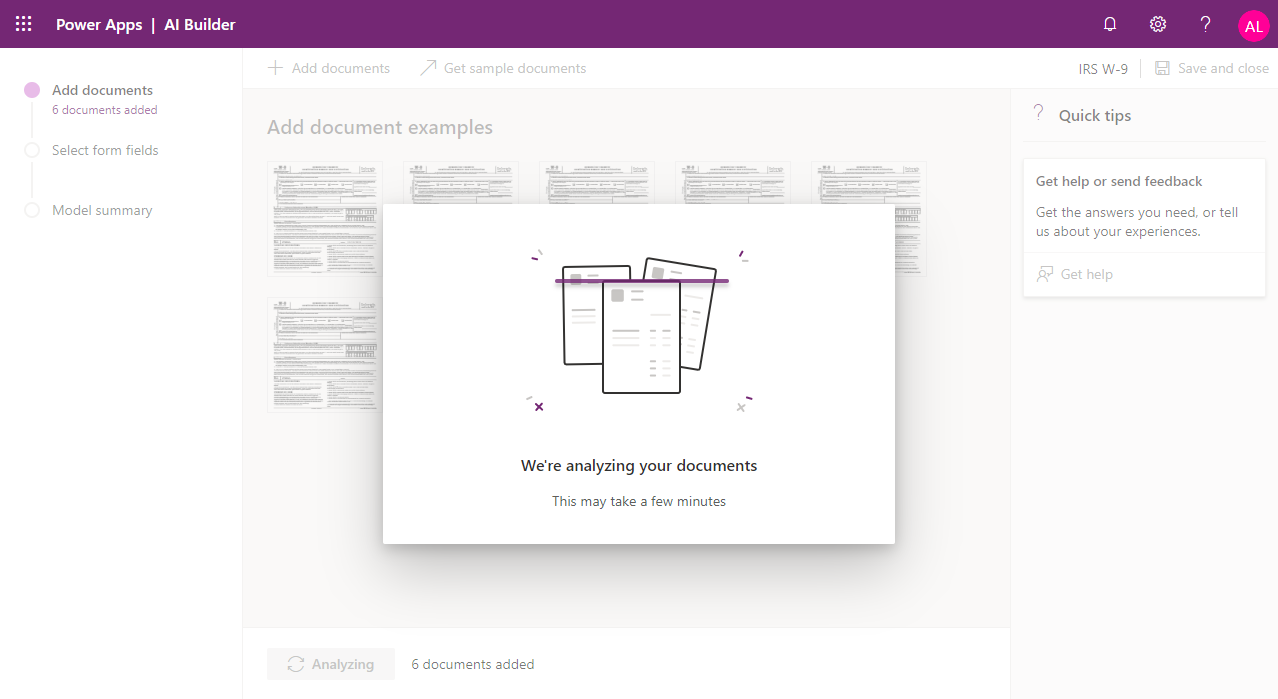
A modal window will pop up showing that the process is analyzing the documents. Based on the complexity of the documents, the number of pages and the amount of fields this can take up to a few minutes. In my case, since they were all single page with not too many fields, this took a little under a minute.
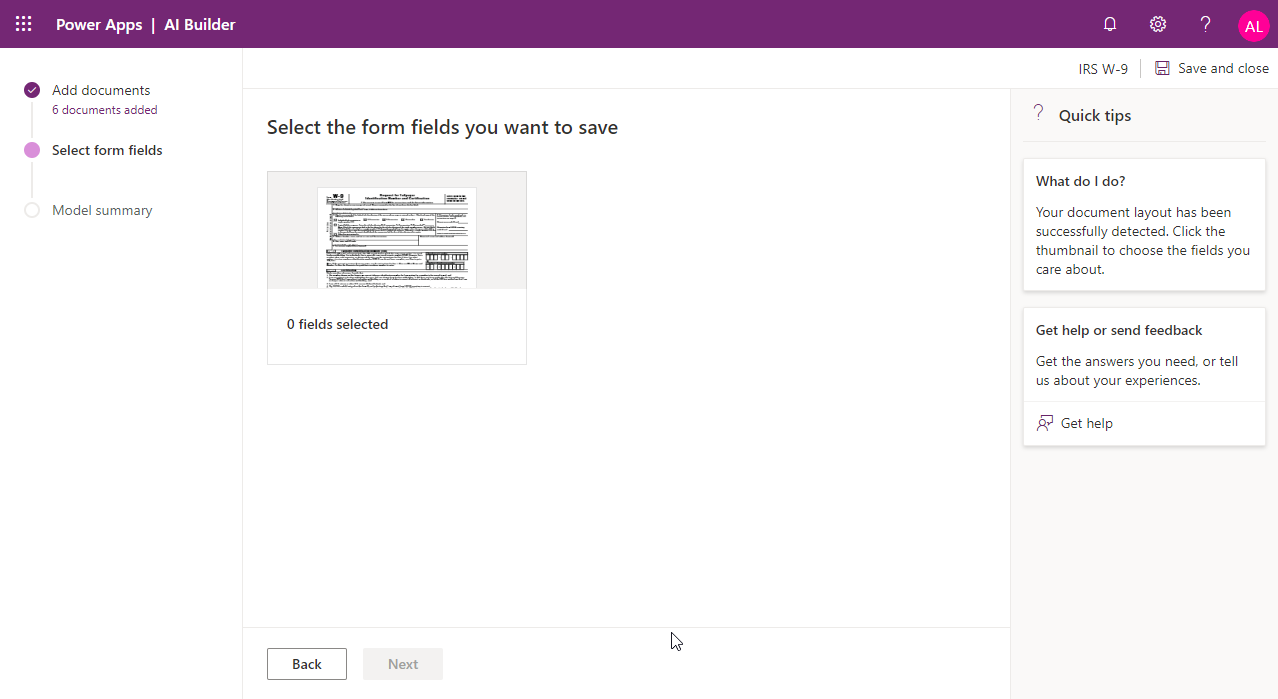
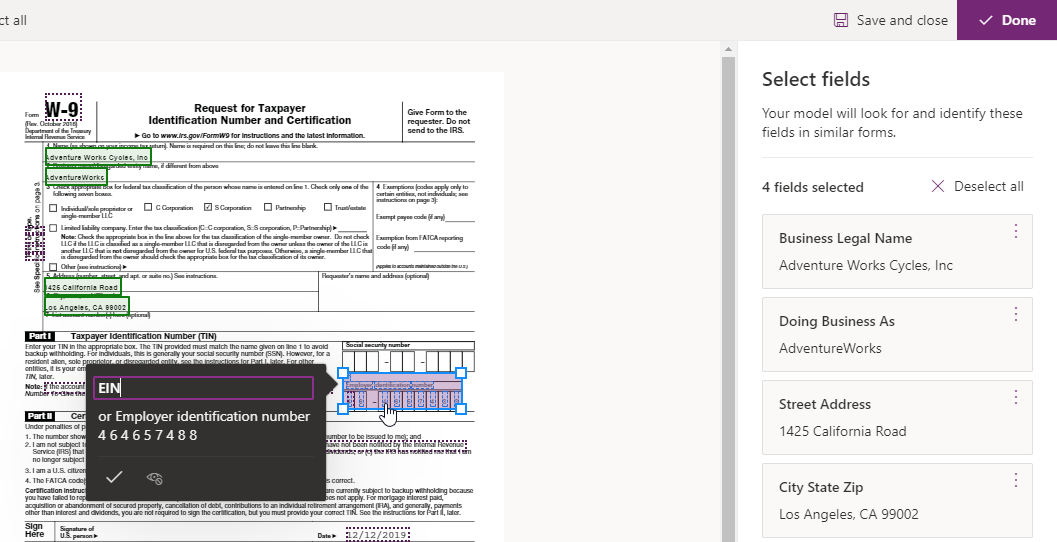
After the analysis has been completed, the wizard will move to the next phase which is adding the form fields. It will show you that 0 fields have been selected. Click on the thumbnail and then click on the Next button to start selecting the fields
You will be navigated to a page that contains a copy of your form with the fields that AI Builder found. You will need to click on each of the fields that you want as part of the form and add it to the list of selected fields
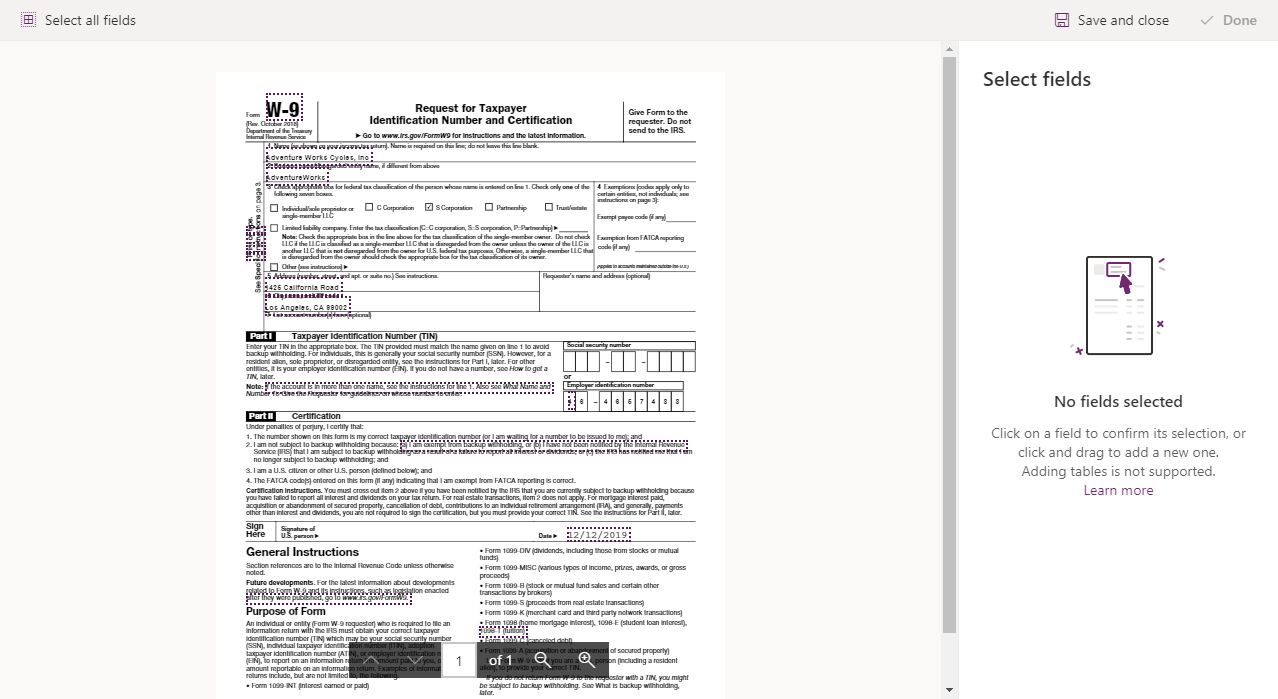
You can simply select the field on the form, change the name of the field if you need to, and click on the check mark in the tooltip window

Repeat this for all the fields that you want. If there are fields that AI Builder did not detect or select for you, you can select them yourselves (a new feature from yesterday’s release), and add them to the list of fields.
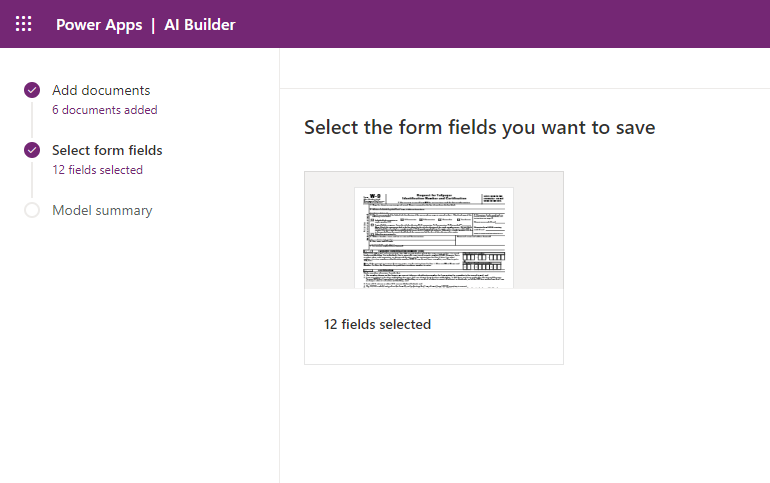
Once done accept the fields, which will redirect you to a Save page. Select the form fields that you want to save, and Save your changes.
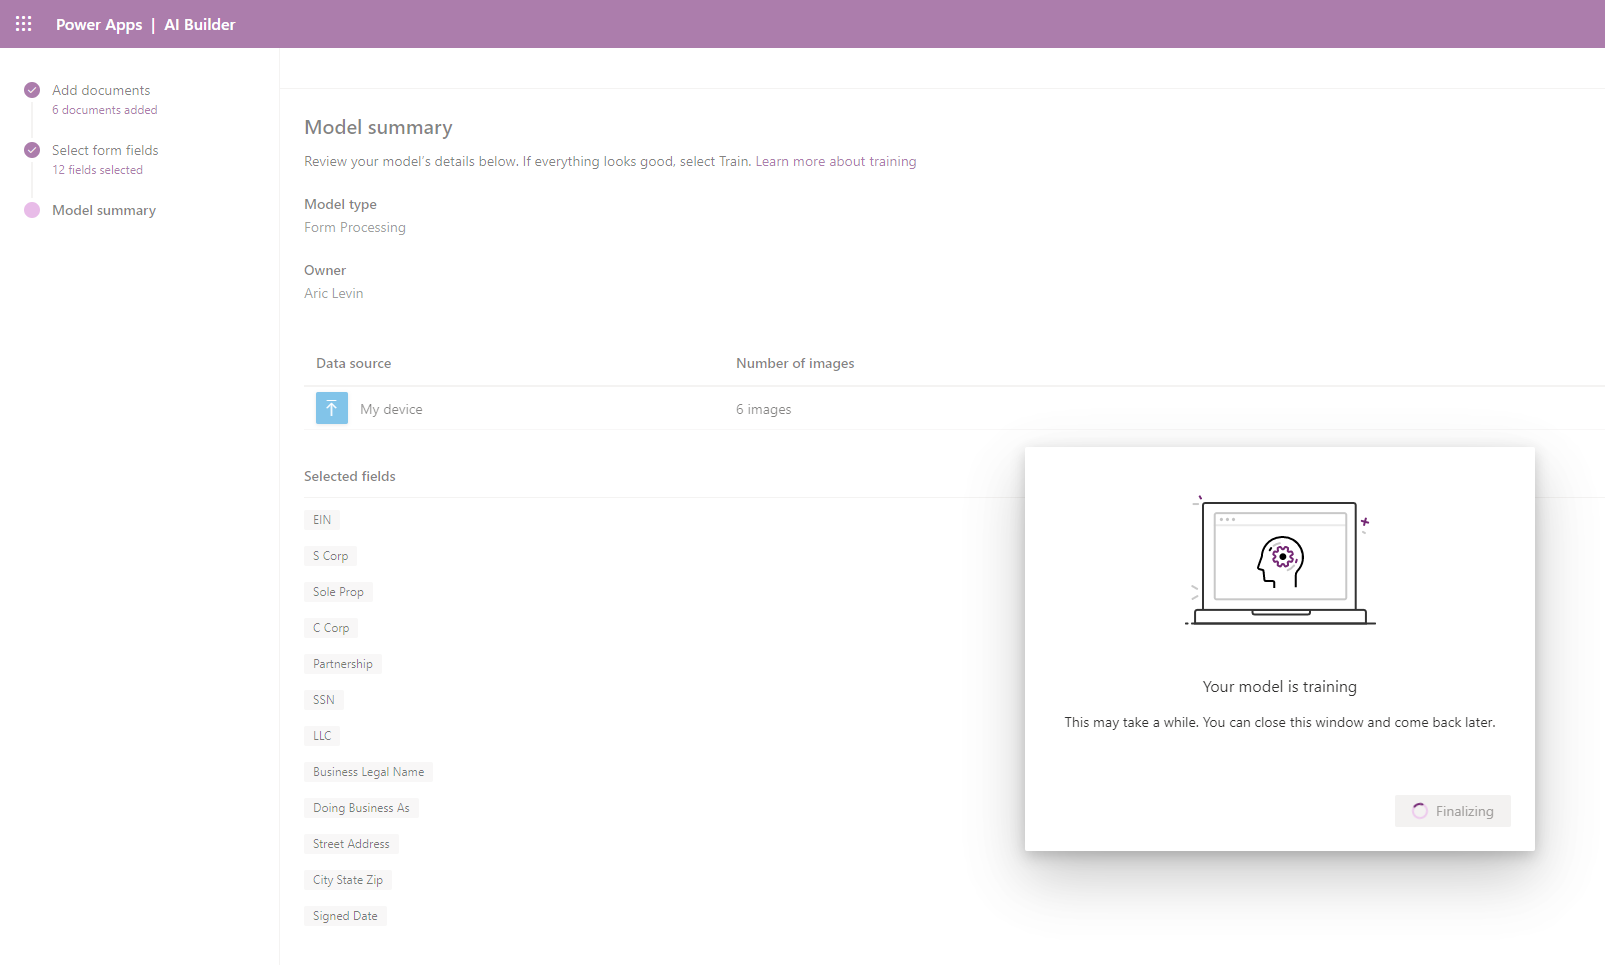
The next and almost final phases is to train the AI model. Click on the button that will start the training. This might take some time, so you can navigate away and come back later when the training has been completed.
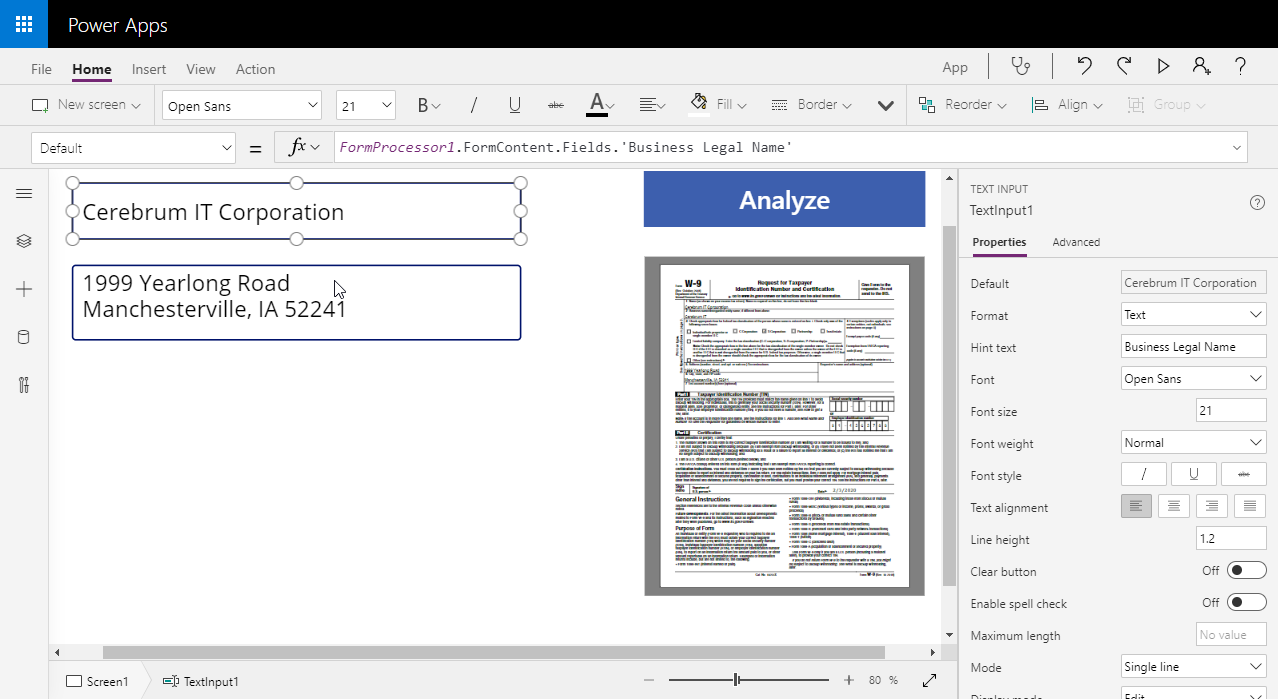
Once the training has been completed, you can do a test run with a different form, and then publish your changes. When your changes have been published you can use the AI Builder form directly from a Canvas App or Power Automate flow.
This entire process took less than an hour from start to finish (once I had the forms completed and ready). Now it’s your turn. Find a form that you would like to use AI for, and see how easy it is to get this up and running.
Please review the blog post from Joe Fernandez on the Microsoft Power Apps blog: