
The next part of this solution is to configure Microsoft Azure. If you do not have an Azure account, you can create a Trial account of Pay as you go account. If you are a partner or have a BizSpark subscription you get a certain amount of credits per month, which should be more than enough for the type of implementation that needs to be done using Azure.
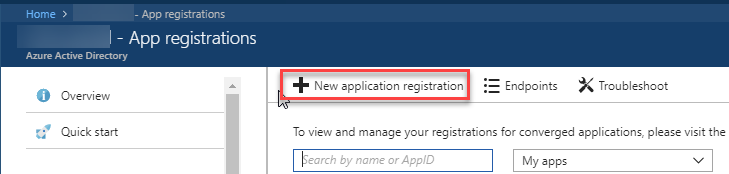
The first thing that we need to do is create an Application, so that we can register the Client Id for the new Application. In order to create an application. In your left hand navigation click on Azure Active Directory, and select App Registrations from the list of options. Click on New application registration button shown below.
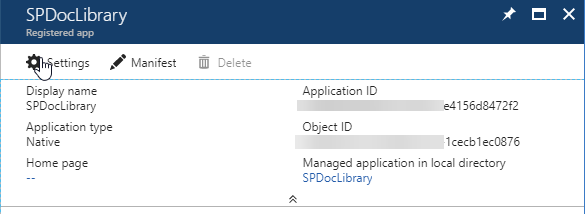
In the Create window, enter a Name for the application, the Application Type (Native), and the Redirect Uri (not really used in this case), and then click on the Create button. Once the application is registered, you will be able to see its properties in the Registered App window. You will need the Application Id to store in the Client Id window. Next, we will need to provide the application permissions to the SharePoint server. Click on the Settings button in the Registered app Pane. This will open the Settings window.
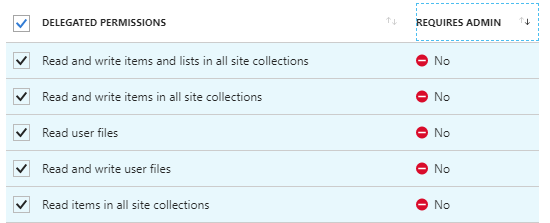
From there click on the Required permissions under API ACCESS section. By default you will only have the Windows Azure Active Directory permissions. Click on the Add button to add additional permissions. We will need to add Office 365 SharePoint Online (Microsoft.SharePoint) permissions. Select Office 365 SharePoint Online, and check all the required permissions. At the least, you will need the following permissions:
Now that we have registered the App in Azure, we need to create an App Service with Azure. The type of App that we need to create is an Api app, which allow the connectivity between Azure and SharePoint.
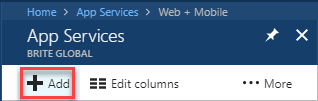
In the Microsoft Azure navigation click on App Services. This will display the AppService navigation as shown in the following image. Click on the Add button.
In the Web Apps section shown below, click on the More button in order to see the selection for API App.
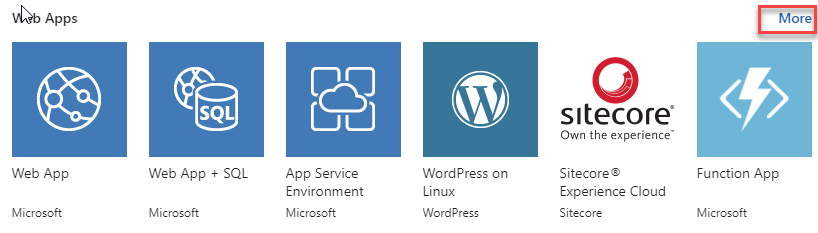
Click on the API App link, and then click on the Create button.

This will display the new API App window. Enter the name of the App, Subscription, Resource Group (either Add New or use an existing one) and the App Service Plan/Location. Click on Create button to finalize the Creation of the App. Once the app is created we will need to add some Application Settings to it as well as set up Cross-Origin Resource Sharing (CORS), which will allow Dynamics 365 code to execute the API functions.
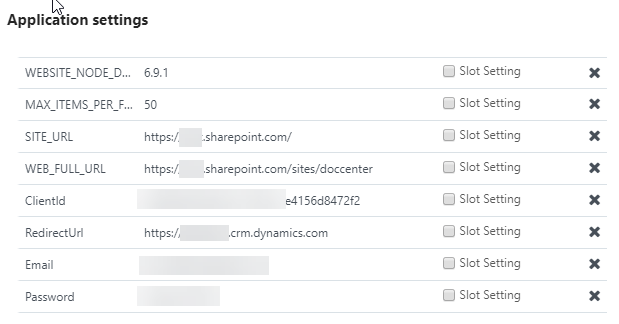
In the Application Settings window, we will enter the following settings (as shown in the image and table below):
| Application Setting | Application Setting Description |
|---|---|
| MAX_ITEMS_PER_FOLDER | Enter the maximum number of files that can be entered in a particular SharePoint folder. This should be no more than 5000 |
| SITE_URL | The root url of your SharePoint environment. This will be in the format of: https://SPROOT.sharepoint.com |
| WEB_FULL_URL | The url of the SharePoint document library. This will be in the format of https://SPROOT/sharepoint.com/sites/doccenter |
| ClientId | The client id (or application id) that is generated by Azure for this application. See previous instructions |
| RedirectUrl | You can set this as the Url of your CRM environment |
| An email account with access to SharePoint. This should most likely be set as a service account and not an individual user account | |
| Password | The password of the email account specified above. If you encrypt the password, you will have to modify the code that authenticates against SharePoint to decrypt the password |
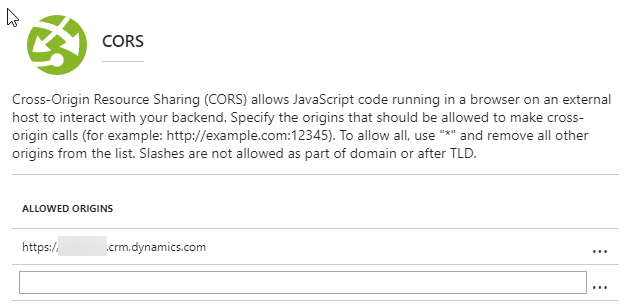
Finally, you will have to set up CORS, so that only CRM has access to this API. The screenshot below shows you the configuration of CORS. All that is required is the Url of the CORS
In the next article of the series, we will go over the Web Api, and uploading it to Azure.